
Subscribe to Our Youtube Channel
Summary of Contents for Chal-tec Twin XL Dinosaur
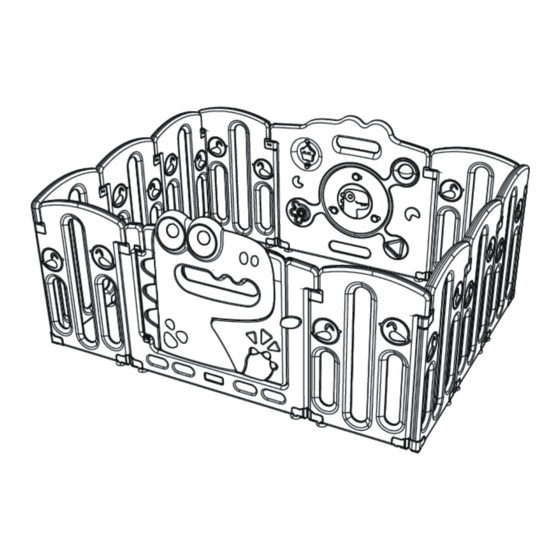
- Page 1 Playpen Twin XL Dinosaur Laufstall Playpen Corralito Parc d’enfant Box per bambini 10040973...
- Page 3 Zugriff auf die aktuellste Bedienungsanleitung und weitere Informationen rund um das Produkt zu erhalten: HERSTELLER & IMPORTEUR (UK) English 7 Hersteller: Español 11 Chal-Tec GmbH, Wallstraße 16, 10179 Berlin, Deutschland. Français 15 Italiano 19 Importeur für Großbritannien: Berlin Brands Group UK Ltd PO Box 1145...
- Page 4 SICHERHEITSHINWEISE • Der Laufstall darf nur von Erwachsenen zusammengebaut werden. • Stellen Sie den Laufstall auf einen flachen und sauberen Untergrund. • Benutzen Sie den Laufstall nur unter Aufsicht von Erwachsenen. • Klettern auf dem Laufstall ist verboten. • Halten Sie den Laufstall von Feuer und Stromquellen fern. •...
- Page 5 ABMESSUNGEN VORSICHTSMASSNAHMEN Stellen Sie den Laufstall auf eine Stellen Sie den Laufstall nicht ebenen Untergrund. auf sandigen oder unebenen Untergrund. Stellen Sie den Laufstall nicht auf Stellen Sie den Laufstall nicht ins einen schiefen Untergrund. Wasser oder auf einen feuchten untergrund.
- Page 6 ZUSAMMENBAU Nehmen Sie den Laufstall aus der Verpackung. Richten Sie den Schlitz der Platte am Schlitz des Verbindungsstücks aus und drücken Sie die Platte fest. Hinweis zum Saugnapf Prüfen Sie, ob sich Schmutz auf dem Saugnapf befindet. Entfernen Sie den Schmutz mit einem Tuch oder Wasser. Wenn der Saugnapf nach längerem Gebrauch nicht mehr haftet, tauchen Sie ihn 30 Minuten lang in warmes Wasser.
- Page 7 Scan the QR code to get access to the latest user manual and more product information. MANUFACTURER & IMPORTER (UK) Manufacturer: Chal-Tec GmbH, Wallstrasse 16, 10179 Berlin, Germany. Importer for Great Britain: Berlin Brands Group UK Ltd PO Box 1145...
-
Page 8: Safety Instructions
SAFETY INSTRUCTIONS • The playpen may only be assembled by adults. • Place the playpen on a flat and clean surface. • Use the playpen only under adult supervision. • Climbing on the playpen is prohibited. • Keep the playpen away from fire and power sources. •... - Page 9 DIMENSIONS PRECAUTIONS Place the playpen on a level surface. Do not place the playpen on sandy or uneven ground. Do not place the playpen on a Do not place the playpen in water or sloping surface. on a damp surface.
- Page 10 ASSEMBLY Remove the playpen from the packaging. Align the slot of the plate with the slot of the connector and press the plate firmly. Note on the suction cup Check whether there is dirt on the suction cup. Remove the dirt with a cloth or water. If the suction cup no longer adheres after prolonged use, immerse it in warm water for 30 minutes.
- Page 11 FABRICANTE E IMPORTADOR (UK) Fabricante: Chal-Tec GmbH, Wallstraße 16, 10179 Berlín, Alemania. Importador para el Reino Unido: Berlin Brands Group UK Ltd PO Box 1145 Oxford, OX1 9UW...
-
Page 12: Indicaciones De Seguridad
INDICACIONES DE SEGURIDAD • El parque solo puede ser montado por adultos. • Coloque el parque en una superficie plana y limpia. • Utilice el parque solo bajo la supervisión de un adulto. • Está prohibido subirse al parque. • Mantenga el parque alejado del fuego y de las fuentes de energía. -
Page 13: Precauciones Especiales
DIMENSIONES PRECAUCIONES ESPECIALES Coloque el parque en una superficie No coloque el parque en una plana. superficie arenosa o irregular. No coloque el parque en una No coloque el parque en el agua o en superficie inclinada. una superficie húmeda. -
Page 14: Montaje
MONTAJE Saque el parque del embalaje. Oriente la ranura de la placa hacia la ranura del conector y presione firmemente la placa. Nota sobre la ventosa Compruebe si hay suciedad en la ventosa. Retire la suciedad con un paño o agua. Si la ventosa no se adhiere después de un uso prolongado, sumérjala en agua caliente durante 30 minutos. - Page 15 : FABRICANT ET IMPORTATEUR (GB) Fabricant : Chal-Tec GmbH, Wallstraße 16, 10179 Berlin, Allemagne. Importateur pour la Grande Bretagne : Berlin Brands Group UK Ltd PO Box 1145...
-
Page 16: Consignes De Sécurité
CONSIGNES DE SÉCURITÉ • Le parc ne peut être assemblé que par des adultes. • Placez le parc sur une surface plane et propre. • N'utilisez le parc que sous la surveillance d'un adulte. • Il est interdit de grimper sur le parc. •... -
Page 17: Précautions De Sécurité
DIMENSIONS PRÉCAUTIONS DE SÉCURITÉ Placez le parc sur une surface plane. Ne placez pas le parc sur un sol sablonneux ou inégal. Ne placez pas le parc sur une surface Ne placez pas le parc dans l'eau ou en pente. sur une surface humide. - Page 18 ASSEMBLAGE Retirez le parc de son emballage. Alignez la fente de la plaque avec la fente de la pièce de raccordement et appuyez sur la plaque. Remarque sur la ventouse Vérifier qu'il n'y a pas de saleté sur la ventouse. Retirez la saleté...
- Page 19 PRODUTTORE E IMPORTATORE (UK) Produttore: Chal-Tec GmbH, Wallstraße 16, 10179 Berlino, Germania. Importatore per la Gran Bretagna: Berlin Brands Group UK Ltd PO Box 1145 Oxford, OX1 9UW...
-
Page 20: Avvertenze Di Sicurezza
AVVERTENZE DI SICUREZZA • Il box può essere montato solo da adulti. • Posizionare il box su una superficie piana e pulita. • Utilizzare il box solo sotto la supervisione di un adulto. • È vietato arrampicarsi sul box. • Tenere il box lontano da fuoco e fonti di corrente. -
Page 21: Misure Di Sicurezza
DIMENSIONI MISURE DI SICUREZZA Posizionare il box su una superficie Non posizionare il box su superfici piana. sabbiose o irregolari. Non posizionare il box su una Non posizionare il box in acqua o su superficie inclinata. superfici umide. - Page 22 ASSEMBLAGGIO Togliere il box dalla confezione. Allineare la scanalatura del pannello con quella del connettore e premere saldamente il pannello. Nota sulla ventosa Controllare se c'è dello sporco sulla ventosa. Rimuovere lo sporco con un panno o dell'acqua. Se la ventosa non aderisce più...
Need help?
Do you have a question about the Twin XL Dinosaur and is the answer not in the manual?
Questions and answers