Table of Contents

Related Manuals for QS Seamaster QSA Series

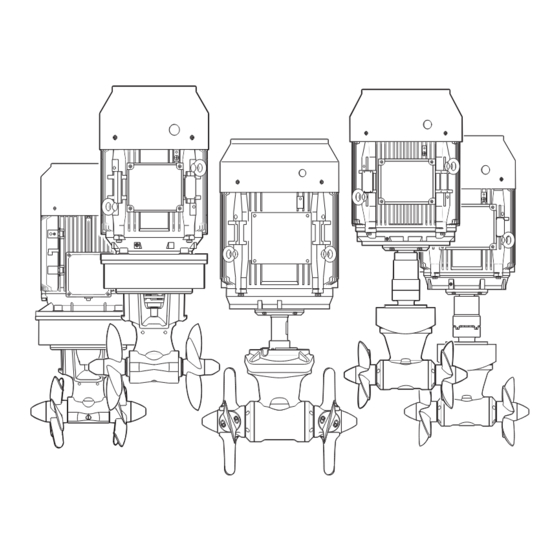
Summary of Contents for QS Seamaster QSA Series
- Page 1 series REV 000B DOUBLE PROPELLER QSA 240-250 • QSA 300-300 • QSA 320-300 • QSA 360-300 • QSA 400-300 • QSA 450-386 QSA 520-386 • QSA 750-513 • QSA 900-513 • QSA 1100-513 THREE-PHASE ELECTRIC THRUSTERS USER MANUAL pag. 3...
- Page 3 7.0 - Warnings Pag. 16 8 - Usage Pag. 17 9 - Maintenance Pag. 17 10 - Disposal of the product Pag. 17 11 - Spare parts Pag. 18 12 - Dimensions Pag. 22 QSA SERIES USER MANUAL - REV000B...
-
Page 4: Information About The Product
® QS SEAMASTER® RESERVES THE RIGHT TO INTRODUCE CHANGES TO THE EQUIPMENT AND THE CONTENTS OF THIS MANUAL WITHOUT PRIOR NOTICE. IN CASE OF DISCREPANCIES OR ERRORS BETWEEN THE TRANSLATED TEXT AND THE ORIGINAL ITALIAN TEXT, PLEASE REFER TO THE ITALIAN TEXT. -
Page 5: Supplied Parts
PROCEEDING WITH THE INSTALLATION IN GOOD LIGHT CONDITIONS. We recommend using an appropriate personal protective equipment. QS Seamaster® thrusters are not suitable for installation in potentially explosive environments and/or atmospheres. Assembly and subsequent checks or repairs must only be carried out by qualified personnel. -
Page 6: Installation Requirements
® • Do not use these appliances for other uses. • QS SEAMASTER® shall accept no responsibility for direct or indirect damages caused by improper use of the appliance or an improper installation. • The Thruster is not designed to maintain loads generated in particular atmospheric conditions (storms). -
Page 7: Installation
• For a correct use of the thruster we suggest a maximum length of 3-4 times the tunnel diameter and a minimum length of 1,5 times the tunnel diameter. To limit efficiency loss it is acceptable a length that is six times the tunnel diameter. MAXIMUM 6 TIMES TUNNEL Ø MINIMUM 1,5 TIMES TUNNEL Ø QSA SERIES USER MANUAL - REV000B... - Page 8 • If the tunnel is near the waterline, it is advisable to fit a grating at the end of the tube. The grating must have vertical and as large as possible meshes to avoid contrasting the propeller thrust. The vertical meshes prevent the entry of most of the floating objects. QSA SERIES USER MANUAL - REV000B...
- Page 9 • Take care that there are no resin residues in the contact area between flange and tube; this could cause misalignment. Any resin residues and any other hindrance to correct contact must be removed by sandpaper. QSA SERIES USER MANUAL - REV000B...
- Page 10 • Insert the elastic joint in the terminal part of the small key into its seat. gearleg shaft. • Insert the motor onto the elastic joint. Secure with four screws and four washers. • Grease the terminal part of the gearleg shaft. QSA SERIES USER MANUAL - REV000B...
- Page 11 • Fig.F Proceed with fitting the gearleg. For further protection against the entry of water, apply silicone for nautical use around the point of contact between flange and tube. Fasten everything to the flange using the special screws. QSA SERIES USER MANUAL - REV000B...
- Page 12 Rilsan Tube and oil tank QSA Ø513 • Insert the Rilsan pipe into the fitting with the special • After fixing the flange, turn the fitting clockwise and expansion tank. align it with the flange opening. QSA SERIES USER MANUAL - REV000B...
- Page 13 • Fill the oil tank with gear oil type GL-5 > 0,2 x d Waterline Tunnel center line POSITION THE PIPE CORRECTLY, IN ORDER TO PREVENT “SIPHON” EFFECT. THE TANK MUST ALWAYS END UP IN VERTICAL POSITION. QSA SERIES USER MANUAL - REV000B...
- Page 14 QSA Ø386 QSA Ø513 3 - Mount the motor on the gearleg and fix it to the support. 4 - Tighten the coupling screw, hold down towards the gearleg. QSA SERIES USER MANUAL - REV000B...
- Page 15 The anodes F must be locked with the screws G soaked with building adhesive (such as Loctite). SOLO Ø513 WARNING: Once the assembly is over, make sure that the propellers are exactly positioned at the centre of the tunnel. QSA SERIES USER MANUAL - REV000B...
-
Page 16: Connection Diagram
75 kW 400 V 75 kW 90 kW *this data refer to S3 operating mode (periodic intermittent duty) - for any modification please contact QS Seamaster 7 - Warnings QSA series 7.0 - Warnings WARNING: This thruster is not designed for a continuous use. It is equipped with protections which limit its operation at a maximum time span, as reported on the controls’... -
Page 17: Maintenance
Local legislation may include the application of serious fines in the event of improper disposal of this product. QSA SERIES USER MANUAL - REV000B... -
Page 18: Spare Parts
4 OSP KIT ANODES PROPELLER QSAØ250 FVSGAN0QS250S00 5 OSP KIT PROPELLER Ø250 RH QS FVSGEL250R00S00 6 OSP KIT PROPELLER Ø250 LH QS FVSGEL250L00S00 7 OSP KIT GASKETS + KEYS Ø250 FVSGGRCQS250S00 8 INVERTER VFD 15KW 400V QS FVNV015KW4QSA00 QSA SERIES USER MANUAL - REV000B... - Page 19 OSP KIT GEARLEG Ø300 QS FVSGGBBT3000S00 OSP KIT GASKETS+KEYS Ø300 FVSGGRCQS300S00 11A INVERTER 15KW 400V IP20 QS -DPMS- FVNV015KW4QSA00 11B INVERTER 22KW 400V IP20 QS -DPMS- FVNV022KW4QSA00 11C INVERTER 37KW 400V IP20 QS -DPMS- FVNV037KW4QSA00 QSA SERIES USER MANUAL - REV000B...
- Page 20 OSP KIT RILSAN TUBE, TANK AND OSP KIT GEARLEG QSA Ø386 B00 FVSGGBBT386BS00 FVSGTBRLSSRBS00 FITTING INVERTER 37KW 400V IP20 OSP KIT ANODES FOR PROPELLER Ø386 FVSGANQSA38AS00 FVNV037KW4QSA00 QS -DPMS- OSP KIT PROPELLER Ø386 RH FVSGEL386RP0S00 QSA SERIES USER MANUAL - REV000B...
- Page 21 OSP KIT PROPELLER RH N Ø513 P600 75KW FVSGEL513RN4S00 8B INVERTER 55KW 400V IP20 QS -DPMS- FVNV055KW4QSA00 4A OSP KIT PROPELLER RH N Ø513 P480 45-55KW FVSGEL513RN3S00 8C INVERTER 75KW 400V IP20 QS -DPMS- FVNV075KW4QSA00 QSA SERIES USER MANUAL - REV000B...
- Page 22 12 - Dimensions QSA Series QSA 240-250 373 (14 QSA 300-300 QSA 360-300 QSA 320-300 QSA 400-300 434 (17 434 (17 QSA SERIES USER MANUAL - REV000B...
- Page 23 12 - Dimensions QSA Series QSA 520-386 QSA 450-386 508 ( 20 ) 508 ( 20 ) QSA 750-513 QSA 900-513 QSA 1100-513 720 mm (28" 11/32 in) QSA SERIES USER MANUAL - REV000B...
- Page 24 REV 000B INSTALLATION AND USER MANUAL Product code and serial number QS Seamaster Via Enrico Fermi 19, 20090 Buccinasco (MI) – Italy - Ph. +39 02488531 – Fax +39 024882545 E-mail: info@qs-seamaster.com - www.qs-seamaster.com...
Need help?
Do you have a question about the QSA Series and is the answer not in the manual?
Questions and answers