Breville VBL060 - Selection of Recipes Included Soup Maker Manual
- Instruction booklet (32 pages)
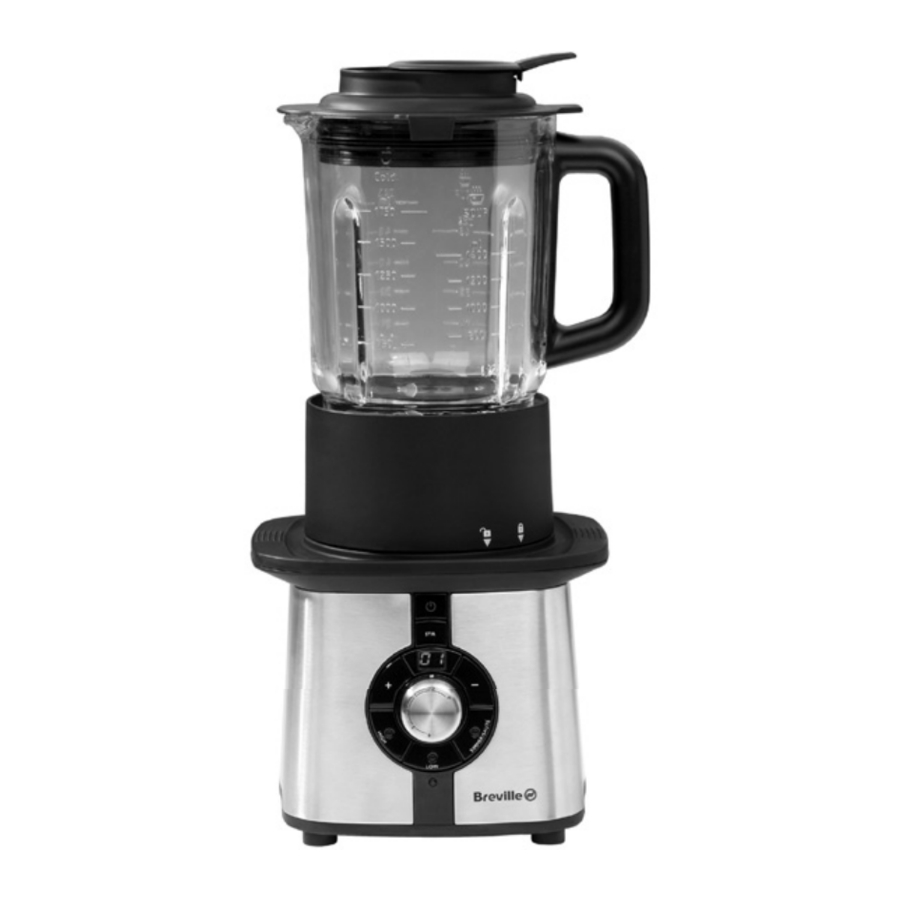
Advertisement
- 1 before using your soup maker
- 2 features
- 3 assembling your soup maker
- 4 making soups and sauces
- 5 blending
- 6 hints and tips
- 7 recipes - soups
- 8 recipes - dressings and dips
- 9 recipes - sauce
- 10 recipes - desserts
- 11 recipes - drinks
- 12 cleaning and storage
- 13 connection to the mains supply
- 14 after sales service
- 15 product safety
- 16 Documents / Resources
before using your soup maker
 Ensure that the appliance is switched off and unplugged from the supply socket if it is left unattended and before assembling, disassembling or cleaning.
The blades have very sharp edges. Take care when handling or cleaning them.
Never immerse the motor unit or power cord and plug in water or any other liquid.
Never use harsh, abrasive or caustic cleaners to clean this appliance.
- Remove your soup maker carefully from the packaging. You may wish to store the packaging for future use.
- Check the contents:
- Motor unit
- Jug
- Lid
- Stopper/measure
- Collar
- Heating plate/blade assembly
- Seal
- Wash all parts that will come into contact with food. Use warm soapy water then rinse and dry thoroughly.
- Using a mild detergent solution, wipe the motor unit with a damp cloth. Dry thoroughly.
features

Due to our policy of continuous improvement, the actual product may differ slightly from the one illustrated in these instructions.
- Stopper/measure
Allows ingredients to be added without removing the lid. Doubles as a convenient measure. - Jug lid
- Glass jug
- Collar, heating plate/blade assembly and seal
- Motor unit
- Blending control
Four blending speeds and pulse function. - Status light
- On/off button
- STIR button
Press and hold to stir the soup or sauce during cooking. The stir button can be used at any time. - Increase timer button
Increases the time in 1 minute increments. Hold to continuously increase the time. You can use this button to increase the cooking time at any point in the cooking cycle. - HIGH heat selector button
For quickly bringing soups and sauces to a rapid boil. Your soup maker will automatically switch to the SIMMER/SAUTÉ setting after several minutes on HIGH. - LOW heat selector button
Reduced temperature setting for use once the soup has reached boiling point on the HIGH setting. - SIMMER/SAUTÉ selector button
Used for sautéing, browning, frying and gently simmering soups and sauces. Use this setting when adding cream or cheese towards the end of cooking. - Decrease timer button
Decreases the time in 1 minute increments. Hold to continuously decrease the time. You can use this button to decrease the cooking time at any point in the cooking cycle. - Display
The display allows you to set the cooking time and, during cooking, counts down in 1 minute increments.
assembling your soup maker
Make sure the unit is switched off and unplugged from the mains supply socket before assembly.
- Place the heating plate/blade assembly into the collar
![]() . Align the tab with the slot in the collar before lowering the heating plate/blade assembly into the collar.
. Align the tab with the slot in the collar before lowering the heating plate/blade assembly into the collar.
![]()
- Moisten both sides of the seal. Use your finger and a few drops of water
![]() . This will make it easier to fit and remove the jug from the collar.
. This will make it easier to fit and remove the jug from the collar.
![]()
- Place the seal onto the heating plate/blade assembly
![]() . Make sure that the seal is completely flat when in contact with the heating plate/blade assembly.
. Make sure that the seal is completely flat when in contact with the heating plate/blade assembly.
![]()
- Fit the jug by lining up the jug handle with the upper unlocked (
![]() ) icon on the collar
) icon on the collar ![]() .
.
![]()
- Rotate the jug handle to the left until it is lined up with the upper locked (
![]() ) icon
) icon ![]() .
.
![]()
- Position the assembled jug and collar so that the lower unlocked (
![]() ) icon on the collar lines up with the triangle symbol (
) icon on the collar lines up with the triangle symbol (![]() ) on the motor unit
) on the motor unit ![]() .
.
![]()
- Rotate the jug until the lower locked (
![]() ) icon on the collar lines up with the triangle symbol (
) icon on the collar lines up with the triangle symbol (![]() ) on the motor unit
) on the motor unit ![]() .
.

- Fit the lid with the side locking tabs positioned as shown
![]() .
.
![]()
- Rotate the lid clockwise to lock it into place
![]() . When correctly fitted, the spout cover on the lid will cover the spout on the jug.
. When correctly fitted, the spout cover on the lid will cover the spout on the jug.
![]()
- Fit the stopper/measure into the opening in the lid
![]() . Press it down until it clicks.
. Press it down until it clicks.
![]()
- Your soup maker is now assembled and ready to use.
 . Align the tab with the slot in the collar before lowering the heating plate/blade assembly into the collar.
 . This will make it easier to fit and remove the jug from the collar.
 . Make sure that the seal is completely flat when in contact with the heating plate/blade assembly.
 .
.
 ) icon
  .
.
 .
.
 .
.
 .
.
 . When correctly fitted, the spout cover on the lid will cover the spout on the jug.
 . Press it down until it clicks.
making soups and sauces
Make sure the unit is switched off and unplugged from the mains supply socket before assembly.
Your soup maker may smoke a little and give off an odour during first use. This is normal and will soon disappear.
Beware of steam escaping from around the area of the stopper/measure during use.
Don't fill the jug above the 1400ml marking.
Never place your fingers inside the jug during operation or when adding ingredients.
- Prepare the ingredients for your recipe.
- Assemble your soup maker on a flat, stable, level surface.
- Plug your soup maker in to a mains supply socket. Press the on/off button to select standby mode. The display will show
![]() and flash.
and flash. - Set the cooking time. When the display stops flashing use the increase timer button to set the desired cooking time in minutes. Each press of the button will increase the time by one minute. You can hold the button down to increase the time more rapidly. You can use the decrease timer button in the same way to decrease the time. Note that the time can be altered at any stage during the cooking process using the increase/decrease buttons.
- Frying/sautéing. If the recipe requires you to fry or sauté ingredients (such as onions or garlic), add a little oil to the heating plate. If using butter, add a little oil to the butter to prevent it from burning. Press the SIMMER/SAUTÉ button and allow the plate to heat up. Add the ingredients and cook as necessary. Press the STIR button as required during cooking to mix the ingredients.
- Cooking cycle. Add all of the remaining ingredients according to the recipe and press the HIGH button. Your soup maker will quickly bring the ingredients to a vigorous boil. The cooking cycle can then be amended by pressing the LOW or SIMMER/SAUTÉ button. A built-in safety feature ensures that after several minutes on the HIGH setting, your soup maker will automatically switch to the simmer/sauté setting and the SIMMER/SAUTÉ button will light up. Press the STIR button at any time during cooking to mix the ingredients. Don't press and hold the STIR button for longer than 10 seconds.
- After the set time has elapsed and the cooking cycle has finished your soup maker will beep six times and enter Keep Warm mode. The status light will change to white to show that your soup maker is in the keep warm mode. The keep warm mode lasts for 40 minutes after which your soup maker will switch to standby mode. To exit keep warm mode, press the on/off button.
- Blending cycle.
![]()
The lid and stopper/measure must be fitted before blending.
You can only blend the soup once the timer has elapsed and the heating cycle has finished. To end the heating cycle early, use the decrease timer button to set the timer to![]() . If your soup maker is in the keep warm mode, press the on/ off button to exit keep warm mode. Press the on/off button again to enter standby mode then blend your soup or sauce by setting the blending control to the 1 or 2 position. You can also use the Pulse position. For your safety, settings 3 and 4 are not available when processing ingredients over 70°C.
. If your soup maker is in the keep warm mode, press the on/ off button to exit keep warm mode. Press the on/off button again to enter standby mode then blend your soup or sauce by setting the blending control to the 1 or 2 position. You can also use the Pulse position. For your safety, settings 3 and 4 are not available when processing ingredients over 70°C. - After blending, remove the jug from the base unit by rotating the jug until the unlocked (
![]() ) icon on the collar lines up with the triangle symbol (
) icon on the collar lines up with the triangle symbol (![]() ) on the base unit. Lift the jug off the base unit. The jug, collar, heating plate and the heating element in the base unit will be HOT — handle with care!
) on the base unit. Lift the jug off the base unit. The jug, collar, heating plate and the heating element in the base unit will be HOT — handle with care!
 and flash.
 . If your soup maker is in the keep warm mode, press the on/ off button to exit keep warm mode. Press the on/off button again to enter standby mode then blend your soup or sauce by setting the blending control to the 1 or 2 position. You can also use the Pulse position. For your safety, settings 3 and 4 are not available when processing ingredients over 70°C.
NOTES
When sautéing, pressing the STIR button can cause ingredients that are too chunky to become jammed. If this happens, wait until the ingredients have softened before using the STIR function again.
During cooking, the heater will switch on and off to maintain temperature. The bubbles formed during cooking may increase and decrease when this happens.
For chunky soup, blend using the STIR button to pulse the ingredients until the desired consistency has been obtained.
Ingredients can be added to the jug during cooking by removing the stopper/measure. However, we do not recommend removing the stopper/measure when your soup maker is on the HIGH setting. Always handle with care and beware of escaping steam from this area during use.
blending
Make sure the unit is switched off and unplugged from the mains supply socket before assembly.
Do not operate the blender continuously for more than one minute without giving it a rest period of two minutes.
Never place your fingers inside the jug during operation or when adding ingredients.
Your soup maker can also be used as you would use a regular blender to make smoothies, milkshakes and much more!
- Assemble your soup maker on a flat, stable, level surface.
- Add the ingredients to the blending jug
![]() before fitting the lid. Don't overfill the jug (maximum quantity is 1750ml when blending cold ingredients).
before fitting the lid. Don't overfill the jug (maximum quantity is 1750ml when blending cold ingredients).
![]()
- Fit the lid and stopper onto the jug. Make sure that the spout cover on the lid aligns with the spout on the jug
![]() .
.
![]()
- Plug your soup maker into a mains outlet
![]() . Your soup maker will beep once and the status light will light up orange and flash.
. Your soup maker will beep once and the status light will light up orange and flash.
![]()
- Press the on/off button
![]() . The display will show
. The display will show ![]() and flash.
and flash.
![]()
- When the display stops flashing use the blending control to process your ingredients
![]() . To start blending, turn the blending control to 1. To blend at a higher speed, set the speed control to 2, 3 or 4.
. To start blending, turn the blending control to 1. To blend at a higher speed, set the speed control to 2, 3 or 4.
![]()
Alternatively, blend food using the pulse function. Twist the blending control clockwise. Your blender will operate when the control is held in this position. Blend in short bursts by twisting and releasing the blending control. - During processing, further ingredients can be added by removing the stopper in the lid
![]() . Refit the stopper after adding any ingredients.
. Refit the stopper after adding any ingredients.
![]()


 and flash.


hints and tips
- For best results prepare all your ingredients in advance. Your Breville Soup maker has a quick cooking cycle so prior preparation of your ingredients is essential.
- When sautéing, add a small amount of oil into the jug and onto the heating plate before heating it. If a recipe requires you to add butter, adding a little oil first will prevent the butter from burning.
- Your soup maker has three temperature settings:
SIMMER/SAUTÉ: For sautéing, browning, frying, gently simmering soups and sauces. Use this setting when adding cream or cheese towards the end of cooking.
LOW: Reduced temperature setting. Select after the soup has reached boiling point on the HIGH setting.
HIGH: Suitable for quickly bringing soups and sauces to a rapid boil. Your soup maker automatically switches to the simmer/sauté setting after several minutes on the HIGH setting. - Try using warm or boiling water when adding stock. This will decrease the total cooking time of your soup.
- During cooking you can:
- Switch between temperature settings. Simply press the required button.
- Increase or decrease the cooking time. Use the increase/decrease timer buttons as required.
- Add more ingredients by removing the stopper/measure. However, we do not recommend removing the stopper/measure when your soup maker is on the HIGH setting. Beware of steam from this area during use.
- Use the STIR function at any stage. Use short burst to avoid blending the ingredients too much.
- When blending hot liquids use the blending control carefully to obtain the desired consistency.
- Never overfill your soup maker. The maximum capacity for hot soup is 1400ml as indicated on the glass jug. Exceeding the 1400ml capacity for hot soup can be dangerous.
- For consistent cooking and best results, we recommend that you chop your vegetables to a 2cm dice.
recipes - soups
Recipe Notes
- For a healthier option, low fat cooking spray can be used in place of oil/butter in all of our soup recipes.
- Half fatcrème fraiche or fromage frais can be used to replace cream
Hearty Pea and Ham
Serves 4
Cooking time 25 minutes
Follow our recipe below for a hearty supper dish or replace the frozen peas with yellow split peas for a lighter alternative.
We add our ham once the soup is blended to give a slightly meaty texture to the finished soup, but you can add yours before blending if you would like it smoother.
- 1 tbsp olive oil
- 200g pack ham, chopped
- 1 onion, roughly chopped
- 1 leek, cleaned and roughly chopped
- 2 cloves garlic, finely chopped
- 500g frozen peas
- 1 medium sized potato (150g) peeled and cut into chunks
- 800ml hot chicken stock
- 1 tsp fresh thyme or marjoram
- Sea salt and freshly ground black pepper to taste
- Set your soup maker timer to 25 minutes and press the SIMMER/SAUTÉ button.
- Wait 30 seconds for the cooking plate to heat up then add the oil.
- Add the onion and leek, replace the lid and sauté for 4-5 minutes to soften. Press the STIR button now and again to stir the onions and leeks.
- Press the HIGH button and add the garlic, peas, potato stock and herbs.
- Bring to the boil then press the LOW button for the remainder of the cooking time.
- Once cooked, pulse your soup in short bursts for a chunkier finish, or blend on position 2 for a smoother texture.
- Add the ham and check the seasoning adjusting as required. Delicious served with Rosemary and Sea Salt Foccacia bread.
Broccoli and Stilton
Serves 4
Cooking time 25 minutes
This is an excellent way of using up a piece of left over Stilton. For a thicker soup add slightly more potato and cheese. We have omitted the salt in this recipe due to the added stilton; we suggest you check the seasoning at the end of blending.
- 30g butter
- 1 tbsp olive oil
- 1 medium onion, diced
- 1 medium leek, washed and chopped
- 300g broccoli, cut into small florets
- 1 medium potato, peeled and cut into chunks
- 800ml chicken or vegetable stock
- 100ml double cream
- Freshly ground black pepper
- 150g Stilton, rind removed and crumbled
- Set your soup maker timer to 25 minutes and press the SIMMER/SAUTÉ button.
- Wait 30 seconds for the cooking plate to heat and then add the oil and butter.
- Add the onion and leek, replace the lid and sauté for 4-5 minutes to soften. Press the STIR button now and again to stir the onions and leeks.
- Press the HIGH button and add the broccoli, potato and stock.
- Bring to the boil then press the SIMMER/SAUTÉ button for the remainder of the cooking time.
- Blend on position 2 until smooth.
- Add the cream, black pepper and stilton until melted.
- Serve immediately.
Minestrone
Serves 4
Cooking time 30 minutes
This is a great soup recipe for using up left over vegetables from your fridge. For a vegetarian alternative leave out the bacon
- 1 tbsp olive oil
- 2 rashers of bacon cut into slices
- 1 medium red onion, roughly chopped
- 1 small leek, roughly sliced
- 1 small carrot, cut into dice
- ½ stick of celery, sliced
- 1 small potato, peeled and diced
- ½ tsp dried oregano
- 1 clove garlic, chopped
- 1 tin, chopped tomatoes
- 400g hot vegetable stock
- 200g cannellini beans, rinsed and drained
- 1 handful of dried pasta shapes, approx 50g.
- 1 handful of curly kale
- Salt and ground black pepper
- Parmesan cheese
- Fresh basil leaves
- Set your soup maker timer to 30 minutes and press the SIMMER/SAUTÉ button.
- Wait 30 seconds for the cooking plate to heat and then add the oil.
- Add the bacon and sauté for approx 2 minutes. Add the onion, leek, carrot, celery, potato, oregano and garlic and sauté for approx 3 minutes until softened. Press the STIR button now and again to stir the ingredients.
- Add the tomatoes and stock and press the HIGH button.
- Bring the soup to boil and then press the LOW button.
- Add the pasta shapes, cannellini beans and the kale and finish cooking on the LOW setting for the remainder of the time.
- Blend the soup carefully so it remains chunky and serve sprinkled with the parmesan cheese and torn basil leaves.
Classic Carrot and Coriander
Serves 4
Cooking time 25 minutes
Simple and easy to prepare, this soup is an excellent starter or lunch dish. Try serving with some cheese and herb bread.
- 25g butter
- 1 tbsp olive oil
- 400g carrots, peeled and sliced
- 1 medium onion, diced
- 1½ tsp ground coriander
- 800ml hot vegetable stock
- Salt and black pepper
- 1 handful of fresh coriander (optional)
- Set your soup maker timer to 25 minutes and press the SIMMER/SAUTÉ button.
- Wait 30 seconds for the cooking plate to heat and then add the oil then butter.
- Add the onion and sauté for approx 2 minutes until softened. Press the STIR button now and again to stir the onions.
- Add the carrots and ground coriander and cook for a further 3 minutes. Use the STIR button as required.
- Pour in the hot stock and press the HIGH button.
- Bring to the boil and then switch to the LOW setting for the remainder of the cooking time.
- At the end of the cooking time, carefully remove the stopper/measure and place a handful of fresh coriander into the soup. Beware of escaping steam!
- Replace the stopper/measure and blend on position 1 until smooth.
- Adjust the seasoning and serve.
Spicy Parsnip Soup
Serves 4
Cooking time 25 minutes
This recipe uses a medium strength curry powder for added spice. If you prefer something a little hotter swap this for a stronger variety.
- 1 tbsp vegetable oil
- 1 onion, roughly diced
- 1 large parsnip, diced
- 2 tsp medium curry powder
- 1 clove of garlic, chopped
- 1 medium potato, peeled and diced
- 50ml dry white wine
- 400ml hot vegetable stock
- Salt and pepper
- Handful of coriander
- Set your soup maker timer to 25 minutes and press the SIMMER/SAUTÉ button.
- Wait 30 seconds for the cooking plate to heat and then add the oil.
- Add the onion, garlic and curry powder and sauté for approx 2-3 minutes until softened. Press the STIR button now and again to stir the ingredients.
- Add the parsnips, potatoes and wine and press the HIGH button. Allow the soup to bubble for 2-3 minutes, stirring occasionally by pressing the STIR button.
- Remove the stopper/measure from the lid and carefully pour in the hot stock. Beware of escaping steam! Replace the stopper/measure and bring to the boil.
- After the soup has come to the boil, select the LOW setting for the remainder of the cooking time.
- Blend on position 2 until smooth.
- Adjust the seasoning and serve garnished with chopped coriander.
Chicken Noodle Soup
Serves 4
Cooking time 20 minutes
- 1 tbsp vegetable oil
- 1medium onion, diced
- 1 medium leek, thinly sliced
- 2 cloves of garlic, chopped
- 900ml hot chicken stock
- 1 x 200g tin sweetcorn, drained
- 1 nest of thin noodles or dried vermicelli, approx 60g
- 250g cooked chicken, shredded
- 1 small handful of chives, chopped
- Salt and pepper
- Set your soup maker timer to 20 minutes and press the SIMMER/SAUTÉ button.
- Wait 30 seconds for the cooking plate to heat and then add the oil.
- Add the onion, leek and garlic and sauté for approx 4-5 minutes until softened. Press the STIR button now and again to stir the ingredients.
- Add the stock, sweetcorn and noodles, press the HIGH button and bring to the boil. Stir once to break up the noodles slightly.
- Select the SIMMER/SAUTÉ setting for the remainder of the cooking time.
- Five minutes before the end of cooking, carefully remove the stopper/measure from the lid and carefully add the chicken and chives. Beware of escaping steam! Allow to heat through for the remainder of the cooking time.
- Check and adjust the seasoning and serve.
Skinny Tomato soup
Serves 4
Cooking time 20 minutes
This recipe uses a low fat cooking spray for a healthier style soup. Alternatively you can replace the spray with a tbsp of cooking oil.
- 4-5 squirts of low fat cooking spray
- 1 onion, roughly chopped
- 2 tins of chopped tomatoes
- 1 tin of baked beans in tomato sauce
- 3-4 dashes of Tabasco sauce, depending on taste
- 1 tbsp Balsamic vinegar
- 1 tbsp Low calorie sweetener
- 300ml hot vegetable stock
- 1 large handful of fresh basil leaves
- Salt and pepper
- Set your soup maker timer to 20 minutes and press the SIMMER/SAUTÉ button.
- Wait 30 seconds for the cooking plate to heat and then add the cooking spray.
- Add the onion and sauté for 2-3 minutes until softened. Press the STIR button now and again to stir the onions.
- Add the tomatoes, beans, Tabasco, Balsamic, sweetener and stock and select the HIGH setting.
- Bring to the boil, and then switch to the LOW setting for the remainder of the cooking time. Stir occasionally.
- Blend on position 2 until smooth. Remove the stopper/measure from the lid and carefully add a large handful of basil. Beware of escaping steam! Replace the stopper/measure and blend again for 10 seconds on position 1.
- Check and adjust the seasoning and serve.
Cream of Mushroom Soup
Serves 4
Cooking time 25 minutes
- 1 tbsp vegetable oil
- 1 onion, roughly diced
- 2 small cloves of garlic, chopped
- 400g chestnut mushrooms, sliced
- 2 medium potatoes, peeled and diced
- 700ml hot vegetable stock
- Salt and pepper
- 100ml double cream
- Chopped parsley
- Set your soup maker timer to 25 minutes and press the SIMMER/SAUTÉ button.
- Wait 30 seconds for the cooking plate to heat and then add the oil.
- Add the onion and garlic and sauté for 2-3 minutes until softened. Press the STIR button now and again to stir the onions and garlic.
- Add the mushrooms, potatoes and stock and select the HIGH setting.
- Bring to the boil, and then switch to the LOW setting for the remainder of the cooking time. Stir occasionally.
- Blend on position 2 until smooth.
- Remove the stopper/measure from the lid and carefully add the cream. Beware of escaping steam! Replace the stopper/measure and press the STIR button to combine.
- Adjust the seasoning and serve garnished with the parsley.
Lentil Dahl Soup
Serves 4
Cooking time 30 minutes
Serve this Indian style soup with some warm grilled naan bread, spread with some garlic butter.
- 1 tbsp vegetable oil
- 1 medium onion, roughly diced
- 1 medium carrot, diced
- 1 large clove of garlic, chopped
- 1 tsp ground cumin
- 1 tsp turmeric
- 1 tsp ground coriander
- ½ tsp chili powder
- 1 tin of chopped tomatoes
- 150g dried split red lentils, rinsed and drained
- 500ml hot vegetable stock
- Set your soup maker timer to 30 minutes and press the SIMMER/SAUTÉ button.
- Wait 30 seconds for the cooking plate to heat and then add the oil.
- Add the onion and carrot and cook for 3-4 minutes until softened. Press the STIR button now and again to stir the ingredients.
- Remove the stopper/measure from the lid, add the spices and garlic to the measure and pour them into the soup maker. Replace the stopper/measure and briefly press the STIR button to combine the ingredients.
- Cook for a further 2 minutes.
- Add the tomatoes, hot stock and lentils and select the HIGH setting.
- Once the soup has reached boiling point, switch to the LOW setting for the remainder of the cooking time.
- Press the STIR button occasionally during cooking to stir the ingredients.
- Blend for 20 seconds on position 1.
![]()
Once the soup has finished cooking it may still bubble due to the texture of the cooked lentils. Please allow a few minutes before removing the lid. - Adjust the seasoning and garnish with some chopped coriander if desired.

recipes - dressings and dips
French Dressing
- 1 clove of garlic
- 6 tbsp olive oil
- 2 tsp Dijon mustard
- 2 tbsp white wine vinegar
- ½ tsp castor sugar
- Salt and pepper
- Place all the ingredients into your soup maker and blend for 20 seconds on position 3 until smooth.
- Store in a screw top jar in the refrigerator. Shake well before serving.
Basil Pesto
- 50g toasted pine nuts
- 1 x 31g pack of basil leaves only
- 50g grated Parmesan
- 150ml Olive Oil
- 2 garlic cloves, chopped
- Pinch of salt
- Black pepper to taste
- Place all the ingredients into your soup maker and pulse until combined. Blend on position 3 until the required consistency is obtained.
Balsamic Dressing
- 4 tbsp Balsamic vinegar
- 1 clove of garlic, cut into quarters
- 2 tsp Dijon mustard
- 100ml extra virgin olive oil
- 1 tbsp honey
- Sea salt and freshly ground black pepper
- Place all the ingredients into your soup maker and blend for 20 seconds on position 3 until smooth.
- Store in a screw top jar in the refrigerator. Shake well before serving.
recipes - sauce
Tikka Masala Sauce
Cooking time 15 minutes
This recipe makes enough sauce to coat 4 diced cooked chicken breasts. Brown your chicken in frying pan whilst the sauce is cooking, for a simple but tasty evening meal.
- 1 tbsp vegetable oil
- 1 large onion, diced
- 2 cloves of garlic, chopped
- 1 thumb sized piece of fresh ginger, peeled and chopped
- 2 tsp garam masala
- 1 tsp turmeric
- 1 tsp chili powder (add more if you like it hotter)
- 1 tbsp tomato puree
- 1 can chopped tomatoes
- 200ml hot vegetable stock
- Salt and pepper
- Set your soup maker timer to 15 minutes and press the SIMMER/SAUTÉ button.
- Wait 30 seconds for the base plate to heat and then add the oil.
- Add the onion, garlic and ginger and cook for 2-3 minutes until softened. Press the STIR button now and again to stir the ingredients.
- Remove the stopper/measure from the lid and add the spices into your soup maker and replace the stopper/measure. Stir to combine and cook a further minute, stirring regularly.
- Add the puree, tomatoes and stock and select the HIGH setting until bubbling. Reduce the setting to LOW for the remainder of the cooking time.
- Blend on position 2 until smooth.
- Adjust the seasoning.
Use the sauce with cooked diced chicken for a tasty curry adding a little cream or yogurt if desired. Delicious served with Pilau rice.
Quick Tomato Sauce for Pasta
Serves 4
Cooking time 10 minutes
Great stirred into freshly cooked pasta for a quick supper, serve with rustic bread and a rocket and parmesan salad.
- 1 tbsp olive oil
- 1 medium onion, finely chopped
- 2 cloves of garlic, chopped
- 1 tsp dried mixed herbs
- 1 tin of chopped tomatoes
- 250ml of passata
- 200ml hot vegetable stock
- 1 tbsp balsamic vinegar (optional)
- 1 tsp castor sugar
- 1 large handful of basil leaves
- Salt and pepper
- Set your soup maker timer to 10 minutes and press the SIMMER/SAUTÉ button.
- Wait 30 seconds for the base plate to heat and then add the oil.
- Add the onion, garlic and herbs and sauté for 2-3 minutes until softened. Press the STIR button now and again to stir the ingredients.
- Add the tomatoes, passata, stock, vinegar and sugar and select the HIGH setting until bubbling, stir frequently.
- Reduce the heat to SIMMER/SAUTÉ for the remainder of the cooking time.
- Add the basil and blend on position 2 until smooth.
Basic Pancake Batter
Makes 8 pancakes
- 1 medium egg and one yolk
- 280ml milk
- 110g plain flour (4 heaped dessertspoons)
- Pinch of salt
- 1 tbsp melted butter
Add all the ingredients to your soup maker jug and blend on position 1 for 10 seconds. Increase the speed setting to 3 for a further 10 seconds until smooth. The batter mix should resemble thin cream.
Cook the pancakes as you normally would. Turn onto a warmed plate and serve with your favourite choice of topping.
recipes - desserts
Easy Apple Tart
Serves 6
Pastry base
- 125g plain flour, sifted
- 75g chilled butter, cut into cubes
- 25g castor sugar
- 2 medium egg yolks
For the filling
- 4 dessert apples
- 50g castor sugar
- 2 tbsp apricot jam
- 1 tbsp honey
- Pre heat the oven to 180°C/350°F, gas mark 4.
- Place the flour, butter and sugar into your soup maker and pulse until the mixture resembles fine bread crumbs.
- Add the egg yolks and pulse again until the pastry forms a ball. Remove the pastry, wrap in cling film and chill in a refrigerator for 1 hour.
- Roll out the pastry and line a 23cm loose bottomed flan tin.
- Cover the pastry with a circle of baking paper. Add some baking beans (if you don't have any, dried beans or uncooked rice will work just as well).
- Bake in the preheated oven for 15 minutes until lightly golden.
- Wash, core and thinly slice the apples. Place them into a bowl of water with a little lemon juice to stop them from discolouring.
- Drain the apples and pat dry. Arrange them on top of the pastry case slightly overlapping them as you go.
- Sprinkle with the sugar and bake for 20-25 minutes until golden and the apples are cooked.
- Once cooked, remove the tart from the oven, warm the apricot jam with the honey and brush generously over the apples.
- Allow to cool and serve with thick cream, ice cream or some warm custard sauce.
recipes - drinks
Strawberry Milkshake
Serves 2
- 400ml chilled semi skimmed milk
- 250g strawberries, washed and hulled
- 3 large scoops vanilla ice cream
Add all the ingredients to your soup maker jug and blend on position 3 until smooth and creamy. Serve immediately in large glasses garnished with a whole strawberry.
Super Breakfast Smoothie
Serves 2
- 250g frozen berries or smoothie mix
- 200g low fat fruit yogurt of your choice
- 150ml semi skimmed milk
- 1 tbsp porridge oats
- 1 tbsp runny honey
Place all the ingredients into your soup maker jug and pulse twice to initially combine the ingredients. Blend on position 3 or 4 for 20 seconds until thick and creamy. Serve immediately.
Mango and Banana Smoothie
Serves 2
- 1 medium mango, stoned and flesh cut into cubes
- Zest of ½ lime
- 1 banana
- 6 ice cubes
- 500ml tropical juice
Place all the ingredients into your soup maker jug and pulse twice to initially combine the ingredients. Blend on position 3 or 4 for 20 seconds until thick and creamy. Serve immediately.
Fruity Fantasy
Serves 2
- 180ml fresh orange juice
- 90ml pineapple juice
- 100g strawberries
- 1 slice honeydew melon
- 1 slice water melon
- 8 small ice cubes
Place all the ingredients into your soup maker jug and blend together on a low speed setting. Divide the cocktail into two glasses and serve immediately.
Dreamy Hot Chocolate
Serves 3-4
- 800ml full fat milk
- 250g milk chocolate, broken into small pieces
- 5 tsp cocoa powder, sieved
- Place all the ingredients into your soup maker. Set the timer to 5 minutes and press the LOW button.
- Slowly bring to a simmer, pressing the STIR button occasionally.
- Switch to the SIMMER/SAUTÉ setting.
- Blend to combine
- Serve the chocolate in tall mugs with whipped cream and grated chocolate or marshmallows.
Blended Mojitos Cocktail
Serves 2
- 8 large fresh mint leaves,
- 2 tbsp granulated sugar or vanilla sugar (vanilla sugar can be made by submerging vanilla pods in castor or granulated sugar for a period of time)
- 3 limes, juice extracted.
- 2 measures of white rum
- Ice cubes
- Chilled soda water
- Lime wedges and mint sprigs for garnishing
- Place the mint leaves, sugar, rum and lime juice into a bowl.
- Using the bottom of a rolling pin, crush the ingredients together to infuse the flavours and set aside for at least 2 hours at room temperature (this really does make a difference to the flavours when they are allowed to develop together like this).
- Add approx 10 cubes of ice to your soup maker jug then strain the infused rum and mint mixture using a sieve over the ice cubes. Add 300ml of soda water and blend together until thoroughly mixed.
- Select two tall slender glasses, divide the drink between them topping up with extra soda if required. Garnish with lime wedges and mint sprigs.
Why not try adding a measure of passion fruit liqueur along with a measure of rum and some fresh passion fruit seeds for a Mojito with a twist!
cleaning and storage
Make sure the unit is switched off and unplugged from the mains supply socket before cleaning. Allow the appliance to fully cool down before cleaning or storing.
The blending blades are very sharp, take extreme caution when washing them.
Do not immerse the motor base, mains lead or plug in water or any other liquid.
Cleaning
- Disassemble the jug, collar, heating plate/blade assembly, seal, lid and stopper/ measure.
- Wash the jug, collar, heating plate/blade assembly, seal, lid and stopper/measure in warm, soapy water. Rinse and dry thoroughly. If necessary, use a washing up brush to get rid of any stubborn food deposits which may have stuck to the blades.
- The jug and collar can be washed in a dishwasher. Do not wash the heating plate/ blade assembly or seal in the dishwasher as they may be damaged
- Using a damp cloth or sponge, wipe down the motor base and dry thoroughly. Make sure you only use a mild detergent solution.
Quick cleaning method
- Prepare your soup maker as if for blending.
- Half fill the jug with warm water and a small amount of detergent.
- Set the blending control to the 1 or 2 position for 10-20 seconds.
- Remove the jug and rinse it under running water.
Storing
Store in a safe, dry place, out of the reach of children.
If you are storing your soup maker for an extended time, we recommend that you loosen the glass jug from the collar. Failure to do so may make subsequent disassembly difficult.
connection to the mains supply
This appliance must be earthed.
This appliance is fitted with either a moulded or rewirable BS1363, 13 amp plug. The fuse should be rated at 13 amps and be ASTA approved to BS1362.
If the fuse in a moulded plug needs to be changed, the fuse cover must be refitted. The appliance must not be used without the fuse cover fitted.
If the plug is unsuitable, it should be dismantled and removed from the supply cord and an appropriate plug fitted as detailed below. If you remove the plug it must not be connected to a 13 amp socket and the plug must be disposed of immediately.
The wires of the mains lead are coloured in accordance with the following code:
GREEN/YELLOW = EARTH
BLUE = NEUTRAL
BROWN = LIVE
The wire which is coloured GREEN/YELLOW must be connected to the terminal in your plug which is marked with an E or by the earth symbol (![]() ) or coloured GREEN or GREEN/YELLOW.
) or coloured GREEN or GREEN/YELLOW.
The wire which is coloured BLUE must be connected to the terminal in your plug which is marked with the letter N or coloured BLACK.
The wire which is coloured BROWN must be connected to the terminal in your plug which is marked with the letter L or coloured RED.
If any other plug is used, a 13 amp fuse must be fitted either in the plug or adaptor or at the distributor board.

after sales service
These appliances are built to the very highest of standards. There are no user serviceable parts. Follow these steps if the unit fails to operate:
- Check the instructions have been followed correctly.
- Check that the fuse has not blown.
- Check that the mains supply is functional.
If the appliance will still not operate, return the appliance to the place it was purchased for a replacement. To return the appliance to the Customer Service Department, follow the steps below:
- Pack it carefully (preferably in the original carton). Ensure the unit is clean.
- Enclose your name and address and quote the model number on all correspondence.
- Give the reason why you are returning it.
- If within the guarantee period, state when and where it was purchased and include proof of purchase (e.g. till receipt).
- Send it to our Customer Service Department at the address below:
Customer Service Department
Jarden Consumer Solutions (Europe) Limited
Middleton Road
Royton
Oldham
OL2 5LN, UK.
Telephone: 0161 621 6900 Fax: 0161 626 0391
e-mail: info@pulse-uk.co.uk
product safety
READ CAREFULLY AND KEEP FOR FUTURE REFERENCE
This product can be used by children aged 8 years and above, and persons who require supervision, provided:
- they are familiar with the hazards associated with the product, and,
- they receive instruction by a competent person on how to safely use the product.
Children must not play with the product. Cleaning and user maintenance must not be done by children unless they are aged 8 or older and are supervised.
Always disconnect the appliance from the mains supply socket if it is left unattended and before assembling, disassembling or cleaning.
If the supply cord is damaged, it must be replaced by the manufacturer, its service agent or similarly qualified persons in order to avoid a hazard.
Never use this appliance for anything other than its intended use. This appliance is for household use only. Do not use this appliance outdoors.
Always ensure that hands are dry before handling the plug or switching on the appliance.
Always use the appliance on a stable, secure, dry and level surface.
This appliance must not be placed on or near any potentially hot surfaces (such as a gas or electric hob).
Never immerse the motor unit or power cord and plug in water or any other liquid.
Never let the power cord hang over the edge of a work top, touch hot surfaces or become knotted, trapped or pinched.
Do not use the appliance if it has been dropped or if there are any visible signs of damage.
Never use any accessory or attachment not recommended by the manufacturer.
Make sure that all attachments are securely and correctly fitted before operating the appliance.
The blades and cutting accessories have very sharp edges. Take care when handling or cleaning them.
Allow moving parts to come to a stop before changing or cleaning accessories.

Documents / Resources
References
Download manual
Here you can download full pdf version of manual, it may contain additional safety instructions, warranty information, FCC rules, etc.
Download Breville VBL060 - Selection of Recipes Included Soup Maker Manual
Advertisement


Need help?
Do you have a question about the VBL060 and is the answer not in the manual?
Questions and answers