Table of Contents

Summary of Contents for RelFar FWH20-S10A
- Page 1 深圳市睿法智能科技有限公司 FWH20-S10A 智能单摆手持焊接头 FWH20-S10A Intelligent Single Pendulum Handheld Welding Head 深圳市睿法智能科技有限公司 Shenzhen RelFar Intelligent Technology Co.,Ltd. 网址: www.relfar.com 电话: 0755-23143635 地址: 广东省深圳市宝安区福海街道和平社区思源一区 E 栋 发行日期 2022-1-19 版本:A...
- Page 2 深圳市睿法智能科技有限公司 Shenzhen RelFar Intelligent Technology Co.,Ltd. Web: www.relfar.com Tel: 0755-23143635 Address: E Block, Siyuan Zone 1, Peace Community, Fuhai Avenue, Bao’an District, Shenzhen City, Guangdong Province. Release Date: 2022-1-19 Version A 前言 感谢您选择本公司的产品! 为了使您对我公司有一个总体认识,本手册对此产品的特点、结构特征、技术参数、使用说明、保养维护等做了 详细的介绍,在使用此产品前,请您详细阅读本手册,这将有助于您更好的使用它。 由于产品功能的不断更新,您所收到的产品在某此方面可能与本手册陈述有所出入,在此谨表歉意。如在使用过 程中有所疑问,请及时来电咨询,我们定当竭诚为您服务。 Introduction Thanks for choosing our products! To ensure you an overall understanding about this product, the manual has made a detailed introduction on features, structure, technical parameters, instructions and maintenance of this product.
- Page 3 深圳市睿法智能科技有限公司 目录 目录..............4 第一章 概述............5 1.1 产品参数..........5 1.2 注意事项..........5 第二章 结构特征............6 2.1 产品结构..........6 第三章 产品安装............7 3.1 管路连接..........7 3.1.1 冷却管路..........7 3.1.2 辅助气体..........7 3.2 光纤输入安装..........8.9 第四章 维护与保养..........10 4.1 光学镜片结构..........10 4.2 光学镜片清洁..........11 4.3 光学镜片拆装..........12 4.3.1 准直镜片拆装....,,....12 4.3.2 聚焦镜片拆装........13 4.3.3 保护镜片拆装........14 第五章 焊接系统............15 5.1 产品安装尺寸图...........15 5.1.1 触摸屏安装尺寸.........15 5.1.2 主板安装尺寸...........16 第六章...
-
Page 4: Table Of Contents
深圳市睿法智能科技有限公司 7.2.1 参数设置........... 25 7.2.2 系统参数........... 25 7.2.3 送丝参数........... 26 7.2.4 设备参数........... 27 第八单 监控保护装置..........27 8.1 保护镜片温度参数设定........28 Content Content...........................4 Chapter 1 Overview.......................5 1.1 Product Parameter..................5 1.2 Cautions....................5 Chapter 2 Structure and Feature..................6 2.1 Product Structure....................6 Chapter 3 Product Assembly..................7 3.1 Tube Connection....................7 3.1.1 Cooling Pipe....................7 3.1.2 Auxiliary Gas....................7... - Page 5 6.13 Galvanometer Interface....................23 Chapter 7 Introduction HMI Operation..................24 7.1 Introduction of HMI Function..................24 7.2 Introduction of HMI Operation..................25 7.2.1 Parameter Setting......................25 7.2.2 System Parameter......................26 7.2.3 Wire Feeding Parameter....................26 7.2.4 Device Parameter.......................27 Chapter 8 Monitoring Protection Device..................27 8.1 Temperature Parameter Setting of Protective Lens............28...
-
Page 6: Chapter 1 Overview
第一章 概述 Chapter 1 Overview 1.1 产品参数 Product Parameter 名称 智能单摆手持焊接头 Name Intelligent single pendulum handheld welding head 型号 FWH20-S10A Model 光纤接口 Fiber interface 1070±20nm 波长范围 Wavelength range ≤2000W 额定功率 Rated power 50mm 准直焦距 Collimating focal length 150mm 聚焦焦距 Focus length -10mm~+10mm... - Page 7 Please keep the product clean and stop the entry into the cavity of cooling liquid, condensate water and other objects to, otherwise, the function may be impacted.
-
Page 8: Chapter 2 Structure And Feature
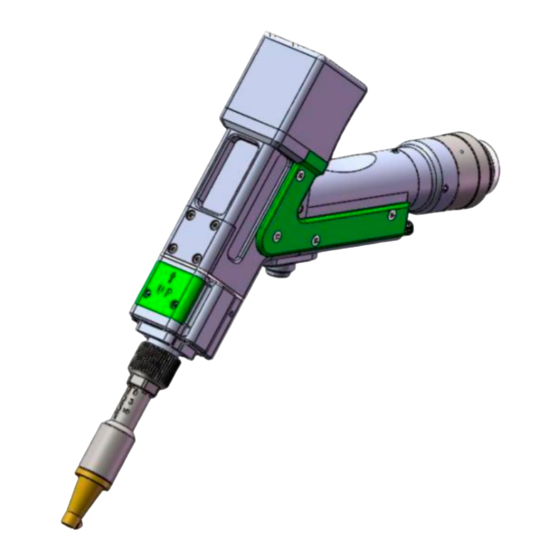
第二章 结构特征 Chapter 2 Structure and Feature 2.1 产品结构 Product Structure... -
Page 9: Chapter 3 Product Assembly
第三章 产品安装 Chapter 3 Product Assembly 3.1 管路连接 Tube connection 冷却水路与辅助保护气体连接 Cooling pipe and auxiliary gas pipe are connected. 冷却水与保护气体连接,以及使用要求: 注: 常规使用气体: 压缩空气(需要进行油水过滤) 常规使用气体有: 氩气、氮气、压缩空气(需要进行油水过 滤) 。 3.1.1 冷却水: 接6mm气管,主要作用当腔内光路产生热 量,通过内部结构件 水路,冷却带走多余热量,保证焊接性 能,冷却水管路要求串连,连接一进一 出水流循环。 3.1.2保护气体: 接 6mm 气管,用于对接焊接气体保护, 输入压力<1Mpa。 Connection between cooling water and protective gas as well as the operating requirements Attention: commonly used gas: compressed air ( It’s necessary to filter oil and water) Compressed used gas: Argon, Nitrogen and compressed air ( It’s necessary to filter oil and water) - Page 10 3.1.2 Protective gas: connected with 6mm gas pipe. It is used for the protection of welding gas with input pressure less than 1Mpa.
-
Page 11: Fiber Input And Installation
3.2 光纤输入安装 ※ 将QBH水平放置,取出防尘密封盖。 3.2 Fiber input installation Put QBH horizontally and take out the dust seal cover 取出防尘盖 ※ 光纤头上红点对准QBH红点,慢慢将光纤头插入QBH中。 Align the red point on the optical fiber head with that in QBH, and insert the optical fiber head into QBH slowly. 两中心红点对齐插入安装... - Page 12 ※ 将QHB拧至锁紧状态: 顺时针方向旋至极限位置(可以 感觉到“哒”的一声) , 向上提起转动外套,再次顺时针旋 转转动外套直至压紧光纤头。 Tighten QHB to the locked state: rotate the QHB clockwise to the limit position with a “click”, then lift the rotary knob up and rotate the knob clockwise again until it presses down on the optical fiber head. 顺时针为锁紧方向...
-
Page 13: Structure Of Optical Lens
第四章 维护与保养 Chapter 4 Maintain 4.1 光学镜片结构 Structure of optical lens ※更换部件都是在无尘车间内装配,除了保护镜抽屉可以拆 装,其他模块原则上禁止拆卸。如必须查看准直镜片和聚焦镜片, 振镜片,请把产品放置洁净环境下拆除。 Replaceable components should be equipped in the dust-free plant. In principle, the modules of the optical lens can’t be assembled or disassembled except the drawer of protective lens. If you have to check the collimating lens, focusing lens and galvanometer lens, please disassemble them in the clean environment. -
Page 14: Cleaning Of Optical Lens
4.2 光学镜片清洁Cleaning of optical lens ※清净光学镜片,操作方法与要注意要点: ※工具: 无尘手套或无尘指套、无尘擦拭棉签、异丙醇、 灌装干燥纯净的压 缩空气。 ※将异丙醇喷撒至无尘擦拭棉签上,镜片正对双眼,左手 大拇指和食指轻轻 捏住镜片的侧面边缘,右手持无尘擦拭棉 签,从下往上或者从左往右,单一方 向轻轻擦拭镜片正反两 面,(切忌不能来回擦拭,以免镜片二次被污染) 并用 灌装 干燥纯净的压缩空气吹拂镜片表面,确认清洁后镜片表面无 任何异物。 Operating method and cautions: Tool: dust-free gloves or dust-free fingertips, dust-free cotton swab, isopropyl alcohol and canned dry pure compressed air. Spray the isopropyl alcohol onto the dust-free cotton swab, make the lens face your eyes, gently pinch the side edge of the lens with the thumb and forefinger of your left hand, wipe the front and back of the lens in one direction from left to right or from top to... -
Page 15: Disassembly Of Optical Lens
4.3 光学镜片拆装Disassembly of optical lens 4.3.1 准直镜片拆装 Disassembly of collimating lens 工具: 2mm内六角扳手、专用夹具板手、无尘棉签、酒精 Tool: 2mm inner hexagon wrench, special fixture wrench, clean cotton swab and alcohol. 无尘手套或无尘指 ※拆装过程需要在洁净的场所完成,拆装镜片时必须带上 套。 The disassembly of lens should be operated with hand wearing dust-free gloves or fingertips in clean environment. -
Page 16: Disassembly Of Focusing Lens
Step 1: remove all the dust on the surface of laser head Step 2: loosen the 3-M4*6 set screw in the figure with a 2mm inner hexagon wrench. Step 3: take out QBH module and seal the port with masking tape to stop the entry of dust into the cavity. Step 4: use the special fixture for the disassembly of lens cone, rotate counterclockwise to loosen the locking spring ring and slowly take out the welding head download. -
Page 18: Disassembly Of Protective Lens
4.3.3 保护镜片拆装Disassembly of protective lens ※拆装过程需要在洁净的场所完成,拆装镜片时必须带上 无尘手尘或无尘指 套。 The assembly and disassembly of lens should be operated with hands wearing dust- free gloves or fingertips in clean environment. 操作方法:Steps: 更换保护镜01 第一步,用手拿着绿色抽屉模块 1手柄两侧面,水平方向抽 出保护镜片后。注意 防尘,用美纹纸封好腔体上露出的窗口, 防止灰尘进入腔内受到污染,再更换保 护镜片。 第二步: 压盖轻轻向下压旋转90°,当两处耳端两处槽口对 齐即是松开,取出压 盖,更换保护镜片。 更换保护镜02 第一步:... -
Page 19: Chapter 5 Welding System
Change protective glass 02: Step 1: take out the green drawer handle module 1 and pull out the protective lens horizontally. Take care of the dust, seal the port exposed on cavity with masking tape to stop the entry of dust into the cavity and replace the protective glass. Step 2: the cover is gently pressed down and rotated 90°. - Page 20 5.1.2 主板安装尺寸...
-
Page 21: Chapter6 Supplies
第六章 电气 Chapter6 Supplies 6.1 电气物料表 Electrical material list 清单 List 序号 名称 图示 数量 备注 Serial Name Picture Number Remark number 1PCS 手持焊枪电机线 Handheld welding gun motor wire 24V 电源盒 1PCS 24V power box 15V电源盒 1PCS 15V power box 1PCS 地线夹组件... -
Page 22: System Wiring
6.2 系统接线 System wiring 下图为整个系统的接线示意图,系统接线可以参考该示意图,详细的接口 定义请参考相关章节。 The following is the wiring diagram of the whole system. System can refer to this diagram. For the detailed interface definition, please refer to the relevant chapter. Important: Do not connect the pins reserved on the mainboard. -
Page 23: Cn5 Power Supply Interface
6.3 CN5供电接口 CN5 power supply interface 供电接口是6PIN 绿色端子,是外部为主板与振镜提供的一个电源接 口,电 压为直流24V(DC 24V)与直流±15V(DC ±15)。表6.3.1 为CN5 供电接口 定义。 Power supply interface is a 6-pin green terminal and a power interface provided for mainboard and galvanometer by external part. The voltage is DC 24V and DC ±15. Chart 6.3.1 shows the definition of CN5 power supply interface. - Page 24 DIR+ 电机送丝使用,接驱动器 Dir+ 电机送丝方向+接 口 Used during motor wire feeding, Motor wire feeding connected with driver Dir+ Dir+ interface 电机送丝使用,接驱动器 Dir- DIR- 电机送丝方向-接口 Motor wire feeding Used during motor wire feeding, Dir- interface connected with driver Dir- 参考地 — Feed 用于...
-
Page 25: Cn2 Laser Interface
6.5 CN2激光器接口CN2 laser interface 激光器接口是一个8PIN 绿色端子,表6.5.1 为激光器接口定义。 Laser interface is a 8-pin green terminal. Chart 6.5.1 shows the definition of laser interface. 表6.5.1 Chart 6.5.1 引脚 信号 定义 说明 Signal Definition Description PWM+ 占空比 1%-99%可调,24V 电平 调制信号+ Modulating signal+ Duty cycle from1% to 99% is adjustable, 24V level 占空比... -
Page 26: Cn3 Temperature Sensor Interface
6.6 CN3温度传感器接口 CN3 temperature sensor interface 温度传感器接口 CN3 是一个4PIN 绿色端子,用户将带有端子的配套连接线 直接插入即可。表6.6.1 为温度传感 器接口定义。 CN3 temperature sensor interface is a 4-pin green terminal. Users can directly insert the connecting wire with terminal into this interface. Chart 6.6.1 shows the definition of temperature sensor interface. 表6.6.1 Chart 6.6.1 引脚... -
Page 27: Cn4 Reserved Serial Port Interface
6.8 CN4预留串口接口 CN4 reserved serial port interface 预留串口CN4 接口是4PIN 绿色端,保留不接线,表6.8.1 为CN4 接口定义 。 CN4 reserved serial port interface is a 4-pin green terminal without wiring. Chart 6.8.1 shows the definition of CN4 interface. 表6.8.1 引脚 信号 定义 说明 Signal Definition Description +24V 电源输出,500mA OVCC... - Page 28 必须将该引脚连接到安全夹上,焊接前, Injector 安全夹信号输入 将安全 Injector signal input 夹夹在金属材料上。 The pin must contacted to the injector. Before welding, clamp the safety clamp to the metal material. 必须将该引脚连接到手持头的喷嘴上,焊接 Interlock 安全锁信号输入 时, Interlock signal input 将喷嘴与金属材料接触。 The pin must be contacted to the nozzle of the handheld head.
-
Page 29: Cn7 General Input Interface 1
6.10 CN7通用输入接口1 CN7 general input interface 1 CN7 接口是一个6PIN 绿色端子,NPN 类型,表6.10.1 为CN7 接口 定义。 CN7 interface is a 6-pin green terminal of NPN type. Chart 6.10.1 shows the definition of CN7 interface. 表6.10.1 Chart 6.10.1 引脚 信号 定义 说明 Signal Definition Description 参考地... - Page 30 Wiring diagram of output port relax 输出口继电器接线示意图...
-
Page 31: Galvanometer Interface
表6.11.1 Chart 6.11.1 引脚 信号 定义 说明 Signal Definition Description 供电电源,最大可输出 500mA +24V 电源输出 OVCC Power supply can output at most 500mA. +24V power output Auxi.air 保护气体 用于保护气体吹气控制 Protective gas For the blowing control of protective gas Output1 绿灯 — Green light Output2 红灯... - Page 32 第七章 HMI操作介绍 Chapter 7 HMI Operating Instruction 7.1 HMI功能介绍 HMI function introduction 手持激光焊接系统操作面板(简称“HMI”) 采用7 寸组态TFT 触摸屏,界 面 美观,操作方便。可以分别设置激光相关的参数,在主界面上能实时显示输入 输出 IO 状态、报警信息以及运动状态。HMI 主界面如下图所示。 Handheld laser welding control system operating panel (“HMI” for short) adopts a 7-inch configuration TFT touch screen with beautiful interface and convenient operation.
- Page 33 报警、激光报警与温度报警状态进行实时显示,启用安全锁则实时显示安全锁状 态; 当报警信号未触发时,相应报警状态前为蓝色; 产生报警时,对应的报警图 标会红蓝交替闪烁。 【主页面】【送丝参数】【诊断】 【系统参数】:显示当前页面参数的参数 类别,点击对应图标可进行对应参数页的切换。例如: 主页面图标变亮,说明当 前显示区域的参数为主页面的参数; 需要切换到送丝参数时,点击送丝参数位置 则切换到送丝参数页,对应的送丝参数位置会变亮。 【手动吹气】【送丝机】:手动进行吹气测试和送丝机的送丝与退丝测试。 例如: 长 按 手动吹气区域则一直进行吹气,松开手动吹气区域则关闭吹气,手 动 送丝与抽丝则长按对应的小三角箭头。 Bluetooth logo: to show whether this device is connected with the mobile terminal through bluetooth. Swing off: to set galvanometer motor swing on or off Safety lock: to start or close the safety lock.
-
Page 34: Parameter Setting
7.2 HMI操作介绍 HMI operation introduction 7.2.1 参数设置: 参数设置包括: 主页面、系统参数、送丝参数、诊断页的设置。 【主页面】 :用于设置焊接时激光、摆动和工艺库等相关的参数。 工艺库: 点击工艺库白色框区域,可选择已设置的工艺库参数。 焊接模式: 设置焊接模式: 连续,脉冲模式。 激光功率: 设置焊接时激光器的峰值功率。 激光频率:设置激光器 PWM 调制信号的频率。 占空比:设置 PWM 调制信号的占空比,设定范围为1%~100%。 摆动频率: 设置电机摆动的频率。 摆动长度: 设置电机摆动的宽度。 送丝速度: 设置焊接时送丝的速度。 出光时间: 点焊模式下的出光时间。 点焊模式:点击进入点焊出光模式。 Parameter setting: Parameter setting includes: Home page, System parameter, Wire feeding parameter and Diagnosis page Home page: used to set parameters related to laser, swing and process library when welding. - Page 35 7.2.2【系统参数】:用于设置设备基本参数,一般由厂家进行配置,进入 页 面前需要输入密码。 系统进入密码为: 666888 六位数。 脉冲开时间: 脉冲模式下的出光时间。 脉冲关时间: 脉冲模式下的关光时间。 缓升时间:用于设置激光器模拟电压在启动时,从起始功率变化到最大功率时缓慢增大 的时间。 缓降时间:用于设置激光器模拟电压在停止时,从最大功率变化到关光功率 时缓慢减小 的时间。 开光功率:用于设置激光器的起始功率,为焊接功率的百分比。 开光渐进时间:控制激光器出光缓慢上升至设置功率所用时间。 关光功率:用于设置激光器的关光功率,为焊接功率的百分比。 关光渐进时间:控制激光器关光功率缓慢下降所用时间。 语言:用于切换语言切换。 提前开气延时:在启动加工时,可以设置延迟开气。当按下外部启动按钮时,先吹气延 时一段时间后,然后开始出激光。 延迟关气延时:在停止加工时,可以设置延迟关气。当停止加工时,先停止 出激光,延 时一段时间后,然后再停止吹气。 自动摆动:用于设置振镜时候进行自动摆动; 启用自动摆动,安全锁导通时 ,振镜自动 进行摆动,安全锁不导通时,延时一段时间后自动让振镜电机不摆 动。 设备参数:用于切换到设备参数页面,需输入密码。 授权:用于主板的授权管理。 设备编号:用于设置控制系统的蓝牙编号。当用户有多台设备时,可自由定 义编号进行 管理。 中心偏移:用于红光中心偏移的设置。...
-
Page 36: Device Parameter
System parameter: used to set the basic parameters of device. Generally, the setting is performed by manufacturers. Before entering the page, users need to enter password. System password: 666888 Pulse on time: the time to start light emission in pulse mode Pulse off time: the time to stop light emission in pulse mode Slow rise time: used to set the time that the laser analog voltage rises from initial power to the maximum power when the it is enabled. - Page 37 7.2.3【送丝参数】:用于设置送丝参数,包括补丝参数、退丝参数等。 退丝速度: 松开启动开关后电机退丝的速度。 退丝时间: 电机退丝的时间。 补丝速度: 电机补丝的速度。 补丝时间: 电机补丝的时间。 送丝延迟时间: 出光后延迟一段时间再送丝,一般为0。 连续送丝: 用于送丝机换丝,单击一次可持续送丝,再次单击后停止。 连续退丝: 用于送丝机换丝,单击一次可持续退丝,再次单击后停止。 Wire feeding parameter: used to set parameters related to wire feeding, wire supplement and withdrawal. Wire withdrawal speed: the wire withdrawal speed of motor when the start button is loosened. Wire withdrawal time: the time for motor wire withdrawal Wire supplement speed: the speed of motor wire supplement Wire supplement time: the time for motor wire supplement...
- Page 38 修正,不需要修正时,一般设置为 1。 镜片温度报警使能:使能镜片温度报警,当温度超过限制值时,会产生 报警信号。 镜片温度报警限值:镜片温度限制值。 激光报警使能:使能激光器报警,当激光器产生报警时,会产生报警信号。 激光报警电平:激光机报警逻辑电平。 冷水机报警使能:使能冷水机报警,当冷水机产生报警时,会产生报警信号。 冷水机报警电平:冷水机报警逻辑电平。 欠压报警使能:使能气体报警,当气体欠压产生报警时,会产生报警信号。 欠压报警电平:欠压报警逻辑电平。 Diagnosis: to monitor the IO status of current system Device parameter: used to set parameters related to device Laser rated power: used to set the rated power of laser Maximum deflection angle of galvanometer: used to set the range of the maximum deflection angle of galvanometer.
-
Page 39: Chapter 8 Monitoring Protection Device
第八章 监控保护装置 Chapter 9 Monitoring Protection Device 8.1 保护镜片温度参数设定 【主页面】→【系统参数】→【设备参数】 →【输入密码888666】→下一页→ 镜片温度报警限值。 镜片温度设定值,建议设定为 50 ,当镜片温度超过设定值后,主页面出现报警 提醒,手持焊接头侧面同时显示灯变为红色。 Temperature parameter setting of Protective Lens Home page-System parameter-Device parameter-Enter password 888666-Next page- Limited value of lens temperature alarm The lens temperature value is proposed to be 50. When the temperature exceeds this value, there will be an alarm prompt on the home page and at the same time, the indicator light on the side of the handheld head turns red. - Page 40 感谢你使用深圳市睿法智能科技产品! 网址: www.relfar.com 电话: 0755-23143635 地址: 广东省深圳市宝安区福海街道和平社区思源一区E栋 Thanks for choosing our products! Web: www.relfar.com Tel: 0755-23143635 Address: E Block, Siyuan Zone 1, Peace Community, Fuhai Avenue, Bao’an District, Shenzhen City, Guangdong Province.
Need help?
Do you have a question about the FWH20-S10A and is the answer not in the manual?
Questions and answers