
Summary of Contents for Rover 1000 Series
- Page 1 THANK YOU FOR YOUR PURCHASE Available on App Store and Play Store Rover 1000 Series eMobile 2 App www.roversystems.com.ph/utility-tools we appreciate your feedback, you can email us at: info@roversystems.com.ph...
- Page 2 Q U I C K G U I D E...
- Page 3 Page 3...
- Page 4 Technical Support Tel No. +63(2) 8723-7959 local 1333 (Smart) (+63) 920-9547473 / (Globe) (+63) 917-8364491 (SUN) (+63) 933-9663291 / (+63) 922-8992930 Page 4...
- Page 5 1.9 TYPE 9 SERIES PANEL 1.9.1 Front-End Panel 1.9.2 Rear Panel 2.2 TYPE 2 SERIES PANEL 2.2.1 Front-End Panel 2.2.2 Rear Panel 2.3 TYPE 3 SERIES PANEL 2.3.1 Front-End Panel 2.3.2 Rear Panel 2.4 TYPE 4 SERIES PANEL 2.4.1 Front-End Panel 2.4.2 Rear Panel 2.5 TYPE 5 SERIES PANEL 2.5.1 Front-End Panel...
-
Page 6: Table Of Contents
SETTING WIRELESS CAMERA AS WIRELESS EXTENDER ALARM 14.1 MOTION DETECT 14.2 AI HUMAN BODY DETECT 14.2 AI FACE DETECTION 14.2.1 PLAYBACK MODE 14.2.2 SET PLAYBACK 14.3 VEHICLE DETECTION (Analog System) 14.4 VEHICLE DETECTION (IP System) 14.4.1 SEND EMAIL (Optional) PTZ Control LAN ACCESS CLOUD NETWORK ACCESS REGISTRATION AND OPERATION 17.1 IP Camera / NVR / DVR Account Creation via WEB Browser interface... - Page 7 Page 7...
- Page 8 1.2 TYPE 2 SERIES PANEL 1.2.1 Front-End Panel 1.2.2 Rear Panel Page 8...
- Page 9 1.3 TYPE 3 SERIES PANEL 1.3.1 Front-End Panel 1.3.2 Rear Panel Page 9...
- Page 10 1.4 TYPE 4 SERIES PANEL 1.4.1 Front-End Panel 1.4.2 Rear Panel Page 10...
- Page 11 1.5 TYPE 5 SERIES PANEL 1.5.1 Front-End Panel 1.5.2 Rear Panel Page 11...
- Page 12 1.6 TYPE 6 SERIES PANEL 1.6.1 Front-End Panel 1.6.2 Rear Panel Page 12...
- Page 13 1.7 TYPE 7 SERIES PANEL 1.7.1 Front-End Panel 1.7.2 Rear Panel Page 13...
- Page 14 1.8 TYPE 8 SERIES PANEL 1.8.1 Front-End Panel 1.8.2 Rear Panel Page 14...
- Page 15 1.9 TYPE 9 SERIES PANEL 1.9.1 Front-End Panel 1.9.2 Rear Panel Page 15...
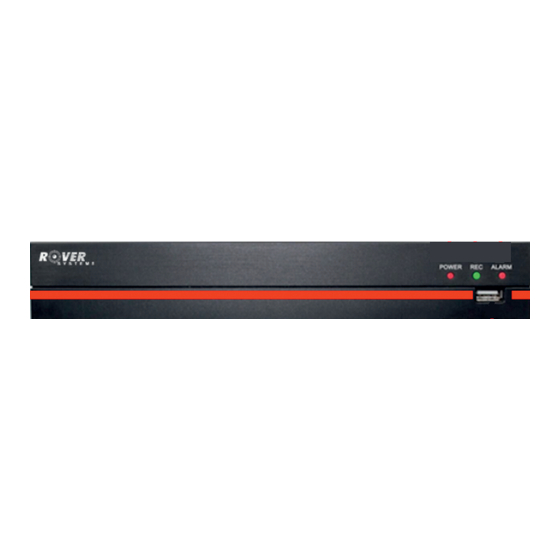
- Page 16 12V DC Input Page 16...
- Page 17 2.2 TYPE 2 SERIES PANEL 2.2.1 Front-End Panel 2.2.2 Rear Panel Audio Out Page 17...
- Page 18 2.3 TYPE 3 SERIES PANEL 2.3.1 Front-End Panel 2.3.2 Rear Panel 48V DC Input PoE Port Audio Power Switch Page 18...
- Page 19 2.4 TYPE 4 SERIES PANEL 2.4.1 Front-End Panel 2.4.2 Rear Panel 48V DC Input PoE Port Audio Power Switch Page 19...
- Page 20 2.5 TYPE 5 SERIES PANEL 2.5.1 Front-End Panel 2.5.2 Rear Panel 12V DC Input Audio Out Page 20...
- Page 21 2.6 TYPE 6 SERIES PANEL 2.6.1 Front-End Panel Alarm Indicator 2.6.2 Rear Panel 12V DC Input Audio Page 21...
- Page 22 up to 4 Page 22...
- Page 23 Regular / Detect / Alarm Recording. to record the DVR / NVR normally. Page 23...
- Page 24 Page 24...
- Page 25 Page 25...
- Page 26 Page 26...
- Page 27 (Applicable to Rover Smart Home Camera and other WIFI Camera) Note: NVR must be connected on Network Router via LAN and IP Camera must also be connected on the same Network router via WIFI. Page 27...
- Page 28 Page 28...
-
Page 29: Setting Wireless Camera As Wireless Extender
(Applicable to the Bundled WIFI NVR and Camera Kit models) plug and play wait for about 10-20 seconds and the camera will 13. SETTING WIRELESS CAMERA AS WIRELESS EXTENDER The Wireless Camera included on this bundled unit can also be set as wireless extender if other wireless cameras to be connected are out of range or have weak NVR reception. - Page 30 3. The NVR will display all the available cameras and the other Menu. Select and click “Repeat Set” to configure the camera to be used as repeater and to connect the camera to be repeated to connect to NVR. Please see Figure 2. Figure 2.
- Page 31 5. To set IPC1 as repeater, move the mouse cursor and click on “IPC1”. A dialog box will appear on screen. Select and Click on Repeat Mode > Auto Repeat. Click on OK button to apply the settings. IPC1 is now ready to act as repeater as illustrated on Figure 4.
-
Page 32: Alarm
Figure 6. Client camera (IPC3) is connected to repeater camera (IPC1). 8. If not successful, repeat step 5, 6 and 7. Click on Update and OK buttons to check the configuration and to apply the settings. See also Figure 6. 14. -
Page 33: Ai Human Body Detect
14.2 AI HUMAN BODY DETECT Page 33... -
Page 34: Ai Face Detection
14.3 AI FACE DETECTION 13.3.1 PLAYBACK MODE Page 34... -
Page 35: Set Playback
14.2.2 SET PLAYBACK Page 35... -
Page 36: Vehicle Detection (Analog System)
14.3 VEHICLE DETECTION (Analog System) To use the Vehicle Detection Function on Analog Camera, Follow the procedure below. 1. Log-in to DVR admin account. See Figure 1. Figure 1. Login DVR admin account. 2. Select on Alarm menu as seen on Figure 2. Figure 2. - Page 37 4. Click the enable check box and select the Channel number to be set for Vehicle Detection function. Refer to Figure 4. Figure 4. Enable check box. Select Channel Number. 5. Click on the Period “Set” to set schedule for the specific day(s) and time to activate the alarm.
-
Page 38: Vehicle Detection (Ip System)
7. Set the Alarm output whether to send email, PTZ Activation (optional), Write log or Mobile Reported. See Figure 7. Figure 7. Set PTZ Activation, Send Email, Write Log, Mobile Reported PTZ Activation It enables the PTZ to work accordingly if alarm was triggered. - Page 39 5. Using the Device Manage Tool, click on the “IP Search” button to search for IP cameras. (See Figure 2) Figure 2. IP Search 6. IP Camera addresses will be displayed on the device list table. (See Figure 3) Figure 3. Display of IP Camera Addresses 7.
- Page 40 8. Set the IP address, Subnet Mask, and Gateway of the IP camera. Enter the “Current User Name” and the “Admin Password” and click “Modify” to apply the settings. (See also Figure 4) IP Address: 192.168.1.10 Subnet Mask: 255.255.255.0 Gateway: 192.168.1.1 (Note: By default, IP Address and Gateway must be on the same domain (192.168.1.x)) 9.
- Page 41 13. Click on “Alarm” Tab. Please see Figure 7. Alarm Vehicle Detection Prompt Figure 7. Alarm Tab. Vehicle Detection Check box. Prompt Check box 14. Under the Alarm Type, check the “Vehicle Detection” check box. See also Figure 7. 15. Unser Operation, check the “Prompt” check box. See also Figure 7. 16.
- Page 42 18. Select and click “Vehicle Detection” menu as seen on Figure 10 Figure 10. Click Vehicle Detection. Note: If the IP Camera's Vehicle Detection must be enabled (see step 14). If not enabled, “NoConfig” message will appear on the screen. See Figure 11. Figure 11.
- Page 43 20. Click the Period “Set” button to set the schedule. See Figure 13. Figure 13. Click on Period “Set” button. 21. Select and set the day and time for the preferred the Vehicle Detection to be activated and click “OK”. See Figure 14. Figure 14.
-
Page 44: Send Email (Optional)
PTZ Activation It enables the PTZ to work accordingly if alarm was triggered. If there are presets assigned to PTZ, it will perform the recorded preset as intended. Send Email It will send an email notification to recipient mail containing the date and time the event happened as notification. - Page 45 3. Go to Main Menu>Alarm>Vehicle Detection. Enable the “Send Email” checkbox. See Figure 18 Figure 18. Enable Send Email check box. 4. Two (2) email accounts are needed for Send Email Configuration. One email account will be used as Sender. The second email account will be used as Receiver. “Sender”...
- Page 46 Figure 20. “EMAIL” configuration screen. SMTP Server, “Sender” and, “Receiver” email address fields. 8. Input the SMTP Server. See Figure 20. a. If you have a Yahoo Sender email address, input smtp.yahoo.com. b. If you have a Gmail Sender email address, input smtp.gmail.com. 9.
- Page 47 13. If using Gmail SMTP server and Sender email account: a. Open the email account. b. Go to Account>Security>2 Step Verification>Generate APP password> allow less secure apps 14. If using Yahoo SMTP server and Sender email account: a. Open the email account. b.
-
Page 48: Ptz Control
15. PTZ Control 16. LAN ACCESS 17. CLOUD NETWORK ACCESS REGISTRATION AND OPERATION 17.1 IP Camera / NVR / DVR Account Creation via WEB Browser interface Page 48... -
Page 49: My Device
17.2 MY DEVICE Page 49... -
Page 50: Web Login User Interface
17.3 Web login User Interface (Login by user) 17.4 IP Camera / NVR / DVR Management and Administration Add Device. Click “Add” to add the serial number of device to be monitored. Page 50... -
Page 51: Mobile Application Administration
Note: A serial number is a unique number or string of characters that identifies a product. Scan Serial number QR code using Rover 1000 Series eMobile 2 to add the device in the app. 18.2 IP Camera / NVR / DVR Account Creation via mobile application software 18.2.1 CLOUD LOGIN... -
Page 52: Mobile Application Interface
18.2.2 LOCAL LOGIN 18.3 Mobile Application interface Page 52... - Page 53 18.4 USING THE APP 18.4.1 ADDING DEVICES 18.4.2 LIVE VIEW Page 53...
-
Page 54: Audio Over Coaxial Cable Configuration And Setup
19. AUDIO OVER COAXIAL CABLE CONFIGURATION AND SETUP Audio over Coaxial Cable is a technology for camera with built in microphone that transmits and records both Audio and Video with RG59 or RG6 coaxial cable only. Traditional audio cable for audio signal is not required. 1. - Page 55 4. On the XVI settings, Click on XVI Audio Set. See Figure 4. Figure 4. Click on XVI Audio Set. 5. On XVI Audio Mode, select Coaxial Acquisition and click OK button. See Figure 5. Figure 5. Select Audio port acquisition. Click OK button. 6.
-
Page 56: Device Manage Tool Installation
1. On your desktop or laptop, open a browser and enter the URL address https://www.roversystems.com.ph/. 2. On the Rover Systems website home page, click the “Menu Navigator” at the top left side, as illustrated below. 3. Go to Library>Utility Tools. See below illustration. - Page 57 4. Search for the file: General_DeviceManage_R150813.T_062322 and click on the “Download File”. 5. After downloading, double click on the extracted file. A prompt will appear on your screen as shown below. Click on “More Info”. Page 57...
- Page 58 6. After clicking More info, another prompt will appear. Click on “Run anyway” button. 7. DeviceManage Setup page will be displayed as shown below. Select on “English” and click on “Next” button. Page 58...
- Page 59 8. “Installation Folder” will be displayed with the default directory. Click on the “Next” button. 9. Create a Shortcut Folder (Default: DeviceManage). Then click on “Next” button. Page 59...
- Page 60 10. Continue the installation by clicking on “Next” button until the installation is finished. A DeviceManage shortcut icon is created on the Desktop. 11. Double click on the DeviceManage icon to open the program. DeviceManage tool will be displayed as shown. Page 60...
- Page 61 Page 61...
Need help?
Do you have a question about the 1000 Series and is the answer not in the manual?
Questions and answers
How do I change wifi connection in ROver 1000 Home eMobile?
To change the Wi-Fi connection in Rover 1000 Home eMobile, ensure the router and IP camera are connected to the same network via Wi-Fi. If using a bundled Wi-Fi NVR and camera kit, follow these steps:
1. Log in to the NVR as the admin.
2. Go to the Main Menu and select "IP Channel."
3. Wait for the NVR to detect available wireless cameras.
4. Click on “Repeat Set” to configure a camera as a wireless extender and connect it to the NVR.
This allows adjustment of wireless camera connections within the same network.
This answer is automatically generated
Where to find the package card number of my cctv