
Related Manuals for PREMIER TECH PT-F210


Summary of Contents for PREMIER TECH PT-F210
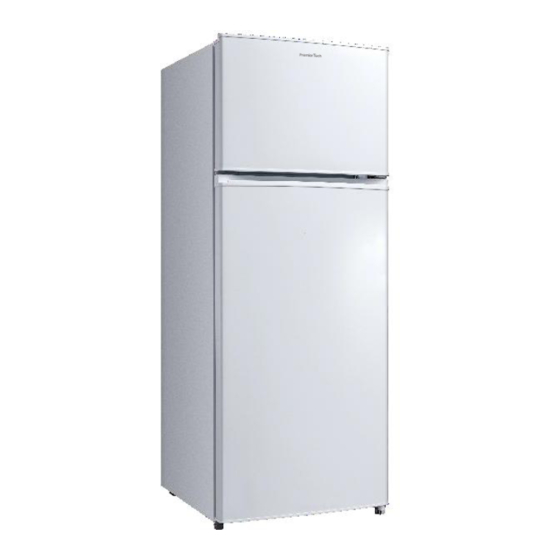
- Page 1 PT-F210 PT-F210S FRIGORIFERO DOPPIA PORTA Manuale di istruzioni DADO Srl – Italy Piva/Vat IT 02681390809...
-
Page 2: Table Of Contents
SOMMARIO AVVERTENZE DI SICUREZZA ....................1 INSTALLAZIONE ......................... 4 Location ........................4 Inversione della porta(optional) ................4 Spazio necessario per l’apertura della porta ............. 8 Livellamento del frigorifero ..................9 Pulizia prima dell’uso ....................9 Prima di utilizzare l’unità .................... 9 Accessori interni ...................... -
Page 3: Avvertenze Di Sicurezza
1. AVVERTENZE DI SICUREZZA Avvertenza: rischio di incendio / materiali infiammabili Questo apparecchio può essere utilizzato da bambini dagli 8 anni in su e da persone con capacità fisiche, sensoriali o mentali ridotte o la mancanza di esperienza e conoscenza se non siano controllati o istruiti all'uso dell'apparecchio in modo sicuro e comprendendone i rischi. - Page 4 ATTENZIONE: Non danneggiare il circuito refrigerante. AVVISO: Non utilizzare apparecchi elettrici all'interno degli scomparti per la conservazione degli alimenti, a meno che non siano del tipo consigliato dal produttore. utilizzare l'apparecchio in ambienti polverosi o in atmosfera esplosiva e infiammabile (gas infiammabili, vapori, vapori di solventi organici, ecc) conservare sostanze esplosive, come bombolette spray con un propellente infiammabile in questo apparecchio.
- Page 5 prega di fare riferimento alla sezione di risoluzione problemi quando l'unità si trova ad affrontare alcuni malfunzionamenti. Non tentare di risolvere il problema da soli, si prega di fare riferimento al solo tecnico certificato. quanto riguarda le informazioni per l'installazione, il funzionamento, la manutenzione e lo smaltimento del dispositivo, fare riferimento alle seguenti parti del manuale.
-
Page 6: Installazione
2. INSTALLAZIONE 2.1 Location Quando si seleziona una posizione per l'unità, è necessario assicurarsi che il pavimento sia piano e solido e che la stanza sia ben ventilata. Evitare di posizionare l'unità vicino a una fonte di calore, ad es. cucina, caldaia o termosifone. Evitare anche la luce solare diretta in quanto potrebbe aumentare il consumo elettrico. - Page 7 2) Rimuovere le viti fissate alla cerniera superiore con un cacciavite a croce. 3) Trasferire le parti appena smontate nell’alloggiamento sull’altro lato della porta. Rimuovere il bullone con la chiave adatta. Rimuovere la rondella, quindi rimuovere gli assi dall'altro lato e fissarli. Rimuovere il blocco posto in corrispondenza dell’alloggiamento della porta.
- Page 8 5) Invertire il blocco limite sulla parte inferior della porta. 6) Riposizionare la cerniera inferiore sull'altro lato, quindi fissarla con le viti 7) Invertire la cerniera centrale. 8) Eseguire lo stesso procedimento per entrambe le porte.
- Page 9 9) Invertire la cerniera superiore. 10) Dopo aver impostato la posizione corretta della porta superiore, fissare la cerniera superiore e il coperchio. 11) Installare i quattro tappi delle viti e i due fermi nella posizione corrispondente. · Assicurarsi che il frigo sia scollegato e vuoto. ·...
-
Page 10: Spazio Necessario Per L'apertura Della Porta
Illuminazione della maniglia della porta (opzionale) Nota: le figure nel manuale dell'utente sono solo per riferimento. Il prodotto reale potrebbe differire leggermente. Il frigorifero deve essere scollegato dalla fonte di alimentazione elettrica prima di tentare l'installazione dell'accessorio. Step 1: Estrarre i fermi dalla porta (lato della porta aperto) Step 2: Installare la maniglia della porta e fissarla con le viti Step 3: Coprire le viti della maniglia con gli appositi tappi * Le immagini sono solo per riferimento. -
Page 11: Livellamento Del Frigorifero
2.4 Livellamento del frigorifero Per fare ciò, regolare i due piedini di livellamento nella parte inferiore dell'unità. Se l'unità non è in piano, la porta non si chiuderà correttamente. Assicurarsi che entrambi i piedini tocchino il terreno prima dell'uso. Regolare I piedini ruotandoli in senso orario e antiorario. 2.5 Pulizia prima dell’uso Pulire l'interno dell'unità... -
Page 12: Panoramica Prodotto
Al fine di sfruttare al massimo il volume dell’unità, l'utente può rimuovere uno o più ripiani oppure i cassetti in base alle proprie esigenze. 3. PANORAMICA PRODOTTO * Le immagini sono solo per riferimento. La configurazione effettiva dipenderà dal prodotto fisico o dalla dichiarazione del distributore... -
Page 13: Operation
4. OPERATION 4.1 Accensione dell'unità Impostazione “Off”: Unità spenta Impostazione di “Min” :Minore temperatura di raffreddamento Impostazione di “Med”o“MID” :Funzionamento normale (adeguato per la maggior parte delle situazioni) Impostazione “Max” :Temperatura più fredda ◆A temperature ambiente elevate, ad es. nelle calde giornate estive, potrebbe essere necessario impostare il termostato sull'impostazione più... -
Page 14: Pulizia
5. PULIZIA 5.1 Scongelamento NOTA: Questa unità non ha un Sistema di scongelamento automatico. 5.2 Pulire l’interno e l’esterno del frigorifero Le polveri dietro il frigorifero e sul terreno devono essere pulite periodicamente per migliorare l'effetto di raffreddamento e il risparmio energetico. ... -
Page 15: Manutenzione
6. MANUTENZIONE 6.1 Sostituzione della luce interna Consigliamo di avvalersi dell’aiuto di un professionista 6.2 Spostamento dell’unità Assicurarsi di chiudere bene le porte prima dello spostamento dell’unità. E’ consigliabile sollevarlo da terra durante lo spostamento. 6.3 Manutenzione L'unità deve essere riparata da un tecnico autorizzato e devono essere utilizzati solo ricambi originali. -
Page 16: Suggerimenti
può essere chiusa Troppo cibo; regolarmente Inclinazione del frigorifero non adeguata. Controllare se il frigorifero è Alta rumorosità equilibrato; Se le parti del frigorifero sono posizionate correttamente. 7.1 Suggerimenti ◆ L'involucro del frigorifero può emettere calore durante il funzionamento specialmente in estate, ciò... -
Page 17: Smaltimento
9. SMALTIMENTO Un metodo di smaltimento ecologico garantirà il recupero e il riutilizzo di materie prime preziose. Il refrigerante utilizzato nell'unità e i materiali isolanti richiedono procedure di smaltimento speciali. Accertarsi che nessuno dei tubi sul retro dell'unità sia danneggiato prima dello smaltimento. Informazioni aggiornate relative alle opzioni di smaltimento della vecchia unità... - Page 18 GARANZIA Ogni prodotto PremierTech venduto ad un acquirente "consumatore" è assistito dalla garanzia sui beni di consumo, che copre i difetti di conformità che si manifestano entro 24 mesi dalla data di consegna del bene (12 mesi se acquirente commerciale). Salvo prova contraria, si presume che i difetti di conformità che si manifestano entro i primi 6 mesi dalla data di consegna del bene esistessero già...
- Page 19 PT-F210 PT-F210S Refrigerator-Freezer USER INSTRUCTION DADO Srl – Italy Piva/Vat IT 02681390809...
- Page 20 Contents SAFETY WARNINGS ......................1 INSTALLTION ........................3 Location ........................3 Reversing the Door Swing(optionnal) ..............3 Door Handle Install Illumination (optional) ............... 7 Door Space Requirements ..................8 Levelling the Unit ....................... 8 Cleaning Before Use ....................8 Before Using Your Unit ....................8 Interior Accessories ....................
-
Page 21: Safety Warnings
1. SAFETY WARNINGS Warning : risk of fire / flammable materials This appliance is intended to be used in household and similar applications such as staff kitchen areas in shops, offices and other working environments; farm houses and by clients in hotels, motels and other residential type environments;... - Page 22 refrigerator must be disconnected from the source of electrical supply before attempting the installation of accessory. Refrigerant and cyclopentane foaming material used for the refrigerator are flammable. Therefore, when the refrigerator is scrapped it shall be kept away from any fire source and be recovered by a special recovering company with corresponding qualification other than be disposed by combustion, so as to prevent damage to the environment or any other harm.
-
Page 23: Installtion
2. INSTALLTION 2.1 Location When selecting a position for your unit you should make sure the floor is flat and firm, and the room is well ventilated. Avoid locating your unit near a heat source, e.g. cooker, boiler or radiator. Also avoid direct sunlight as it may increase the electrical consumption. - Page 24 2) Remove the screws fixed the top-hinge with cross-slot screwdriver. 3) Replace the top-hinge and the top-door limit block and the door bearing bush to the other side. Remove the nut with sleeve.Take off the washer then remove the axes to the other side and fixed.
- Page 25 4) Disassemble the screws fixed the bottom-hinge with cross-slot screwdriver . Note:the refrigerator-freezer incline angle less 45°. 5) Replace the bottom door bearing bush and the limit block. 6) Replace the bottom hinge to the other side then fix it with screws...
- Page 26 7) Replace the mid-hinge. 8) Set the bottom door right position,fix the mid-hinge. 9) Replace the top-hinge. 10) Set the top door right position,fix the top-hinge and the cover.
-
Page 27: Door Handle Install Illumination (Optional)
11) Install the four screw caps and two catches to corresponding position. ·Ensure the Appliance is unplugged and empty. ·Adjust the two leveling feet to their highest position. ·We recommend you have someone to assist you. 12) replace the leveler to the other side and adjust it to make sure the cabinet level. *The picture above is only for reference. -
Page 28: Door Space Requirements
Step 3: Cover screw caps of the handle into screw holes *The picture above is only for reference. The actual configuration will depend on the physical product or statement by the distributor Door Space Requirements The unit's door must be able to open fully as shown. W×D≥902×1052mm Levelling the Unit... -
Page 29: Interior Accessories
of blood, drugs or biological products. Do not place items such as bottled or sealed container of fluid such as bottled beers and beverages in the freezer to prevent bursts and other losses. Before placing any food in your unit, turn it on and wait for 24 hours, to make sure it is working properly and to allow it time to fall to the correct temperature. -
Page 30: Product Overview
3. PRODUCT OVERVIEW *The picture above is only for reference. The actual configuration will depend on the physical product or statement by the distributor 4. OPERATION 4.1 Switching On Your Unit Setting“Off” :UnitOff Setting“Min” :Less Cool Temperature Setting“Med” or “MID” :Normal Operation(adequate for most situations) Setting“Max”... -
Page 31: Noise Inside The Unit
control knob is set to OFF, the refrigerator will not be running. 4.2 Noise Inside the Unit! You may notice that your unit makes some unusual noises. Most of these are perfectly normal, but you should be aware of them! These noises are caused by the circulation of the refrigerant liquid in the cooling system. -
Page 32: Cleaning Tips
interior of the refrigerator or contaminated food. Clean the bottle frame, shelves and drawers with a soft cloth dampened with soapy water or diluted detergent. Dry with a soft cloth or dry naturally. Wipe the outer surface of the refrigerator with a soft cloth dampened with soapy water, detergent, etc., and then wipe dry. -
Page 33: Trouble Shooting
7. Trouble shooting The following simple issues can be handled by the user. Please call the after-sale service department if the issues are not settled. Whether the freezer is plugged and connected to power; Inoperation Low voltage; Failure power or tripping circuit Odorous foods should closely wrapped;... -
Page 34: Disposal
◆ The appliance should be located in the coolest area of the room, away from heat producing appliances or heating ducts, and out of the direct sunlight. ◆ Let hot foods cool to room temperature before placing in the appliance. Overloading the appliance forces the compressor to run longer. - Page 35 WARRANTY Every PremierTech product sold to a "consumer" buyer is backed by a guarantee on consumer goods, which provides a guarantee of conformity within 24 months from the date of delivery of the goods (12 months if commercial buyer). Unless there is evidence to the contrary, it is assumed that the lack of conformity that occurs within the first 6 months from the delivery date of the goods already existed for a given data, a less than hypothesis is incompatible with the nature of the asset or with the nature of the defect Compliance.
Need help?
Do you have a question about the PT-F210 and is the answer not in the manual?
Questions and answers