Advertisement
Quick Links
Advertisement

Summary of Contents for QULOMVS HKOFOC008
- Page 1 Assembly Instructions HKOFOC008...
-
Page 2: Care And Use
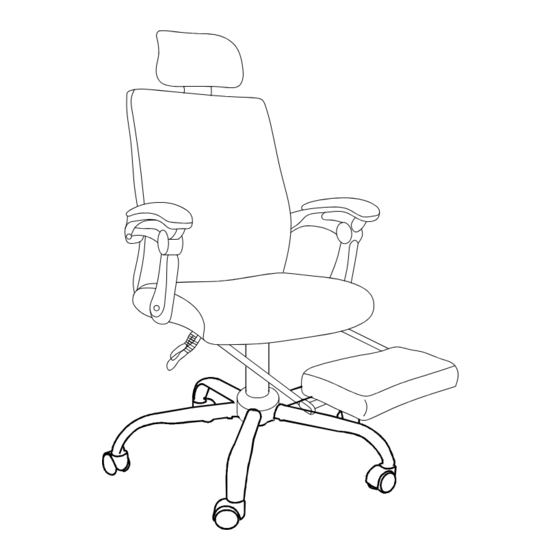
Assembly Instructions HKOFOC008 ASSEMBLY REQUIREMENT 1 PERSON ASSEMBLY | 30 MINUTES ASSEMBLY TIME (APPROXIMATE) TOOLS REQUIRED: ALLEN WRENCHES (PROVIDED) ASSEMBLY REQUIREMENT 1. Remove all packaging materials, staples and packing straps from the carton. 2. Refer to Parts Checklist and ensure they are complete before you start assembling. -
Page 3: Return Policy
1 YEAR on compoment parts including Control Mechanisms, gas cylinder, wood, plastic parts, base and casters. 1 YEAR on Upholstery mesh and foam against wear and deterioration. To make a warranty claim, please contact Qulomvs, provide model number, proof of purchase and description of the problem. At it’s option Qulomvs will: a) Supply compatible components of current manufacture. - Page 4 8x35 6x25 8x20 8x25 K1x7 K2x4 6x18 6x18 Sx10 S*10 Step 1:Insert Base Legs[ H ] one by one to the Base Center[ G ]. Next, screw ten Screw[ S ] into the holes with the Allen Wrench[ Q ]to attach the base and the legs. Page 3...
- Page 5 Step 2:Insert the casters [ I ] into the five star base. This may take significant force. Gentl squeeze the base cover and place around the center of the 5 star base. Insert the gas lift into the center of the base. Step 3:Align the Mechanism [ E ] over the pre-drilled holes underneath the Seat Cushion [ B ], make sure the front of the mechanism is facing the front of the Seat.
- Page 6 The backrest needs to be inserted into the tray, not attached to the outside when installed. Step 4:Attach the Backrest [ A ] to the Seat Cushion with Washers [ K1 ] and Screws [ N ]. P J K1 P L K1 Step 5:Attach the Armrest [ D ] to the Seat Cushion [ B ] and Backrest [ A ] with washers [ K1 ],[ K2 ], Screws [ J ],[ L ] and Cover [ P ].
- Page 7 Step 6:Attach the Headrest [ C ] to the Backrest with Screws [ M ] and Cover [P ]. Step 7:Insert the Seat Base into the tilt mechanism. Page 6...
- Page 8 Step 8:Enjoy your Office Chair! Page 7...
- Page 9 Missing something? CONTACT INFO: qulomvs_service@outlook.com Page 8...
Need help?
Do you have a question about the HKOFOC008 and is the answer not in the manual?
Questions and answers