
Summary of Contents for Automation Systems AUSTRALIA TiTAN 2410
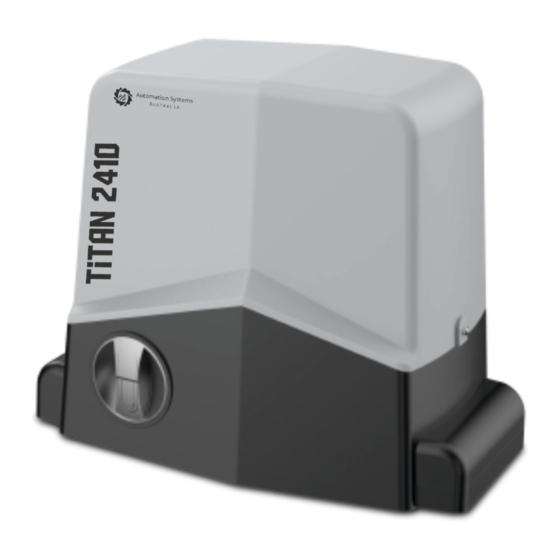
- Page 1 Automation Systems Australia Titan 2410 Advanced Digital Sliding Gate System Step by Step Simple Installation Guide on Page 2 REV 0...
-
Page 2: Table Of Contents
Table of Contents Specifications, Dimension and Tools Required Step By Step Installation Guide Installation Layout/Wiring Layout Motor Installation Motor Installation Continued Controller Layout and Display Screen Status CERO Standalone Solar System Connection Battery Backup Connection, Power Transformer Connection SPEED, TIME and SENS Trim pot Adjustments, System Menu Hierarchy Basic Menu (operating logic) Basic Menu continued ( wireless learning, automatic closing time, working time learning, fast speed level and Motor Test) - Page 3 Typical Tools Required Wire Stripper Socket & Spanner Multi Meter Drill and Drill Bits 2/2.5mm Flat Head for Sets (not essential) Masonry and Metal Terminal Connections Specifications Operating Voltage 24V AC/24V DC Standby Consumption ~40mA Battery Backup Speed 22-36 CM/S 1000 Kg 1000 Kg Motor Limit...
-
Page 4: Step By Step Installation Guide
Step by Step Installation Guide Install gate motor, rack and limit strikers Electric System Path Connect in WIRED accesories Solar System Path See accessories pages or there specific manuals Turn on the Power Point Connect Solar System PAGE. 7 Connect Battery Backup (if Turn ON the load output on the solar applicable) regulator... -
Page 5: Installation Layout/Wiring Layout
Installation Layout Optional Wireless DEX 4 Optional Wireless Dukie+ FENCE FENCE POST POST GATE Optional Wireless DEX 4 Optional Wireless Dukie+ Additional Safety Sensor M/N is optional Number Accesory Requirments Gate Motor Power by transformer or Solar Entry Keypad Dex 4 (wireless), All others wired to gate controller by 4 core cable Exit Keypad Dex 4 (wireless), All others wired to gate controller by 4 core cable Gate Stop... -
Page 6: Motor Installation
Motor Installation Step 1 Identify the OPENING direction of your gate based on the illustrations below. Gate opens to the LEFT or RIGHT is always made from the inside looking towards the street (outside). LEFT RIGHT HAND SIDE HAND SIDE Outside Outside OPENING... - Page 7 Step 5 Manually Release the gate motor and set the gate 250mm from the open position . Sit a piece of gear rack on top of the motors pinion gear and level it according to the gates current level (adjustable later), allow for a 2-3mm clearance (backlash) between the top of the pinion tooth and the base of the gear rack.
- Page 8 Controller Layout 25. Digital Display 29. Slow Speed Adjustment (SPEED) 26. UP Button 30. Obstacle Detect Adjustment (SENS) 31. Slow Speed Travel Time (TIME) 27. MODE/OK Button 28. DOWN Button 8.8. 15. Negative for Constant Accessories Output MODE DOWN 14. Constant 12V Accessories Output (Regulated) 13.
-
Page 9: Cero Standalone Solar System Connection
CERO Standalone Solar System Connection A standalone solar system is a totally off grid solution used for green energy initiatives or simply when its not possible to run power to the gate system. To conserve power constant power draw devices such as wired keypads are not to be used, the alternative is a wireless keypad as they use there own batteries. - Page 10 Battery Backup Connection The battery backup will allow for uninterrupted usage in case of a power disruption. The battery backup system can operate the gate for a period of 24 to 36 hours during the power disruption. Once the power is restored the system will automatically recharge the battery system ready for the next use.
- Page 11 “SPEED” Slow Speed/De-acceleration Adjustment The “SPEED” Trim pot is the slow speed trimmer allowing a fine tuning of the SLOW Speed portion of the operating cycle, Typically adjustment range is 20% to 50% from the slowest speed (minimum) depending on gate size, weight and inertia. Slowest Speed Fastest Speed SPEED...
-
Page 12: Basic Menu (Operating Logic)
Basic Menu Setting the system Operating Logic (Default Standard) Standard Operates OPEN/CLOSE by remote and/or wired-wireless accessories Standard WITH Automatic Closing Timer Adjust the Automatic Closing Timer in SP menu Operates OPEN remote and/or Wireless Accessories with an automatic closing timer (can still be closed earlier by remote and/or wired-wireless accessories) Timer can be cancelled using the STOP feature Typical Complex... - Page 13 Basic Menu continued Remote and Wireless Keypad Learning/Deleting Detailed Page 15 & 17, C1 Command C2 Command Driveway Light Command Learning STOP Command Learning Delete WITH the wireless component present Delete by memory position Delete the entire memory (format) Automatic Closing Time (Default 10 seconds) Only valid when using an OPERATION LOGIC oL that uses automatic closing 01= Immediate Close...
-
Page 14: Core Menu (Manual Time Adjustments, Gate Direction, Photocell, Stop, Limit Switch Polarity)
Core Menu Manual Adjustment of Working Time Menu (fine tuning of times) Full Operation Working Time of Motor Pedestrian Working Time Courtesy Light Time (In multipliers of 10, eg. 01=10 Seconds, 60=600 Seconds) Gate Direction (Default Right Hand Opening) Right Hand Opening Left Hand Opening Photocell Input Sets the controller to accept NORMALLY CLOSED photocell... -
Page 15: Core Menu Continued
Core Menu continued Special Detector Input (Default dt) Photostop Mode (Normally Closed Circuit) Similar to a typical photocell input but also incorporates the opening cycle. 1. During opening it will pause gate till clear 2. During auto close it will restart the timer 3. - Page 16 Core Menu continued Light Output Mode Flashing illumination ON/OFF during the cycle Static illumination during the cycle Auxiliary Light System Mode Driveway light output, set in working time (operates by individual remote button and also gate operation button), (Green and Common terminals) Strobe light output, is on in all statuses except closed (Green and Common terminals) Traffic Light Mode Green and Common terminals when gate is in the open position...
-
Page 17: Remote Learning (Detailed)
Remote Learning C1 Command Learning From the standby Cycle to Lc and Cycle to c 1 –- screen press the SET press SET button once Remote Operating Logic Channels c 1 c2 Press the button you wish to use on the remote The display will also show you the enrolled position Residential it has been stored in the memory, this can be... - Page 18 Delete by remote button From the standby screen –- press the MODE button once Press the button on the Cycle to rt Cycle to Lc and press remote you wish to MODE delete Automation Systems Australia Delete by enrollment number From the standby screen –- press the MODE button...
- Page 19 Identify the enrollment Number From the standby Screen press each button on the remote INDIVIDUALLY, the number displayed on the screen upon each button press is the enrollment number, one remote MAY have multiple enrollment numbers based on the paired features Button is enrolled as Button is enrolled as No Response, Not...
-
Page 20: Motor Test
Motor Test Mode The purpose of motor testing is to identify the correct operating procedure before the time travel calibration. The information that can be gained from the motor test is if the motors are wired: a) Correct polarity meaning they operate in the correct direction according to the control board. b)The limit switches have been correctly set for the OPEN and CLOSED position. -
Page 21: Learn Time Calibration/Gate Calibration
Learn Time Calibration The automatic learning procedure will teach the gate controller the operational times for the gate motors travel, this will allow for the correct calibration and introduce a slowdown at the appropriate position along with the relevant protection cut off time. Please ensure that the system is set to the appropriate direction before proceeding (page 12). - Page 22 DUKIE and DUKIE+ Photocells SEE NEXT PAGE ON SPECIAL DETECTOR AND PHOTOSTOP Typical Photocell Arangment Photocells are a necessity when automating, they provide an additional layer of safety by infrared beam across the driveway. The photocell terminal is used as the primary photocell connection which will revert the gate back to open when an obstacle is detected during close. If an obstacle is present before a close command then it will prevent closure til the obstacle is clear.
- Page 23 DUKIE and DUKIE+ Photocells continued Special Detector Mode / Photostop SEE PREVIOUS PAGE ON TYPICAL PHOTOCELL CONNECTION An additional set of photocells installed just past the gates open position. Ideal for scenarios requiring a command to close after the vehicle has passed through and used to signal the system that the gate has been used and is ready to close.
- Page 24 Traffic Light Control A traffic light can integrate directly into the system to alert the traffic when it is safe to pass through the gateway. When the gate has reached the open position, the green terminal will activate allowing for the green on the traffic light to illuminate. When OPENING, CLOSING or CLOSED the red terminal will activate allowing for the red on the traffic light to illuminate.
- Page 25 Tekno Wi-Fi APP Switch The Tekno Wi-Fi App Switch integrates into the system allowing for operation by APP anywhere in the world, the Tekno module requires good 2.4GHZ connection to the Wi-Fi of the premises. SP/E0 Using Logic Mode “Standard” or “Standard with Automatic Closing Timer”...
- Page 26 Tekno 4 GSM Intercom The Tekno 4 GSM intercom allows totally wireless TWO WAY communication to any user, anywhere in the world using the mobile network. It allows for the automatic gate operation by pressing * during a call or by sending an SMS command at any time. Automation Systems SP/E0 Australia...
- Page 27 Emergency Stop Button An emergency stop button is used typically if the system is in a manned operation such as a security office or gate house OR such applications where an internal door is automated. Sets the controller to Eo accept SP/E0 Stop Button PT/EC...
- Page 28 Remote Enrollment number Users Name/Employee ID Feature Page 26...
-
Page 29: Warranty Terms
The warranty will not cover freight fees to base, customs fees or any labour costs at the installation site but will cover repair or replacement of the product as seen fit. Automation Systems Australia will cover the freight of the returned item to the original address if deemed as a warranty repair or replacement item.
Need help?
Do you have a question about the TiTAN 2410 and is the answer not in the manual?
Questions and answers
Hi I have just fitted a 2410 solar sliding gate opener to my gate When I open it it’s fine then a 10 second counter comes up and it closes How do I stop this count down. Please
To stop the 10-second countdown on the TiTAN 2410 solar sliding gate opener, you need to interrupt the closing process. This can be done using the SF Detector Mode. If a detector is triggered during the countdown or while closing, the gate will reopen and then wait two seconds before attempting to close again. Disconnecting or triggering the sensor can stop the countdown temporarily.
This answer is automatically generated