Table of Contents
Advertisement
Advertisement
Table of Contents

Related Manuals for viceroy WRECOIND60

Summary of Contents for viceroy WRECOIND60
- Page 1 WRECOIND60 PLUG & PLAY User Manual WRECOIND60 PLUG & PLAY User Manual...
-
Page 2: Table Of Contents
| What's required for installation | What's in the box | Installation | Connectivity To connect your appliance with another appliance with RF technology please refer to Viceroy Hood Manual. | Use | Functions & Settings | Care & Maintenance | Service & Spares... -
Page 3: Before You Start
Safety | Before you start | Safety These instructions are for your safety. Please If the surface of the hob is read them thoroughly prior to installation cracked, switch off the appliance and retain them for future reference. to avoid the possibility of electric WARNING: All installation shock. - Page 4 Safety | Safety (continued) • CAUTION: The cooking process has to be supervised. A short term cooking process has to be supervised continuously. Use only hob guards designed • After use, switch off the hob element by its by the manufacturer of the control and do not rely on the pan detector.
-
Page 5: Electrical Installation
IMPORTANT This hob can be plugged directly into a mains power out plug supplied. Safety Plugged Version (Factory Supplied - Maximum Input 28 | Electrical installation Factory Fitted Power Plug Connection This hob can be plugged directly into a mains power outlet using the 3 pin (UK) plug supplied. - Page 6 2. Remove the factory fitted cable and replace it with the correct grade for the permanent installation as per the connection diagram below. Power cable can be purchased separately at viceroy.co.uk 1. Remove the screw and terminal cover. N (Blue/Grey) L (Brown/Black)
- Page 7 Safety Software Configuration 1. Turn on the hob using the ON/OFF key. The hob will show on each cooking zone. 2. Touch the front left zone key and the Timer key together for three seconds. The hob will beep and show '5' in the timer display. 3.
-
Page 8: Technical Data
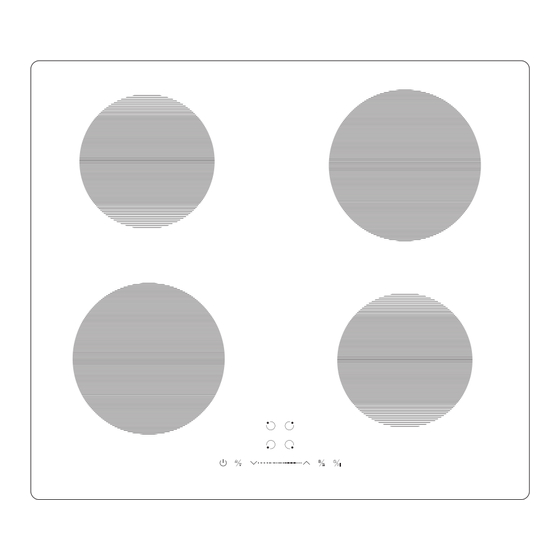
Safety | Technical data Model identification WRECOIND60 Cooking zones 4 Zones Supply voltage 220-240V Installed electric power 6400W (Preset 2800W) Product size L x W x H (mm) 590 x 520 x 60 Built-in dimensions A x B (mm) 565 x 495 Weight and dimensions are approximate. -
Page 9: Troubleshooting
Safety | Troubleshooting IMPORTANT: The connectivity operation above must be completed within two minutes of turning on the power to the cooker hood. If this is not successful, switch off both the hood and the hob, wait for one minute and attempt the connectivity again. If an abnormality occurs , the induction hob will enter the protective state automatically and display corresponding protective codes: Error code... -
Page 10: Guarantee
• BS EN 62233: 2008 • EN 60350-2:2013+A11 • Product: ECO Plug & Play Induction Hob • BS EN 55014-1:2017+A11:2020 • Model: WRECOIND60 • BS EN 55014-2:2015 • BS EN IEC 61000-3-2:2019+A1:2021 EU: The object of the declaration described above is in conformity with the relevant •... - Page 11 Guarantee | Recycling & disposal DISPOSAL: Do not dispose this product as unsorted municipal waste. Collection of such waste separately for special treatment is necessary. This appliance is labelled in compliance with European directive 2011/65/EU for Waste Electrical and Electronic Equipment (WEEE). By ensuring that this appliance is disposed of correctly, you will help prevent any possible damage to the environment and to human...
-
Page 12: What's Required For Installation
Installation | What's required for installation | What's in the box [01] x 1 [02] x 1... -
Page 13: Installation
Installation | Cut out work surface L (mm) W (mm) H (mm) D (mm) A (mm) B (mm) X (mm) 50 min Note: Where a cooker hood is Cut out the work surface according to the sizes shown in the drawing. NOT installed the safety distance between the hotplate and the For the purpose of installation and use,... - Page 14 Installation | Before you install the hob Before locating the fixing brackets the • A suitable isolating switch providing full hob should be placed on a stable, smooth disconnection from the mains power surface (use the packaging). Do not apply supply is incorporated in the permanent force onto the controls protruding from wiring, mounted and positioned to comply...
- Page 15 Installation | Seal the work surface & hob IMPORTANT: Ensure that the product is fully cured as per the manufacturers instructions before you commence installation of the hob. The hob MUST NOT be sealed into the worktop. Cut out worktop to supplied dimensions shown in DIAGRAM 01 with suitable equipment.
-
Page 16: Use
| Induction Cooking Before using your Induction Hob • Read this guide, taking special note of the Safety section. • Remove any protective film that may still be on your Induction hob. Induction cooking is a safe, advanced, efficient, and economical cooking technology. It works by electromagnetic vibrations generating heat directly in the pan, rather than indirectly through heating the glass surface. - Page 17 | Choosing the right cookware Only use cookware with a base suitable for induction cooking. Look for the induction symbol on the packaging or on the bottom of the pan. • You can check whether your cookware is suitable by carrying out a magnet test.
-
Page 18: Functions & Settings
| Before you start People with a heart pacemaker should consult with their doctor before WARNING: Read the instructions using any induction hob. before using the appliance. Switch on the appliance at the plug socket or double pole isolation switch. The appliance is ready for use. - Page 19 General Use Child Lock Function • You can lock the controls to prevent Boost Control/Keep Warm Functions unintended use (for example children accidentally turning the cooking Activate Boost Control zones on). • Select the heating zone you wish to • When the controls are locked, all the use by touching the relevant Zone controls except the OFF control are Select Key.
- Page 20 General Use Timer/Pause Functions 5. Buzzer will beep for 30 seconds and the timer indicator will turn off when the set You can use the timer in two different time has expired. ways: Setting the timer to turn one or more •...
- Page 21 General Use Over-Temperature Protection An internal temperature sensor will monitor the temperature inside the induction hob. When an excessive temperature is detected, the induction hob will stop operation automatically. Detection of Small Articles When an unsuitable size or non-magnetic pan (e.g.
- Page 22 | Using your Induction Hob If the display flashes alternately – with the heat setting This means that: • You have not placed a pan on the correct cooking zone, the pan you’re using is not suitable for induction cooking, To start cooking the pan is too small or not properly centred 1.
-
Page 23: Care & Maintenance
Care & Maintenance | Looking after your appliance IMPORTANT: Always switch off the electricity supply before performing any maintenance work. The appliance should be cleaned after use, allow to cool first! Type of dirt Cleaning method Cleaning materials Apply white vinegar to the surface, Limescale Special induction hob cleaner then wipe it dry with soft cloth. -
Page 24: Service & Spares
Service & Spares | After sales & service support For after sales, service enquiries & spares support Please contact: 0333 247 1128 Monday to Friday: 9am-5pm Saturday: 9am-1pm Email enquiries: wrenservice@apelson.co.uk Dedicated spares online at: viceroy.co.uk VICEROY WRECOIND60 V14 SEPT 2022...
Need help?
Do you have a question about the WRECOIND60 and is the answer not in the manual?
Questions and answers