Advertisement
Quick Links
<<Before assembling, read all the instructions>>
2
5
A
B
C
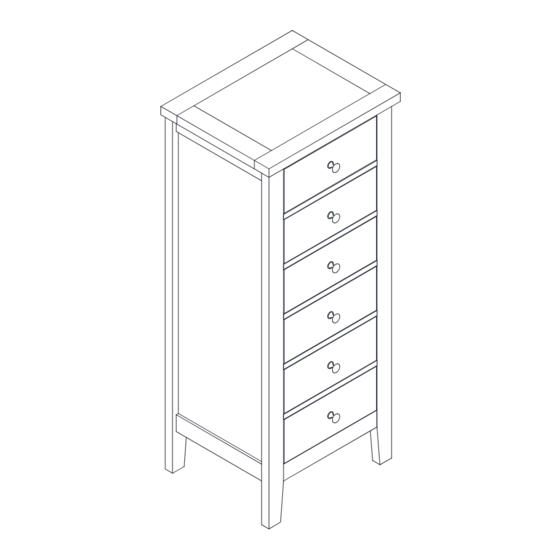
Leines Tall Bedside Cabinet 6 Drawer
D
E
F
G
1
ASSEMBLY INSTRUCTIONS
7
13
6
6
6
6
6
6
4
4
5
6x30mm
6x35mm
15x12mm
15x9.5mm
3x12mm
4x30mm
1
3
2
H
28pcs
I
50pcs
J
26pcs
K
24pcs
L
72pcs
M
24pcs
12pcs
ID23942
1
7
11
9
13
12
10
8
6
x6
4
5
6pcs
4x16mm
A
6pcs
6x30mm
B
15pcs
2.5x10mm
6x35mm
C
2pcs
15x12mm
4x25mm
D
2pcs
15x9.5mm
6x20mm
E
1set
3x12mm
4x12mm
F
4x30mm
G
3
6
6
6
6
6
4
5
H
28pcs
I
50pcs
J
26pcs
K
24pcs
L
72pcs
M
24pcs
2
12pcs
1
Advertisement

Related Manuals for NOA & NANI ID23942


Summary of Contents for NOA & NANI ID23942
- Page 1 50pcs 6pcs 28pcs 6x35mm 6x30mm 26pcs 15pcs 50pcs 15x12mm 2.5x10mm 6x35mm Leines Tall Bedside Cabinet 6 Drawer 24pcs 2pcs 26pcs 15x9.5mm 15x12mm 4x25mm 72pcs 2pcs 24pcs 3x12mm 15x9.5mm 6x20mm 24pcs 1set 72pcs 4x30mm 3x12mm 4x12mm 24pcs 12pcs 4x30mm ID23942 12pcs...
- Page 2 Tools Required Tools Required CAUTION: Do not use tools other than those required , as th can damage your new item CAUTION: D can damage NOTE Please check you have all hardware before assemblin g. If y ou are missing an y hardware , p lease contact the store of purchase. Please check you have Please ensure you have the name of the item , required hardware part a If y ou are missing an y h...
- Page 3 Tools Required CAUTION: Do not use tools other than those required, as this can damage your new item not use tools other than those required , as this NOTE our new item • Please check you have all hardware before assembling. •...
- Page 4 8 x6 8 x6 5 x2 5 x2 (B)x46pcs (CL) (E)x36pcs )x12pcs...
- Page 5 Cam Lock Fastening System 90° (A)x14pcs (C)x12pcs (A)x10pcs (C)x10pcs...
- Page 6 (A)x4pcs (A)x4pcs (A)x4pcs (B)x4pcs (B)x4pcs (B)x4pcs (C)x4pcs (C)x4pcs (C)x4pcs (K)x2pcs (K)x2pcs (K)x2pcs (L)x2pcs (L)x2pcs (L)x2pcs (M)x1set (M)x1set (M)x1set (J)x15pcs (J)x15pcs (J)x15pcs...
- Page 7 10x6 10x6 11x6 11x6 (E)x36pcs (E)x36pcs )x12pcs )x12pcs (F)x24pcs (F)x24pcs (D)x24pcs (D)x24pcs (H)x6pcs (H)x6pcs (I)x6pcs (I)x6pcs...
- Page 9 Details of Installing the Drawer Steps for disassembly runner:move out the inside part to the end, press the plastic upward and pull out until the runner to separate. Ensure that the runners on the cabinet are all the way to the front.
- Page 10 Hold the drawer horizontally and ensure the slide tracks are aligned to the runners. Push the drawer gently inwards until you hear a soft click. WARNING: Any uneven force used, or any component is out of place upon installation of the drawer, will result in the damage of the rails. In case of incorrect installation, gently press the plastic buttons (one side push up the other side push down) to detach the slide track and pull out the drawer.
- Page 11 IMPORTANT - READ CAREFULLY - RETAIN FOR FUTURE REFERENCE Safety Information All assembly fixings should be tightened properly and care should be taken that no fittings are loose. Regular tightening of the bolts is recommended to extend the lifespan of the product. Please follow all the instructions when assembling the product and do not use power tools when building.
Need help?
Do you have a question about the ID23942 and is the answer not in the manual?
Questions and answers