Table of Contents
Advertisement
Quick Links
Advertisement
Table of Contents

Related Manuals for Janome MC230E


Summary of Contents for Janome MC230E
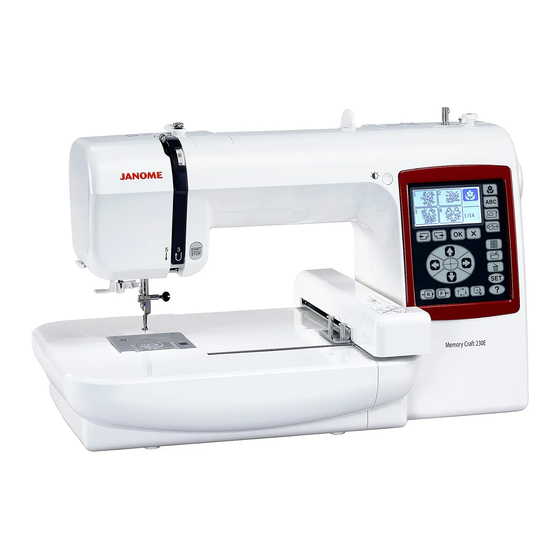
- Page 1 First Edition: 19 July 2018 SERVICE MANUAL & PARTS LIST Model: MC230E...
-
Page 2: Table Of Contents
CONTENTS Replacing External Parts (1) Face Cover ..............1 Replacing External Parts (2) Bed Cover ..............2 Replacing External Parts (3) Front Cover ..............3 Replacing External Parts (4) Rear Cover ..............4 Adjusting the Needle Drop Position ................5 Adjusting the Hook Timing ................... -
Page 3: Replacing External Parts (1) Face Cover
Replacing External Parts (1) Face Cover Setscrew Replacing the face cover To remove: 1. Remove the setscrew and remove the face cover. To attach: 2. Follow the above procedure in reverse. Face cover... -
Page 4: Replacing External Parts (2) Bed Cover
Replacing External Parts (2) Bed Cover Setscrews (A) Replacing the bed cover To remove: Needle plate 1. Turn the power switch on to move the carriage to the stored position, then turn the power switch off. Setscrew (B) Setscrew (B) 2. -
Page 5: Replacing External Parts (3) Front Cover
Replacing External Parts (3) Front Cover Replacing the Front cover To remove: 1. Turn the power switch on and select the em- broidery pattern #1 to move the carriage to the Setscrew (A) starting position, then turn the power switch off. Remove the face cover and bed cover. -
Page 6: Replacing External Parts (4) Rear Cover
Replacing External Parts (4) Rear Cover Setscrew (A) Replacing the Rear Cover To remove: Rear cover 1. Remove the face cover, bed cover. Setscrews (B) 2. Remove the setscrew (A). 3. Remove the 2 setscrews (B), (C), and (D). 4. Remove the carriage cover. 5. -
Page 7: Adjusting The Needle Drop Position
Adjusting the Needle Drop Position The needle should be positioned at the center of the needle plate hole. Setscrews (A) 1. Lower the needle to the lowest position by turning the hand wheel. 2. Remove the face cover. 3. Loosen the 2 setscrews (A). Needle bar supporter 4. -
Page 8: Adjusting The Hook Timing
Adjusting the Hook Timing The hook timing is an amount of ascending travel of the needle bar from its lowest position to where the tip of the rotary hook meets the right side of the needle that should be 1.65 to 1.95 mm. -
Page 9: Adjusting The Needle Bar Height
Adjusting the Needle Bar Height The distance between the top of the needle eye and the upper surface of the hook race should be 3.2 to 3.6 mm when the tip of the rotary hook meets the right side of the needle in the ascending travel form the lowest position. -
Page 10: Adjusting The Clearance Between Needle And Hook
Adjusting the Clearance between Needle and Hook The clearance between the needle and the rotary hook should be -0.10 to +0.05 mm. Setscrew (C) Setscrew (A) 1. Remove the bed cover. 2. Remove the presser foot, needle plate and bobbin holder. Replace the needle (#11) with the test pin. -
Page 11: Adjusting The Backlash Between The Rotary Hook Gear And Lower Shaft Gear
Adjusting the Backlash between the Rotary Hook Gear and Lower Shaft Gear The rotary play of the hook should be 0. 8 mm or less. 1. Remove the bed cover. Lower shaft bushing 2. Remove the needle, presser foot, needle plate and bobbin holder. -
Page 12: Adjusting The Needle Stop Position
Adjusting the Needle Stop Position The needle should stop 12.9-14.4 mm above the needle plate surface when machine stops. 1. Remove the face cove, bed cover and front cover (do not disconnect any connector). 2. Turn the power switch on and press the start/stop button twice. -
Page 13: Adjusting The Needle Thread Tension
Adjusting the Needle Thread Tension The needle thread tension should be 46 to 54 grams when the tension dial is set at “4” and measured with a #50 polyester thread being pulled in the direction of the arrow at approximately 110 mm/sec. 1. -
Page 14: Adjusting The Tension Release Mechanism
Adjusting the Tension Release Mechanism When the presser foot lifter is raised the tension disks should open to release the needle thread tension. Tension release rod Setscrew 1. Remove the front cover. 2. Lower the presser foot lifter and set the tension dial at “9”. -
Page 15: Replacing The Thread Tension Unit
Replacing the Thread Tension Unit To remove : 1. Remove the face cover, bed cover and front Thread tension unit cover. 2. Remove the setscrews (A) and (B). Remove the thread tension unit. To attach: 3. Follow the above procedure in reverse. NOTE: After replacement, adjust the tension release mech- anism and tension solenoid (refer to the next page). -
Page 16: Replacing And Adjusting The Needle Threader
Replacing and Adjusting the Needle Threader If the hook of the needle threader is damaged, replace the threader plate as follows. To replace: 1. Pry out the threader plate with a screwdriver while pushing down and holding the threader knob. 2. -
Page 17: Adjusting The Height Of The Embroidery Foot
Adjusting the Height of the Embroidery Foot Space between the needle plate and bottom of the embroidery foot should be 1.0 to 1.3 mm when the presser bar is at the lowest position. 1. Remove the face cover. Presser foot lifter 2. -
Page 18: Replacing The Printed Circuit Board A
Replacing the Printed Circuit Board A To remove: 1. Remove the face cover, bed cover and front cover. 2. Disconnect all the connectors from the printed circuit board A. Disconnecting LCD Module Flexible 3. Remove the 4 setscrews and remove the printed Flexible PCB circuit board A. -
Page 19: Replacing The Lcd Module
Replacing the LCD Module To remove: 1. Remove the face cover, bed cover and front Setscrew Setscrew cover. 2. Remove the printed circuit board A. 3. Remove the 4 setscrews and remove the LCD module. To attach: 4. Follow the above procedure in reverse. NOTE: Refer to the previous page for connector diagram. -
Page 20: Replacing The Printed Circuit Board F
Replacing the Printed Circuit Board F To remove: 1. Remove the face cover, bed cover and front Setscrew Printed circuit board F cover. 2. Disconnect the connectors from the printed circuit board A. 3. Remove the 2 setscrews and remove the printed circuit board F. -
Page 21: Adjusting The Tension Solenoid
Adjusting the Tension Solenoid 1. Remove the face cover, bed cover and front cover. Setscrews 2. Lower the presser foot lifter. Loosen the 2 setscrews. 3. Slide the solenoid to make a 1.6 mm gap between the solenoid and snap ring while shifting the sole- noid to the right (See fig. -
Page 22: Replacing The Dc Motor And Adjusting The Motor Belt Tension
Replacing the DC Motor and Adjusting the Motor Belt Tension To remove: 1. Remove the face cover, bed cover, front cover and rear cover. 2. Remove the motor belt. 3. Remove the 2 setscrews and remove the DC motor. To attach: 4. -
Page 23: Replacing The Carriage Unit
Replacing the Carriage Unit To remove: 1. Remove the face cover, bed cover and front Setscrew (A) cover. 2. Remove the setscrew (A) and remove the carriage cover. 3. Remove the 4 setscrews (B) and remove the carriage unit. To attach: 4. -
Page 24: Adjusting The Y-Sensor
Adjusting the Y-sensor 1. Remove the face cover, bed cover and front cover (do not disconnect the connectors). Setscrew 2. Remove the carriage cover (refer to the previous page). 3. Turn the power switch on to move the carriage to Y-shield plate the home position. -
Page 25: Adjusting The X-Sensor
Adjusting the X-sensor 1. Remove the face cover, bed cover and front cover (do not disconnect the connectors). 2. Remove the carriage unit (refer to page 21). 3. Turn the power switch on to move the carriage to the home position. 4. -
Page 26: Adjusting The X And Y-Sensors (Simple Adjustment)
Adjusting the X and Y-sensors (Simple Adjustment) 1. Remove the bed cover and carriage cover. 2. Attach the hoop to the carriage and place the template on the hoop. 3. Turn the power switch on and select the built-in design pattern #1. 4. -
Page 27: Adjusting The Y-Motor Gear
Adjusting the Y-motor Gear If the machine is noisy when sewing an embroidery design, adjust the Y-motor gear as fol- lows. 1. Remove the carriage cover. 2. Turn the power switch on and press the lettering key and select Gothic font. Enter 3 large “A”... -
Page 28: Adjusting The X-Motor Gear
Adjusting the X-motor Gear If the machine is noisy when sewing an embroidery design, adjust the X-motor gear as fol- lows. 1. Remove the face cover, bed cover and front cover (do not disconnect the connectors). 2. Turn the power switch on and press the lettering key and select Gothic font. -
Page 29: Adjusting The Y-Carriage Supporter
Adjusting the Y-carriage Supporter 1. Remove the carriage cover. 2. To eliminate a vertical play of the Y-carriage, adjust the position of the Y-carriage supporter. Y-carriage supporter 3. Loosen the setscrew and insert a 0.2 mm thick gauge under the Y-carriage supporter. 0.2 mm 4. -
Page 30: Replacing The Switching Power Supply
Replacing the Switching Power Supply Grounding wires Setscrew (A) Setscrew (B) To remove: 1. Remove the face cover, bed cover, front cover and rear cover. 2. Remove the setscrew (A) and remove the Switching grounding wires. power supply 3. Remove the 3 setscrews (B) and remove the switching power supply. -
Page 31: Parts List
PARTS LIST... - Page 32 MODEL: MC230E PARTS LIST...
- Page 33 MODEL: MC230E PARTS LIST PARTS DESCRIPTION 852603200 Needle plate (unit) 852005103 Needle plate 654078004 Rotation stopper 751374007 Hook cover plate supporter 825016000 Hook cover plate release button 825017001 Spring 000169709 Setscrew 2x2.3 681009101 Needle plate setscrew 825018035 Hook cover plate...
- Page 34 MODEL: MC230E PARTS LIST...
- Page 35 MODEL: MC230E PARTS LIST PARTS DESCRIPTION 856606009 Presser bar base plate (unit) 856013003 Presser bar base plate 856014004 Needle drop adjusting plate 000101507 Setscrew 3.5x5 856015005 Presser bar 856016006 Presser bar spring 856017007 Presser bar supporter 000111500 Hexagonal socket screw 4x8...
- Page 36 MODEL: MC230E PARTS LIST...
- Page 37 MODEL: MC230E PARTS LIST PARTS DESCRIPTION 660631103 Thread take-up lever (unit) 000036902 Washer FT80 639016007 Needle bar crank rod 660058007 Thread take-up lever pin 000002806 Snap ring E-6 000111201 Hexagonal socket screw 4x4 000037800 Washer FT40 660061003 Washer 000002105 Snap ring E-3...
- Page 38 MODEL: MC230E PARTS LIST...
- Page 39 MODEL: MC230E PARTS LIST PARTS DESCRIPTION 856611007 Upper shaft (unit) 000110901 Hexagonal socket screw 5x4 829042007 Upper shaft front bushing 000036717 Washer FT102 639095000 Ring 000111304 Hexagonal socket screw 5x5 731384008 Felt 660103008 Upper shaft timing gear 000020501 Spring pin 3x22...
- Page 40 MODEL: MC230E PARTS LIST...
- Page 41 MODEL: MC230E PARTS LIST PARTS DESCRIPTION 856613009 Hook race (unit) 627567001 Bobbin holder stopper (unit) 000081005 Setscrew 4x8 000070506 Washer 4 627569405 Bobbin holder (unit) 102261103 Bobbin 856612008 Lower shaft (unit) 000219808 Ball bearing 698ZZ 000032403 Snap ring 5103-31 650076000...
- Page 42 MODEL: MC230E PARTS LIST...
- Page 43 MODEL: MC230E PARTS LIST PARTS DESCRIPTION 856614011 Front cover (unit) 856032A01 Front cover 856033032 Touch panel frame 000014306 Snap ring CS-3 856503108 Touch panel (unit) 856123007 Touch panel sheet 856525003 LCD (unit) 856526004 Core 000120203 Setscrew 3x8 (B) 856528213 Printed circuit board A (unit)
- Page 44 MODEL: MC230E PARTS LIST...
- Page 45 MODEL: MC230E PARTS LIST PARTS DESCRIPTION 856602809 Rear cover (unit) 856005909 Rear cover 856603006 Thread guide (unit) 000014409 Snap ring CS-8 834122101 Top cover thread guide 000162001 Setscrew 2.6x5 000020109 Spring pin 2x8 840602109 Thread cutter (unit) 000014306 Snap ring CS-3...
- Page 46 MODEL: MC230E PARTS LIST...
- Page 47 MODEL: MC230E PARTS LIST PARTS DESCRIPTION 856615207 Carriage (unit) 856616002 X-carriage (unit) 856619005 Y-carriage (unit) 856038004 Carriage base 856508000 Stepping motor (unit) 000103808 Setscrew 3x5 856617003 X-sensor (unit) 856040009 Gear 856041000 Gear set plate 856042001 Gear 000071116 Washer 5 000002507...
- Page 48 MODEL: MC230E PARTS LIST...
- Page 49 MODEL: MC230E PARTS LIST PARTS DESCRIPTION 856870800 Accessory (unit) 102261103 Bobbin 102403109 Felt 802424004 Lint brush 820832005 Screwdriver 803813007 Scissors 625031500 Spool pin 829803004 Spool holder base 822019509 Spool holder (small) 653802002 Screwdriver 852802108 Needle set (unit) 856801006 Embroidery hoop (unit)
Need help?
Do you have a question about the MC230E and is the answer not in the manual?
Questions and answers