Table of Contents
Advertisement
Advertisement
Table of Contents

Related Manuals for Creda IWD12

Summary of Contents for Creda IWD12
- Page 1 Instructions for Installation and Use For Integrated Washer and Washer Dryer Models IWM12 & IWD12 Congratulations on the purchase of your new built-in appliance. IMPORTANT INFORMATION Please read this Instruction Manual thoroughly before installing and using your appliance for the first time.
-
Page 2: Electricity Supply
IMPORTANT INFORMATION: Do not plug in and switch appliance on at the mains until installation is complete. You may be charged for a service call if a problem with your appliance is caused by incorrect installation or misuse. Electricity Supply WARNING: This appliance must be earthed. -
Page 3: Table Of Contents
Fitting your appliance into your kitchen.. 10 vii. Levelling... The Controls Getting to know your Appliance: Washing Machine IWM12...13 Washer Dryer IWD12...14 Choosing a Programme: Washing Machine IWM12...15 Washer Dryer IWD12...16 Recycling & Disposal Information As part of our continued commitment to helping the environment, We reserve the right to use quality recycled components to keep down customer costs and minimise material wastage. -
Page 4: Installation Instructions
Installation Instructions IMPORTANT INFORMATION: Follow these 7 steps for a trouble free installation: iii. Connect to the Water Supply... vi. Fitting your appliance into your vii. Levelling... Do not plug in and switch appliance on at the mains until installation is complete. You may be charged for a service call if a problem with your appliance is caused by incorrect installation or misuse. -
Page 5: Ii. Choose A Location
i. Remove Transit Screws... BEFORE ATTEMPTING TO USE THE MACHINE, YOU MUST FOLLOW THE PROCEDURE DESCRIBED BELOW. The inside of the appliance is supported, for transportation, by four screws on the back panel. Before using the appliance these MUST be removed. NOTE: You may need a second person to help you. Important: Use the cap supplied to close the 3 holes which housed the plug, situated in the right hand part of the lower back of the appliance. -
Page 6: Iii. Connect To The Water Supply
If you have no hot water supply or your hot water pressure is low: A cold fill adaptor and fitting instructions are available from your local Creda authorised Service Centre or by calling the Genuine Parts and Accessories Mail Order Hotline UK on 08709 077 077 (or in the Republic of Ireland on (01) 842 6836). -
Page 7: Iv. Connect To A Drainage System
iv. Connect to a Drainage System... Connect up the drain hose, after fitting the hooked end support supplied in the machine. Ensure the drainage hose is not obstructed, trapped or kinked. Any extension of the drainage pipe must be no longer than 1 metre, it must have the same inner diameter and must have no constrictions of any nature. - Page 8 v. Fitting the Door Panel... The packaging is designed to make it possible to mount the wooden panel onto the appliance without removing it completely. covers the face of the machine must not be less than 18mm in thickness and can be hinged on either side.
- Page 9 Fitting the Door Panel and Plinth... Mounting parts onto the face of the appliance: Mount the hinge supports onto the face of the machine, positioning the hole indicated by the arrow, in Fig.1, towards the inside of the face and using the type C screws. Mount the magnetic plate on the opposite side, at the top, using the two type B screws.
-
Page 10: Vi. Fitting Your Appliance Into Your Kitchen
Remember you may be charged for a service call if a problem with your appliance is caused by incorrect installation or misuse. vi. Fitting your appliance into your kitchen... Inserting the machine into the cabinet:- Push the machine into the opening, aligning it with the cabinets (Fig.8). Regulate the adjustable feet to raise the machine to the appropriate height. -
Page 11: Vii. Levelling
vii. Levelling... Adjust the feet until all four feet are in firm contact with the floor ensuring the appliance stands level in every direction. You can check this using a spirit level. We recommend you level the appliance to prevent vibration being transmitted to the surrounding furniture, check that the sides and the top of the appliance are unable to touch the furniture. -
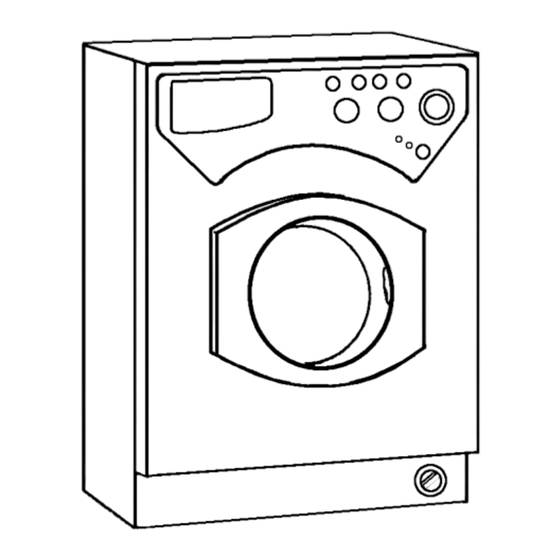
Page 12: The Controls
The Controls Understanding the Control Panel: The Controls WARNINGS Do not allow children to play with the appliance or tamper with the controls. Washing Machine: Programme Selection Knob and Programme Start Temperature Control Knob Spin Selection Knob Detergent Dispenser Rinse Hold Fast Wash Intensive Wash PreWash... -
Page 13: Getting To Know Your Appliance
Getting to Know Your Appliance Functions - Washing Machine A. Programme Selection knob... Turn the knob, clockwise only, until the symbol/letter of the required programme (refer to Choosing a Wash Programme) is in line with the pointer on the control panel. After the wash programme has been set and accepted by the washing machine, turning the Programme Selection knob will have no effect (except for when turned to position Stop/Reset). - Page 14 Getting to Know Your Appliance WARNINGS Do not overload appliance! It may damage laundry and reduce the quality of the wash. Note: We recommend on completion of your programme that you switch off the appliance by pressing the ‘ON/OFF’ . As a safety measure, switch off both the mains electricity and water supply...
-
Page 15: Washing Machine Iwm12
Choosing a Programme Washing Machine: IWM12 COTTONS Exceptionally soiled Heavily soiled whites We recommend the Persil Heavily soiled whites and range of detergent products colourfast Slightly soiled whites and delicate colours Rinse cycles Sort the laundry according to the wash care labels and Spin cycle the degree of soiling. -
Page 16: Washer Dryer Iwd12
Washer Dryer: IWD12 COTTONS Exceptionally soiled Exceptionally soiled Heavily soiled whites and colourfast Heavily soiled whites and We recommend the Persil colourfast range of detergent products Slightly soiled whites and delicate colours Rinse cycles Sort the laundry according Spin cycle... -
Page 17: Adding Detergent
The Dispenser Drawer The dispenser drawer is opened by rotating outwards. Adding Detergent (1) Pre-wash tray (powder) and (2) Main wash detergent tray (powder or liquid) To obtain the desired wash results and optimum detergent consumption, determine the amount of detergent in relation to the water hardness in your area, the type and quantity of laundry and its degree of soiling. -
Page 18: Using Your Appliance
Select one of the delay time positions (12, 9, 3 or 1 hours with Washing Machine Model IWM12 and 12, 9 and 3 hours with Washer Dryer Model IWD12), press the On/Off button wait a short time until the On/Off indicator light stops flashing to show the setting has been accepted. -
Page 19: Drying Only
Using your appliance How to dry (Washer Dryer only). A Combined Washing and drying programme See table below and follow instructions provided for MAX load to have an automatic washing and drying cycle. Select the wash programme. Select the programme wash temperature. Set the Drying Cycle knob C to the type of drying cycle required. -
Page 20: Washcare Tips
Washcare tips Cutting costs effectively:- Maximise the load size Achieve the best use of energy, water, detergent and time by using the recommended maximum load size. Save up to 50% energy by washing a full load instead of 2 half loads. Do you need a pre-wash? For heavily soiled laundry only! Save detergent, time, water and between 5 to 15% energy consumption by NOT selecting pre-wash for slight to normal soiled laundry. -
Page 21: Cleaning The Exterior
Cleaning Removing and Cleaning the Dispenser Drawer... Note: It is advisable to clean the detergent compartment regularly. To do this: Open the drawer out as far as it will go. Lift it up (1) and pull (2), this should release it from its housing. -
Page 22: Troubleshooting
If there is still a problem contact Creda Service (see KEY CONTACTS back cover). General Maintenance... -
Page 24: Repair Service
Creda has the largest appliance manufacturer’s service team in Europe, trained specialists directly employed by us (Please keep the receipt as evidence will be required when the engineer calls). All Creda Services are offered as an extra benefit and do not affect your statutory rights.
Need help?
Do you have a question about the IWD12 and is the answer not in the manual?
Questions and answers