
Related Manuals for Philips 46PP9527


Summary of Contents for Philips 46PP9527
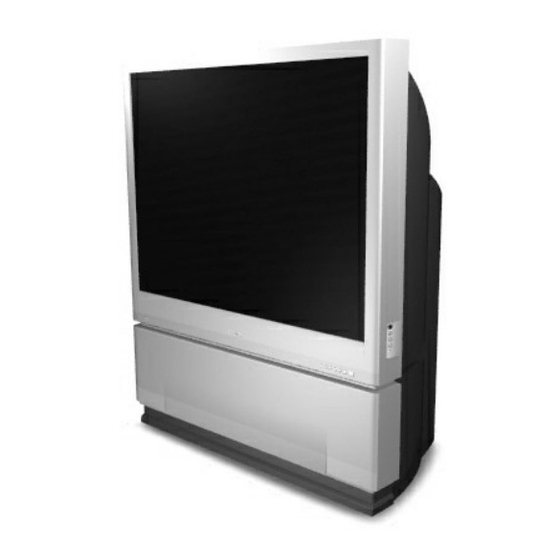
- Page 1 Rear-projection TV Rear-projection TV with HD Input with HD Input 46PP9527 55PP9527 3135 035 21751...
-
Page 2: Table Of Contents
Thank you for purchasing this television set. You are now the proud owner of a Philips TV, which promises full value to you as a customer. Please read this manual carefully and thoroughly for help with installation and operation. Setup and Installation Product Highlights . -
Page 3: Product Highlights
Periodically, APAC automatically shifts your television picture in increments that are very small and yet large enough to blur image retention that can lead to screen burn. Coupled with the Philips Auto Screen Format feature, APAC helps provide you protection from the dreaded screen burn. -
Page 4: Installing The Tv
The major benefit of this projection tele- vision is its large viewing screen.To see the large screen at its best, test various locations in the room to find the optimal spot for viewing. Be sure to allow a minimum of 15 cm of space around the TV. -
Page 5: Using The Tv Keys
MAINS POWER KEY Switches the mains power on or off. VOLUME fi fi % % fi fi key adjusts the sound volume softer.The key adjusts the sound volume louder. When using the on- fi fi screen menu, press Volume to navigate right and left and down. CHANNEL % % fi... -
Page 6: Using The Remote Control Keys
† to search, *Manufactured under license from Dolby Laboratories. “Dolby” and the double-D symbol are trademarks of Dolby Laboratories. Pixel Plus, Incredible Surround, and Active Control are trademarks of Philips Consumer Electronics. Copyright 2003 Philips Consumer Electronics. All rights reserved. fi ®... - Page 7 SING THE fi ® Ò ‡ π † PIXEL PLUS MENU Ï ¬ ZOOM ACTIVE SMART CONTROL SMART EMOTE ONTROL STANDBY • Switches the set on and off from standby mode. (The red light indi- cator lights up when the set is in standby mode.) No Function CURSOR UP Press to navigate the menus and adjust the settings.
-
Page 8: The Menu System
Press the MENU Ï key on the remote control to summon the main menu. Note: Should your remote control be lost or broken you can still use the keys on the front of the TV. See p. 8. Press the cursor button up or down to select the TV, Settings, Install or Demo menu. -
Page 9: Using The Menus
Press the MENU Ï key on the remote control. When you switch on your TV for the first time and no chan- nels are stored so far, the menu Language automatically appears on the screen. This menu also has an additional item Exit with which the menu can be dismissed. -
Page 10: Give Name
Give name Select Give Name in the Install menu and press the cursor down. Select the programme number. Note: keep the cursor up/down pressed to scroll through the programme list quickly. Press the cursor right. A keyboard appears on the screen. -
Page 11: Picture
Picture menu Use the Picture menu to adjust picture settings. screen Menu-Info i for more information about the menu items. Ï key on the remote control to Press the MENU summon the main menu. Press the cursor right to select Select the menu items in the Picture menu with the cursor up/down. -
Page 12: Sound
Sound menu Use the Sound menu to adjust sound settings. screen Menu-Info i for more information about the menu items. Ï key on the remote control to Press the MENU summon the main menu. Press the cursor right to select Select the menu items in the Sound menu with the cursor up/down and adjust the settings with the cur- sor left/right. -
Page 13: Features
Features menu Use the Features menu to adjust sound settings. screen Menu-Info i for more information about the menu items Ï key on the remote control to Press the MENU summon the main menu. Press the cursor right to select Features. Select the menu items in the Features menu with the cursor up/down and adjust the settings with the cur- sor left/right. -
Page 14: General
General menu Use the General menu to adjust settings that are not changed often. Use the on-screen Menu-Info i for more information about the menu items Ï key on the remote control to Press the MENU summon the main menu. Press the cursor down to select Press the cursor right to select Select the menu items in the General menu with the... - Page 15 SING THE Source Use this menu to select the peripheral you connected to one of the external inputs.Use the on-screen Menu-Info i for more information about the menu items Ï key on the remote control to Press the MENU summon the main menu. Press the cursor down to select Press the cursor right to select Press the cursor down to select one of the external...
-
Page 16: Demo
The Demo menu allows to demonstrate the TV features separately or in a continuous loop. Ï key on the remote control to Press the MENU summon the main menu. Select Demo in the Main menu with the cursor down. Select Auto demo or one of the features with the cursor right and press the OK key on the remote control. -
Page 17: Using Picture-In-Picture
The Picture-in-Picture (PIP) feature allows you to call up a subscreen within your main screen to watch two more or channels or a channel and a peripheral at the same time. The Dual-window feature allows you to divide the main screen into two subscreens so that two channels or a channel and an external source can be watched simultane- ously. -
Page 18: Using Teletext (If Provided)
Many TV channels broadcast information via teletext. Each channel that broadcasts teletext transmits a page with information on how to use its teletext system. Look for the teletext page with the main index (usually p. 100). Depending on the TV channel, teletext is transmitted in different sys- tems. - Page 19 Quickly Running Through the Teletext Pages Press the cursor up/down or the CH +/– keys to run through the pre- vious or the following pages. Selecting the Index Teletext Page m key to return to the main index (usually Press the p.
-
Page 20: Peripheral Equipment
You can connect a wide range of video and audio equipment to your TV in various ways.This page and the next one provide an overview of signal compatabilities and the types of equipment you can connect to the sock- ets. Connection examples follow on subsequent pages. As necessary, also refer to the handbook for peripheral equipment. - Page 21 The AV3 and AV4 sockets allow you to connect digital equipment with 1080i/480p (60Hz) or 576p (50Hz) signal output. Overview : High-definition Inputs AV3—use to connect digital equipment with a 1080i/480p (60Hz) or 576p (50Hz) signal output, such as digital set-top boxes or DVD players with progressive-scan capability.You can connect equipment with YPbPr component video or RGB outputs to the AV4 sockets.
- Page 22 Video Recorder : Playback Connect the RF cable to the RF socket on your video recorder. Connect another RF cable from the output of your video recorder to the ANTENNA IN 75Ω socket on your TV. Better playback quality can be obtained if you also connect the Video, Audio Left and Right (only for stereo equipment) cables to the VIDEO and AUDIO L (mono) and R inputs of INPUT-AV 2.
- Page 23 Video Recorder : Recording To record S-VHS quality, connect an S-VHS peripheral directly to the video recorder. Recording a TV Programme Select the channel number on your video recorder. Set your video recorder to record. See the handbook for your video recorder. Switching channel numbers on your TV does not disturb recording Recording a Programme on Your Video Recorder Connected to MONITOR OUT from Audio/Video Equipment Connected...
- Page 24 Video Recorder and Other A/V Peripherals Connect the RF cable to the RF socket on your A/V peripheral equipment. To obtain better picture quality, also connect the Video and Audio left and Audio right (only for stereo equipment) cables to the VIDEO and AUDIO L (mono) and AUDIO R input of the INPUT- AV 2 sockets.
- Page 25 S-Video Equipment Note : Progressive-scan DVD players can be connected to the AV3 or AV4 inputs only. Connect an S-VIDEO cable to the INPUT-AV 2 S-VIDEO input. Connect the audio cables to the equipment’s AUDIO L (mono) and AUDIO R sockets and to the INPUT-AV 2 AUDIO L (mono) and AUDIO R sockets on your TV.
-
Page 26: Camera And Camcorder
Camera and Camcorder Connect your camera or camcorder to sockets at the side of your TV. Connect the equipment to the VIDEO or S-VIDEO socket. Note : S-VHS quality with an S-VHS camcorder is obtained by connecting an S-VIDEO cable with the S-VIDEO socket instead of making a connection to the VIDEO socket. - Page 27 Additional Audio Connections : Surround Sound Your TV has extra sockets that allow you to connect to an external audio amplifier system and powered subwoofer.This connection will pro- vide a surround-sound experience similar to a movie theatre or concert hall. Connect speaker wires from the Center Speakers Output of the surround-sound amplifier to the corresponding (+, –) CENTER CHANNEL AMP INPUT sockets on the TV.
-
Page 28: Selecting Connected Equipment For Viewing
ELECTING Equipment Connected with an Aerial Cable Only Select the channel number under which you have stored the test signal with the digit keys. Equipment Connected to the back or to the side of the TV w to select the AV input for the device you want to use: Press AV1,AV2,AV3,AV4, or side Press the Accessory buttons to control an accessory device with... -
Page 29: Care, Cleaning, And Tips
ISPOSAL OF THE Philips is making its products environmentally friendly.Your new TV contains materials that can be recycled and reused. Specialised companies can dismantle your discarded TV at the end of its life, concentrating on the reusable materials and minimising the amount of materials to be disposed. -
Page 30: Before Calling Service
TV remote control does not work No power No picture Good picture but no sound Good sound but poor colour or no picture Poor picture Snowy picture and noise Colour patch (unevenness) Horizontal dotted lines Double images or “ghost” images One white line across the screen NICAM sound distortion (crackling noise) - Page 31 audio inputs, 20 AV3, 21, 25 AV4, 21, 25 automatic tuning of channels, 9 camcorder, 26 cleaning, 29 child lock, 13 converge. 15 demo, 16 Dolby* virtual, 6 dual screen, see PIP DVD, 24 favorite channel list, 10 features menu, 13 freeze, 6 general menu, 14 give name, 10...
-
Page 32: Specifications
Product Type Rear-projection TV with HD Input Picture • Picture screen diameter : 55PP8620 : 140 cm (55 in.) 46PP8621 : 117 cm (46 in.) • Visible screen size : 55PP8620 : 140 cm (55 in.) 46PP8621 : 117 cm (46 in.) •... -
Page 33: International Guarantee Conditions
NTERNATIONAL This product is guaranteed by Philips for a period of one year after the date of purchase against defects due to faulty workmanship or materials.The guarantee covers both parts and labour. Service under guarantee is only provided upon presentation of reasonable evidence (e.g., completed guarantee card or purchase receipts) that the date of the claim is within the guarantee period. - Page 34 Estrada da Outurela 118 P-2795 Carnaxide Lisboa Phone (01) 416 30 63 / 416 69 61 Fax (01) 416 30 73 SPAIN Philips Servicio Atención al Cliente Bernardino Obregón, 26 E-28012 Madrid Phone (91) 5300777 Fax (91) 4678925 SWEDEN Philips Kundtjänst Kottbygatan 7.Kista...
- Page 35 PERU Philips Peruana S.A. Customer Desk Comandante Espinar 719 Casilla 1841 Lima. 18 Phone (014) 479783 Fax (014) 468949 URUGUAY Ind. Philips del Uruguay S.A. Avenida Uruguay 1287 Customer Help Desk 11100 Montevideo Phone (02) 923392 Fax (02) 920752 ENTRES...
-
Page 36: Consumer Information Centres
Philips Authorized Service Centre 148 Fu Jian Road M. Shanghai 200001 Phone (021) 3281005/38275 Fax (021) 3281005 HONG KONG Philips Electronics Hong Kong Limited Consumer Service 10/F., Flat A, Park Sun Building 103-107 Wo Yi Hop Road Kwai Chung, N.T. Phone 2619-9663... - Page 37 JAPAN Philips Consumer Electronics 1-11-9, Ebisuminami Shibuya-Ku Tokyo 150 Phone (03) 3719 2235 Fax (03) 3715 9992 KOREA Philips Korea Ltd. - Philips House C.P.O. Box 3680 260-199 Itaewon-Dong Yongsan-Ku Seoul 140-202 Phone (02) 5961195/1196 (02) 5967632/76325 Fax (02) 5959688 MALAYSIA Philips Malaysia Sdn.
Need help?
Do you have a question about the 46PP9527 and is the answer not in the manual?
Questions and answers