
Summary of Contents for SEDEA 531610-2210
- Page 1 NOTICE D’INSTALLATION Kit de démarrage Wi-Fi + tête thermostatique no-531610-2210...
- Page 2 Déclaration de conformité Le soussigné, SEDEA, déclare que l’équipement radioélectrique du type Kit de démarrage Wi-Fi + tête thermostatique est conforme à la directive 2014/53/UE. Le texte complet de la déclaration UE de conformité...
-
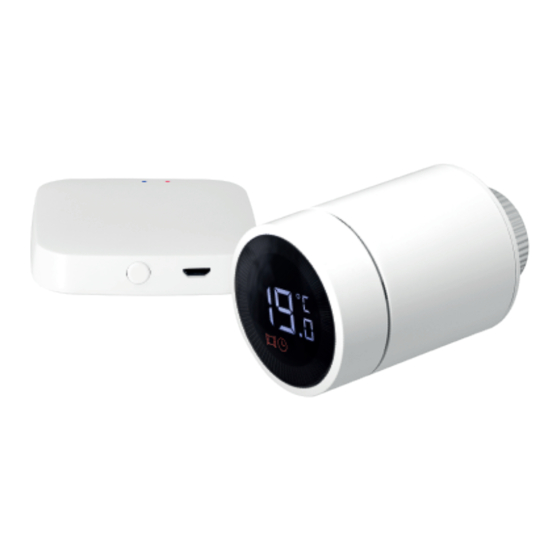
Page 3: Composition Du Kit
filière spécifique, lorsqu'elles seront en fin de vie, veuillez les ramener dans un point de collecte adapté (déchetterie, bacs de recyclage dédiés..). Adresse Importé par SEDEA Parc d’activités du mélantois client@sedea.fr rue des saules CS80458 03 20 96 59 91... - Page 4 DESCRIPTION TÊTE 1. Écran LCD 2. Molette de réglage 3. Voyant lumineux 4. Écrou de fixation 5. Erreur 6. Batterie faible 7. Température de consigne 8. Détection fenêtre ouverte* 9. Mode automatique 10. Mode manuel 11. Mode installation 12. Réseau 13.
- Page 5 DESCRIPTION PASSERELLE Voyant rouge (réseau) Voyant bleu (état) Bouton reset (appui pendant plus de 5 secondes) Connecteur Micro USB (pour alimentation 5VCC...
- Page 6 CONSIGNES AVANT INSTALLATION Afin de minimiser l'influence de la chaleur du radiateur sur la tête thermostatique, il est recommandé de l'installer comme suit : Des adaptateurs sont fournis vous permettant de raccorder la tête thermostatique à la vanne de votre radiateur.
- Page 7 MONTAGE TÊTE THERMOSTATIQUE 1. Maintenez la tête à l’arrière 2. Insérez 2 piles AA 1.5 volts (écrou) puis faite pivoter le corps alcalines (ne pas utiliser de piles de l’appareil dans le sens rechargeables). Veillez à bien antihoraire afin de déverrouiller respecter le sens d’insertion : la et d’ouvrir son boîtier.
- Page 8 4. Repositionnez le boîtier de la tête thermostatique. Tournez le dans le sens horaire pour verrouiller l’ensemble. 5. Appuyez sur l’écran pendant 3 secondes avant d’installer la tête sur la valve du radiateur.
- Page 9 F1₁ ainsi que le symbole apparaissent sur l’écran. Le moteur de la tête s’initialise (vibrations). 7. Alignez l’écrou de vissage de la tête thermostatique avec la vanne du radiateur. Poussez légèrement vers l’avant puis vissez doucement l’écrou dans le sens des aiguilles d’une montre. Ne pas trop serrer ! le couple de serrage maximal est de 5 N-m.
- Page 10 8. Une fois la tête correctement installée, appuyez sur l’écran : F1₂ L’afficheur indique 9. Après 10 secondes, le symbole disparaît et la température actuelle est affichée. L’installation de la tête thermostatique est terminée.
-
Page 11: Calibrage Automatique
Calibrage automatique Lorsque la tête thermostatique est installée, l'équipement sera ajusté automatiquement en fonction du système de chauffage. Au cours de ce processus, vous pouvez constater que le thermostat réagit lentement ou qu'il se réchauffe ou se refroidit automatiquement. L’appareil ferme la vanne du radiateur à un moment précis, puis l'ouvre à... -
Page 12: Mode Automatique
UTILISATION TÊTE THERMOSTATIQUE 1. Sélection du mode Appuyez sur l’écran une fois pour basculer entre les modes Automatique Manuel Anti-gel Mode automatique En mode automatique, la tête se règle automatiquement sur la température souhaitée. Exemple : 21 lorsque vous êtes à la maison, 17 pendant le sommeil et 15 lorsque vous n’êtes pas chez vous. -
Page 13: Mode Manuel
Mode manuel Dans ce mode, vous réglez simplement la température que vous souhaitez à l’aide de la molette de réglage (plage de température : 5 à 30°C). Mode anti-gel Lorsque vous quittez votre domicile pour une longue période, réglez le thermostat en mode antigel (plage de température : 5 à... - Page 14 3. Verrouillage enfants Appuyez longuement sur l’écran de la tête thermostatique pour activer ou désactiver la fonction verrouillage enfants. Lorsque cette fonction est activée, toutes les opérations sur la tête sont invalidées pour empêcher les enfants de jouer avec l’appareil ou de le faire fonctionner par curiosité.
-
Page 15: Connexion Wifi
CONNEXION WIFI 1. Téléchargement de l’application SEDEA Home Téléchargez l’application SEDEA Home disponible sur Google Play et sur l’App store : Si vous n’avez pas accès au Playstore, nous vous invitons à scanner le QR Code ci-contre afin de pouvoir télécharger le fichier d’installation de... - Page 16 Création compte SEDEA Home Créer un nouveau compte Pour créer votre compte SEDEA Home, vous avez la possibilité d’utiliser votre adresse mail ou votre numéro de mobile. Pour vérifier Créer un nouveau compte votre adresse mail ou votre numéro de téléphone, un code vous sera envoyé...
- Page 17 2. Connexion WiFi 2.1 Ouvrir l’application puis cliquer sur le + situé en haut à droite de l’écran : Il est ensuite conseillé de suivre l’assistant d’installation affiché sur votre smartphone. 2.2. Sélectionnez l’appareil (Tête thermostatique eTH600) dans la liste proposée : Tête thermostatique (Zigbee) eTH600...
- Page 18 2.3. Sélectionnez ensuite le type de passerelle utilisée (filaire ou sans fil) Il faut ici sélectionner la passerelle sans fil : 2.4. Entrez le mot de passe de votre réseau WiFi dès que celui-ci vous sera demandé puis cliquez sur «Confirmer».
- Page 19 3. Branchement de la passerelle Pour profiter d’une connexion réseau optimale, branchez la passerelle Wi-Fi au plus près de votre box internet. - Raccordez le cordon Micro USB fourni à un chargeur USB 5 volts 1 ampère (minimum) : 5.0V DC 1.0A - Branchez le chargeur USB sur une prise de courant.
- Page 20 Le voyant est allumé fixe Le voyant rouge clignote rapidement Cliquez sur suivant. L’application SEDEA Home lance alors une recherche de périphérique sur votre réseau. Une fois l’appareil reconnu, il est connecté au réseau Wi-Fi et associé à votre compte SEDEA Home :...
- Page 21 4. Jumelage passerelle et tête thermostatique 4.1. Cliquez sur la passerelle WiFi sur la page d’accueil de l’application SEDEA Home : 4.2. Cliquez «Ajouter un sous-appareil» :...
- Page 22 4.3. Appuyez 3 fois consécutives sur l’écran pour entrer en mode d’appairage : 3 appuis courts Les voyants lumineux de la tête thermostatique commencent à clignoter : cliquez sur «La LED clignote déjà» sur l’application.
- Page 23 4.4. La passerelle Wi-Fi recherche les appareils Zigbee à proximité, cliquez sur «Terminé» lorsque la tête thermostatique a été trouvée :...
- Page 24 Page d’accueil de l’appareil : Niveau des piles Activer / Désactiver la Température de consigne détection de vanne Température ambiante Activer / Désactiver la Mode manuel détection de fenêtre ouverte Mode automatique Mode antigel Activer / Désactiver le 10. Réglage température verrouillage enfants 11.
- Page 25 APPLICATION SEDEA HOME L’application SEDEA Home vous permettra de régler la température de votre domicile quelque soit l’endroit où vous vous trouvez. 1. Choix du mode Posez votre doigt pendant environ 1 seconde sur les symboles suivants pour choisir le mode de fonctionnement de la tête...
- Page 26 2. Réglage du Mode automatique (programmations) Le mode automatique permet de programmer les horaires de déclenchement/arrêt du chauffage adaptés à votre rythme de vie. Exemple : vous pouvez programmer un cycle de confort de 19°C activé de 6h à 8h et de 18h à 23h et un cycle de maintien de température de 15°C de 8h à...
- Page 27 2.3. Cliquez «Ajouter un programmateur» situé au bas de l’écran : 2.4. Choisissez tout d’abord l’heure 2.5. Sélectionnez ensuite la température :...
- Page 28 2.6. Vous pouvez également choisir la récurrence du programmateur. Cela vous permet de répéter une programmation et de créer un programme pour la semaine et un pour le week-end par exemple. Répétez les opérations précédentes pour chaque changement de température que vous souhaitez programmer.
- Page 29 3. Activation / Désactivation fonctions supplémentaires Cliquez sur les fonctions ci-dessous pour les activer ou désactiver : Fonction activée par défaut La fonction de détection de vanne permet d’exécuter, si nécessaire, ses propres procédures d'inspection de la soupape du radiateur. Fonction désactivée par défaut Permet de bloquer tout réglage manuel de la tête thermostatique depuis l’application (idéal pour éviter que...
-
Page 30: Caractéristiques Techniques
COMMENT RÉINITIALISER L’APPAREIL ? Réinitialiser l’appareil depuis le compte SEDEA Home - Ouvrir l’application SEDEA Home puis cliquez sur l’appareil concerné (Tête thermostatique et/ou Passerelle WiFi eTH600) - Une fois sur l’écran de l’appareil, cliquez sur le symbole «crayon» situé en haut à droite de l’écran du smartphone pour accéder aux paramètres... - Page 31 RECOMMANDATIONS DE SÉCURITÉ - Veuillez respecter le sens d'insertion des piles lors de leur mise en place/remplacement. - Choisissez toujours la taille et le type corrects de piles les mieux adaptés à l’utilisation prévue. Il convient de conserver les informations fournies avec le matériel pour aider au choix correct des piles, afin de s'y référer.
- Page 32 - Pour éviter toute défaillance, n'immergez pas les produits dans l’eau ou tout autre liquide. Ne placez pas ceux-ci à proximité d’eau ou d’une source d’humidité ou d’objets remplis d’eau, telle qu’une baignoire, un lavabo, un évier de cuisine, une piscine. - N’utilisez jamais d’objets pointus pour accéder à...
- Page 33 INSTALLATION INSTRUCTIONS Wi-Fi starter kit + thermostatic head no-531610-2210...
- Page 34 Declaration of conformity The undersigned, SEDEA, declares that the radio equipment of the type Wi-Fi Starter Kit + Thermostatic Head is in conformity with Directive 2014/53/EU. The full text of the EU Declaration of Conformity can be...
-
Page 35: Composition Of The Kit
(waste collection centre, dedicated recycling bins ..). Address Imported by SEDEA Parc d’activités du mélantois client@sedea.fr rue des saules CS80458 59814 LESQUIN cedex... - Page 36 DESCRIPTION HEAD 1. LCD screen 2. Adjustment wheel 3. Indicator light 4. Fastening nut 5. Error 6. Low battery 7. Setpoint temperature 8. Detection of open window* 9. Automatic mode 10. Manual mode 11. Installation mode 12. Network 13. Child lock *When the thermostatic head detects that the window is open, the valve will be closed for 30 minutes to reduce heat loss...
-
Page 37: Gateway Description
GATEWAY DESCRIPTION Red light (network) Blue light (status) Reset button (pressed for more than 5 seconds) Micro USB connector (for 5VDC 1A power supply) -
Page 38: Instructions Before Installation
INSTRUCTIONS BEFORE INSTALLATION In order to minimise the influence of the heat from the radiator on the thermostatic head, it is recommended to install it as follows : Adapters are supplied to connect the thermostatic head to your radiator valve. Test the connection before starting the installation. - Page 39 THERMOSTATIC HEAD MOUNTING 1. Hold the head at the back 2. Insert 2 AA 1.5 volt alkaline (nut) and then rotate the body batteries (do not use counter-clockwise to unlock and rechargeable batteries). Make open the housing. sure that the batteries are inserted in the correct direction: the polarity is indicated on the battery compartment.
- Page 40 4. Replace the thermostatic head housing. Turn it clockwise to lock it in place. 5. Press the screen for 3 seconds before installing the head on the radiator valve.
- Page 41 F1₁ and the symbol appear on the display. The head motor initializes (vibrates). 7. Align the screw nut on the thermostatic head with the radiator valve. Push slightly forward and then gently screw the nut clockwise. Do not overtighten! The maximum tightening torque is 5 N-m.
- Page 42 8. Once the head is correctly installed, F1₂ press the display: The display shows 9. After 10 seconds the symbol disappears and the current temperature is displayed. The installation of the thermostatic head is complete.
-
Page 43: Automatic Calibration
Automatic calibration When the thermostatic head is installed, the equipment will be adjusted automatically according to the heating system. During this process, you may notice that the thermostat reacts slowly or heats up or cools down automatically. The unit closes the radiator valve at a specific time and then opens it again to detect the exact opening position of the valve. -
Page 44: Automatic Mode
USE OF THERMOSTATIC HEAD 1. Mode selection Press the screen once to toggle between modes Automatic Manuel Anti-frost Automatic mode In automatic mode, the head automatically adjusts to the desired temperature. Example: 21 when at home, 17 when sleeping and 15 when away from home. The automatic mode setting requires connection to the gateway and the Wi-Fi network. - Page 45 Manual mode In this mode, you simply set the temperature you want using the control wheel (temperature range: 5 to 30°C). Anti-frost mode When you leave your home for a long period of time, set the thermostat to frost protection mode (temperature range: 5 to 15°C).
- Page 46 3. Child lock Press and hold the thermostatic head display to activate or deactivate the child lock function. When this function is activated, all operations on the head are disabled to prevent children from playing with the appliance or operating it out of curiosity. 1.
- Page 47 WI-FI CONNECTION 1. Download the SEDEA Home application Download the SEDEA Home application available on Google Play and on the App store : If you do not have access to the Playstore, we invite you to scan the QR Code opposite in order to download the installation file of the...
- Page 48 Create a SEDEA Home account Create a new account To create your SEDEA Home account, you can use your email address or your mobile number. To verify your email address or Create a new account phone number, a code will be sent to you and you will have to create a password to finalize...
- Page 49 2. WiFi connection 2.1 Open the application and click on the + at the top right of the screen : You are then advised to follow the installation wizard displayed on your smartphone. 2.2. Select the device (eTH600 thermostatic head) from the list : Tête thermostatique (Zigbee) eTH600...
- Page 50 2.3. Then select the type of gateway used (wired or wireless) The wireless gateway must be selected here : 2.4. Enter your WiFi network password when prompted and click "Confirm". (2.4GHz WiFi network to which your smartphone is connected)
- Page 51 3. Connecting the gateway To enjoy an optimal network connection, connect the Wi-Fi gateway as close as possible to your Internet box. - Connect the supplied Micro USB cord to a 5 volt 1 amp USB charger (minimum) : 5.0V DC 1.0A - Connect the USB charger to a power outlet.
- Page 52 : The light is on steady Red light flashes rapidly Click on Next. The SEDEA Home application will search for a device on your network. Once the device is recognized, it is connected to the Wi-Fi network and associated with...
- Page 53 4. Gateway and thermostatic head pairing 4.1. Click on the WiFi gateway on the homepage of the SEDEA Home application : 4.2. Click "Add a sub-device" :...
- Page 54 4.3. Press the screen 3 times consecutively to enter pairing mode : 3 supports short The LEDs on the thermostatic head start to flash: click on "LED is already flashing" on the application.
- Page 55 4.4. The Wi-Fi gateway searches for nearby Zigbee devices, click "Done" when the thermostatic head has been found :...
- Page 56 Unit's home page : Battery level Enable / Disable valve Setpoint temperature detection Ambient temperature Enable / Disable open window Manual mode detection Automatic mode Frost protection mode Enable / Disable child lock 10. Temperature setting 11. Setup menu...
- Page 57 SEDEA HOME APPLICATION The SEDEA Home application will allow you to adjust the temperature of your home wherever you are. 1. Choice of mode Touch the following symbols for about 1 second to select the operating mode of the thermostatic head :...
- Page 58 2. Setting the Automatic Mode (programs) The automatic mode allows you to program the heating on/off times to suit your lifestyle. Example : You can program a comfort cycle of 19°C activated from 6am to 8am and from 6pm to 11pm and a temperature maintenance cycle of 15°C from 8am to 6pm and from 11pm to 6am.
- Page 59 2.3. Click "Add a programmer" at the bottom of the screen : 2.4. First, choose the time 2.5. Then select the temperature :...
- Page 60 2.6. You can also choose the recurrence of the programmer. This allows you to repeat a programme and create one programme for the week and one for the weekend for example. Repeat the above steps for each temperature change you wish to program.
- Page 61 3. Activation / deactivation of additional functions Click on the functions below to activate or deactivate them : Function enabled by default The valve detection function allows you to perform your own radiator valve inspection procedures if necessary. Function disabled by default Allows you to block any manual adjustment of the thermostatic head from the application (ideal for preventing children from playing with the device).
-
Page 62: Technical Specifications
HOW DO I RESET THE DEVICE ? Reset the device from the SEDEA Home account - Open the SEDEA Home application and click on the device concerned (Thermostatic head and/or WiFi Gateway eTH600) - Once on the device screen, click on the "pencil" symbol at the top right of the smartphone screen to access the settings - At the bottom of the page, click on "Remove device"... - Page 63 SAFETY RECOMMENDATIONS - Please observe the direction of insertion of the batteries when inserting/replacing them. - Always choose the correct size and type of battery best suited to the intended use. The information supplied with the equipment to help with the correct choice of batteries should be kept for future reference.
- Page 64 - To avoid failure, do not immerse the products in water or any other liquid. Do not place them near water or moisture sources or objects filled with water, such as bathtubs, washbasins, kitchen sinks, or swimming pools. - Never use sharp objects to access the interior of products. - Do not knock the products or expose them to strong shocks.
Need help?
Do you have a question about the 531610-2210 and is the answer not in the manual?
Questions and answers