Table of Contents
Advertisement
Quick Links
Advertisement
Table of Contents

Summary of Contents for iOptron iMate
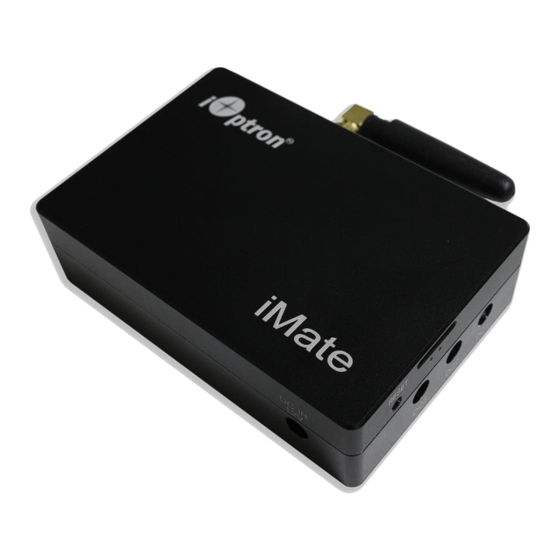
- Page 1 ® iOptron iMate Astronomy Control Box Instruction Manual Product #8480...
-
Page 2: Table Of Contents
3.2. Product End of Life Disposal Instructions ....................17 IOPTRON ONE YEAR TELESCOPE, MOUNT, AND CONTROLLER WARRANTY ............18 Ver. 1.0 2023.10 iOptron reserves the rights to revise this instruction without notice. Actual color/contents/design/function may differ from those described in this instruction. -
Page 3: Ioptron Imate Overview
With 32Gb eMMC storage along with a slot for up to 64Gb TF (micro SD) memory, iMate has the ability to control and capture an entire automated imaging session. The iMate is cross-platform; use it with Windows, IOS, Linux, Android, etc. - Page 4 USB ports, directly or via a USB hub. Connect a 12V DC power supply to the iMate DC IN port (5.5/2.1mm plug, center positive). Power on the mount and iMate and you are ready to go! Since iMate uses KStars and INDI Lab, it can connect any device that has an INDI driver.
-
Page 5: Connect A Mount To The Imate
(4) Connect a 12V DC power (5.5/2.1mm, center positive plug) to iMate. You may also use the power output port from the mount (5) Turn both mount power and iMate power on. You should see a tiny green LED below the TF card slot. - Page 6 (2) Click on downloaded NoMachine to install the software (3) A shortcut will be shown on your computer desktop. 2. From your computer Wi-Fi network list, choose iMate_XXXXXX. Enter password 12345678 to connect the computer to iMate Wi-Fi network.
- Page 7 4. Click OK on welcome screens. You may also check the box before “Don’t show this dialog anymore” to skip this screen next time running the software. 5. If the mount is powered on, the “iMate” server will be appeared on the screen. Click on iMate icon, then click OK on next “Verify host identification” screen.
- Page 8 7. Click OKs to pass the help screens. You may also check the box before “Don’t show this dialog anymore” to skip this screen next time running the software. 8. Now the NoMachine will load the software from the iMate. Resize the Windows to adjust for better display. Click on iOptron Applications bar on top left corner...
- Page 9 9. From pull down menu to select Education =>KStars. Close the tip after the KStars finished loading.
- Page 10 10. Select Tools=>Ekos 11. Create an Profile by click on “+” 12. Enter the Profile Name, here we use CEM70-NUC. Check the Mode as Local. Select iOptron/CEM70 from Mount List. Add a camera from the list (PlayerOne).
- Page 11 You have to add at least one camera here; even you do not have the camera attached. Click Save to save the profile. You may add/change other devices later. 13. Click Arrow button to start the Ekos. It should connect to the CEM70-NUC and the camera, if it is connected to one of the USB ports.
-
Page 12: Operation The Mount Via An Imate And Kstars/Ekos
2.3. Operation the Mount via an iMate and KStars/Ekos The initial settings, such as time, site and initial position, are the basics to ensure a telescope mount having a good GOTO accuracy. The default is KStars updates all devices. -
Page 13: Set Up Imate Time
2.3.1. Set up iMate Time Connect the iMate. The initial time shown here is 8/24/2023 01:26. From iOptron Applications pull down menu to select Education =>iMateSetTime. This will bring up the imatesettime screen. Enter the time in the format MMDDhhmmYYYY.00 or MMDDhhmmYY. Here we entered 090815202023.00, or 0908152023 for Sept 8, 2023, 15:20. -
Page 14: Set Up Zero Position
Control Panel. It will show all connected devices. This panel can be activated by clicking on INDI icon Click on Find Home from iOptron CEM70. The mount will perform Searhing Zero Position and return to Zero Position. The Home status will turn to green. -
Page 15: Add Other Devices
2.4. Other iMate Functions 2.4.1. iMate DC Power Output Control iMate has three (3) DC12V outputs. DC3 is always on. DC2 and DC1 can be programmed ON/OFF. From iOptron Applications pull down menu to select Education =>iMatePowerBox. This will bring up the... -
Page 16: Ipolarserver
Enter 0 to Exit iMatePowerBox program. 2.4.2. iPolarServer Plug your iPolar into one of the iMate USB port. From iOptron Applications pull down menu to select Education =>iPolarServer. The iMate will connect to iPolar camera. After camera is connected, you can perform polar alignment using an iOS App. -
Page 17: Customer Servicing
We have found that most problems can be resolved by e-mails or telephone calls. So please contact iOptron first to avoid unnecessarily returning the mount for repair. -
Page 18: Ioptron One Year Telescope, Mount, And Controller Warranty
A. iOptron warrants your telescope, mount, or controller to be free from defects in materials and workmanship for one year. iOptron will repair or replace such product or part which, upon inspection by iOptron, is found to be defective in materials or workmanship. As a condition to the obligation of iOptron to repair or replace such product, the product must be returned to iOptron together with proof-of-purchase satisfactory to iOptron.
Need help?
Do you have a question about the iMate and is the answer not in the manual?
Questions and answers