Advertisement

USER'S OPERATION MANUAL
Before operating this unit, please read this manual
thoroughly, and retain for future reference
RS694N4BCE
RS694N4BBE
EN
English

Advertisement

Table of Contents
loading
Need help?

Need help?

Do you have a question about the RS694N4BCE and is the answer not in the manual?

Questions and answers

Michael Myers
April 18, 2025

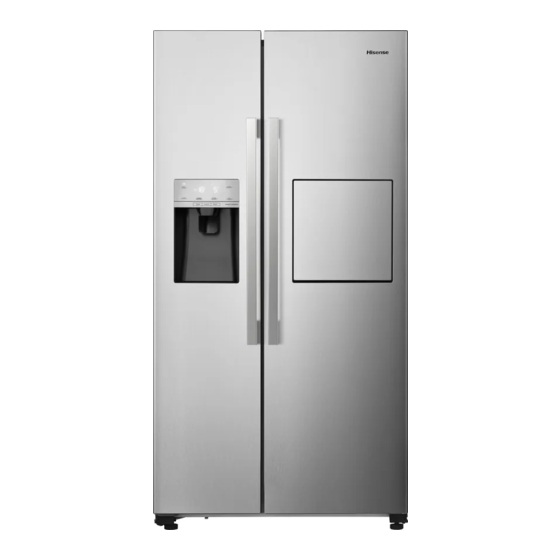
is the height dimension taken and the door or at the rear of the unit which loos to be lower

1 comments:
Mr. Anderson
May 9, 2025

The height dimension of the Hisense RS694N4BCE is 1142.5 mm, and it is measured from the rear of the unit.

This answer is automatically generated

Subscribe to Our Youtube Channel

Summary of Contents for Hisense RS694N4BCE

  • Page 1 USER’S OPERATION MANUAL Before operating this unit, please read this manual thoroughly, and retain for future reference RS694N4BCE RS694N4BBE English...
  • Page 2 For your safety and correct usage before installing and first using the appliance, read this user manual carefully, including its hints and warnings. To avoid unnecessary mistakes and accidents, it is important to make sure that all people using the appliance are thoroughly familiar with its operation and safety features.
  • Page 3 Keep all packaging away from children as there is risk of suffocation. If you are discarding the appliance, pull the plug out of the socket, cut the connection cable (as close to the appliance as you can) and remove the door to prevent children playing from suffering an electric shock or from closing themselves inside it.
  • Page 4 WARNING — The refrigerant and insulation blowing gas are flammable. When disposing of the appliance, do so only at an authorized waste disposal centre. Do not expose to flame. WARNING —When positioning the appliance, ensure the supply cord is not trapped or damaged. WARNING —Do not locate multiple portable socket-outlets or portable power supplies at the rear of the appliance.
  • Page 5: Electrical Safety

    It is dangerous to alter the specifications or modify this product in any way. Any damage to the cord may cause a shortcircuit, fire, and/or electric shock. Electrical safety 1.The power cord must not be lengthened. 2. Make sure that the power plug is not crushed or damaged. A crushed or damaged power plug may overheat and cause a fire.
  • Page 6 Do not place food products directly against the air outlet on the rear wall. Store pre-packed frozen food in accordance with the frozen food manufacture’s instructions. The appliances manufactures storage recommendations should be strictly adhered to.Refer to relrelevant instructions for storage. Do not place carbonated or fizzy drinks in the freeze compartment as it creates pressure on the container,which may cause it to explode,resulting in damage to the...
  • Page 7 Before maintenance, switch off the appliance and disconnect the mains plug from the mains socket. Do not clean the appliance with metal objects, steam cleaner, ethereal oils, organic solvents or abrasive cleansers. Do not use sharp objects to remove frost from the appliance. Use a plastic scraper.
  • Page 8: Installing Your New Appliance

    Installing your new appliance Before using the appliance for the first Relevant information (mm) time, you should be aware of the following tips. 908 417.5 600 1142.5 Ventilation of appliance In order to improve efficiency of the cooling system and save ≥7 5 energy, it is necessary to maintain ≥1 0 0...
  • Page 9 Leveling of appliance Warning! For sufficient leveling and air For proper installation, this refrigerator circulating in the lower rear section of must be placed on a level surface of the appliance, the bottom feet may hard material that is the same height need to be adjusted.
  • Page 10 Note! Installing the water lines and filter The water lines must be fully Installing the water filter fit the water filter , follow the inserted into the filter to prevent water installing steps below. leaking. First, take out the water filter and The line length should be less than water lines from the fridge room.
  • Page 11 Second, fully insert the water lines Note: After installed the filter, please open into the Inlet and Outlet of the water the water valve to flush the filter for 5 filter. Water line minutes before use. Water line Water Filter Outlet Inlet Water...
  • Page 12 Open the water valve to flush the The water lines should not be lines, and check leakage in the water pressed by heavy things and should connectors. If any leak, please check not bend too much. that if the lines are fully inserted Warning! where the connector leaked.
  • Page 13 Beverage Compartment...
  • Page 14: Display Controls

    Display controls Use your appliance according to the following control guidelines, your product has a control panel as shown in the diagram below. " Filter Reset 3 When the appliance is powered on for Caution! When you set a the first time, the backlighting of the temperature, you set an average icons on the display panel starts temperature for the whole refrigerator...
  • Page 15 You can touch “Ice Off” button to “Child Lock and Door Alarm” control the ice maker. When the Child " Child Lock 3 Lock is off, and the ice function is on, This button serves two purposes: you can touch the “Ice Off” icon to 1.Child Lock close the ice maker, and the icon “...
  • Page 16 following sequence. “Fridge temperature control” " Super Cool 3 You can touch the “Fridge” icon to activate the mode to control the fridge Press and hold the “Freezer” button temperature. When you touch the for 3 seconds, the icon “ ”will be button continuously, the temperature illuminated, the freezer temperature...
  • Page 17 You can press the "Cubed" or “Eco” for 3 seconds to reset the filter. "Crushed" option to choose the t When you replace the water filter, of Ice to be dispensed. You can touch some water may leak from the filter the "Water"...
  • Page 18: Using Your Appliance

    Using your appliance This section tells you how to use most 2. Using your refrigerator compartment of the useful features. We recommend The refrigerator compartment is that you read through them carefully suitable for storage of vegetables and before using the appliance. fruit.
  • Page 19 When you remove the shelves, gently Bottled or canned liquid are at risk of pull them forward until the shelf exploding caused by volume expansion and so should not be comes clear of the shelf guides. When you return the shelves, make stored in the freezer compartment.
  • Page 20 5. Using the Ice Bucket If you want to remove the Ice Bucket: Please hold the handle as shown in the figure below. Then lift up and pull the Ice Bucket out slowly to prevent ② ① damage. Removing Steps: Push up ift up the Ice Bucket...
  • Page 21 The first batch of ice cubes after Ice Bucket installation may be small, because air has entered the water line. Any air will be purged during normal use. If the ice cubes is still small, please check the water is circulated in line, or water valve is opened large enough, or the Storage Box water is at a high pressure properly.
  • Page 22 6.Home bar Less than two goblets can be hang on the cup. Please press the middle position The bar door is safely shut as it of the top of the bar door, when you clicks on. hear a "click" sound, the bar-door hear a click sound, the bar-door could be opened.
  • Page 23 Please do not remove the shelf Please do not damage the tray of the bar, such as: using your hand to press the tray or scratching the tray with a sharp tool. Please clean up the beverage, liquid and sundries on the tray of the bar in time.
  • Page 24: Cleaning And Care

    Cleaning and care For hygienic reasons the appliance Warning! (including exterior and interior Do not use sharp objects as they accessories) should be cleaned are likely to scratch the surface. regularly (at least every two months). Do not use Thinner, Car detergent, Warning! Clorox, ethereal oil, abrasive The appliance must not be connected...
  • Page 25 Although this appliance automatically Replacing the LED light defrosts, a layer of frost may occur on Warning: The LED light must be the freezer compartment’s interior replaced by a competent person. If walls if the freezer door is opened the LED light is damaged, follow the frequently or kept open too long.
  • Page 26: Helpful Hints And Tips

    Helpful hints and tips Meat (All Types) Wrap in polythene Energy saving tips food: wrap and place on the glass We recommend that you follow the shelf above the vegetable drawer. tips to save energy. Always follow food storage times and Try to avoid keeping the door open use by dates suggested by for long periods in order to conserve...
  • Page 27 It is recommended to label and date If the appliance needs to be switched each frozen package in order to keep off for an extended period, the track of the storage time. following steps should be taken to prevent mould on the appliance. Hints for the storage of frozen food 1.
  • Page 28: Troubleshooting

    Troubleshooting If you experience a problem with your appliance or are concerned that the appliance is not functioning correctly, you can carry out some easy checks before calling for service, please see below. You can carry out some easy checks according to this section before calling for service. Warning! Don't try to repair the appliance yourself.
  • Page 29 It is normal to frequently hear the sound of the motor, it will need to run more during following circumstances: Temperature setting is set colder than necessary. Large quantity of warm food has recently been stored within the The motor runs appliance.
  • Page 30: Disposal Of The Appliance

    have set the Cubed or Crushed mode on. Is there any ice blocked within the ice maker bucket or ice chute? Is the freezer temperature too warm? Try setting the freezer temperature lower. Is the water storage box installed accurately? Make sure there is enough water in the water storage box.
  • Page 31 To avoid contamination of food, please respect the following instructions Opening the door for long periods can cause a significant increase of the temperature in the compartments of the appliance. - Clean regularly surfaces that can come in contact with food and accessible drainage systems.
  • Page 32 Hisense Help Line 0191 387 0804 Service...
  • Page 33 Hisense UK Ltd Ground floor Munroe Court White Rose Office Park Millshaw Park Lane Leeds LS11 0EA...

This manual is also suitable for:

Rs694n4bbe

Table of Contents

Save PDF