
Summary of Contents for Kalamera K-Kitchen KBG-3104SC
- Page 1 INSTRUCTION MANUAL Barbecue Gas Grill MODEL: KBG-3104SC Please read carefully and follow all safety rules and operating instructions.
-
Page 2: Table Of Contents
Content Warning ..........................3 Before Lighting ........................4 Safety Precautions ........................5 Assembly ..........................6 Operating Instructions ......................9 Care and Maintenance ......................10 Built in ...........................11 Trouble Shooting ........................18 Warranty ..........................19... -
Page 3: Warning
Warning To reduce the risk of fire, burn hazard or other injury, read the USER MANUAL carefully and completely before using this appliance FOR OUTDOOR USE ONLY Do not store or use gasoline or other flammable liquids or vapors in the vicinity of this or any other appliances. -
Page 4: Before Lighting
Before Lighting Read instructions before lighting. lnspect the gas supply hose prior to turning on the gas. If there is evidence of cut, wear or abrasion, it must be replaced prior to use. Only the pressure regulator and gas hose assembly supplied with this appliance should be used. ... -
Page 5: Safety Precautions
Safety Precautions When using this grill basic practices must be followed, including but not limited to following: Do not repair or replace any part of the grill unless specifically recommended in this manual. All other service should be referred to a qualified technician. ... -
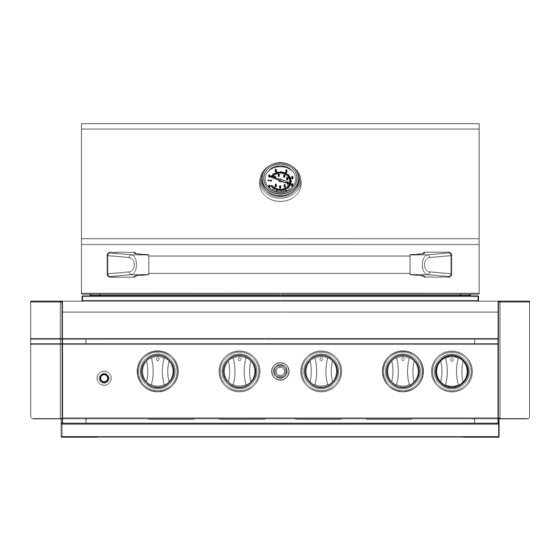
Page 6: Assembly
Assembly Before assembly, make sure all parts are present. If any part is missing or damage, do not attempt to assemble the appliance. TOOLS REQUIRED * Philips screwdriver ( not included) 1. Built in bracket assembly 2. Flame tamer assembly 3. - Page 7 6. For transformer 7. For rotisserie kit sets a). To protect against electrical shock, do not immerse cord or plug in water or other liquid; b). Unplug from the outlet when not in use and before cleaning. Allow to cool before putting on or taking off parts;...
- Page 8 Connecting the Liquid Propane Gas Cylinder To connect the liquid propane gas cylinder: 1. The cylinder valve should be in OFF position. 2. Make sure the burner valve is in OFF position. 3. Inspect the valve connections, port and regulator assembly. Remove debris and inspect the hose for damage.
-
Page 9: Operating Instructions
Operating Instructions Only the pressure regulator and hose assembly supplied with the grill should be used. Any replacement of pressure regulator and hose assembly must be specified by the grill manufacturer. Gas Consumption Burner Injector Btu/hr Injector Bty/hr Main Burner 1.0mm 48,000 1.50mm... -
Page 10: Care And Maintenance
Keeping the ventilation opening(s) of the cylinder enclosure free and clear from debris. b. Visually checking burner flames including pilot burner flame if provided, with pictorial representations. Care and Maintenance STAINLESS STEEL There are many stainless steel cleaners available. Always use the mildest cleaning process first, scrubbing in the direction for the grain. -
Page 11: Built In
Built in Cabinet Cutout Dimension The illustration below includes cutout dimensions and minimum spacing requirements. The installation of this grill must confirm with local codes, or, in the absence of local codes, with either the National Fuel Gas Code, ANSI Z223.1/NPFA 54, Natural Gas and Propane Installation Codes, CSA B149, or Propane Storage and Handling Code B149.2. - Page 12 -Any enclosure for built in installation is to have at least one ventilation opening on an exposed exteriors side located within 2 ½” (6cm) of the top and is to be a minimum 20 in.2 (129 cm2). One ventilation opening within 1 ½” (3cm) of the bottom of the enclosure, and the bottom openings is to be a minimum of 10 in.2 (64.5cm2).
- Page 13 3. Mount the bracket on the cabinet 4. FOR NG Connect the QDD to the natural gas supply, then connect the grey hose To QDD Connect the grey hose to the grill...
- Page 14 Convert from LPG to NG 1. CONVERSIONS ONLY TO BE DONE BY AUTHORIZED PERSON 2. MAKE SURE ALL CONTROL KNOB AND CYLINDER VALVE ARE IN OFF POSITION. 3. The appliance must be isolated from the gas supply piping system by closing its individual manual shut-off valve during any pressure testing of the gas supply piping system at test pressures equal to or less than 1/2 psi (3.5 kPa).
- Page 15 Tools Required for Converting from LP to NG CAUTION: BEFORE PROCEEDING THE CONVERSION, SHUFF OF THE GAS SUPPLY TO THE APPLIACNES PRIOR TO DISCONNECTING ELECTRICAL POWER Main Burner Conversion 1. Unscrew and remove the rear panel pictured. 2. Unscrew the main burner securing screws and remove the burner, sitting it alongside.
- Page 16 3. With the burner removed, you will see the brass gas jet (LPG) which is screwed into the end of the valve. Using the 6mm nut driver supplied, unscrew the end LPG jet while retaining the inner (NG) jet. LPG JET NG jet remained 4.
- Page 17 2. Remove the LPG jet from the elbow shaped brass injector assembly. Connect the QDD to the Natural gas supply, then connect the grey hose to QDD LEAK TESTING MUST BE DONE ON THE APPLIANCE AFTER CONVERSION PRIOR TO PLACING IT INTO OPERATION.
-
Page 18: Trouble Shooting
Trouble Shooting Problem Possible Cause Prevention/Solution Burner will not light. •No gas flow. • Check to see if LP tank is empty. •Coupling nut and regulator • Turn the coupling nut about one-half to not fully connected. three quarters additional turn until solid •Obstruction of gas flow. -
Page 19: Warranty
Once confirmed that your appliance is eligible for the warranty service, Kalamera Customer Service Department will contact you by mail or phone about the maintenance solution. Replacement parts and/or units will be new, re-manufactured or refurbished and is subject to the manufacturer’s discretion. - Page 20 To obtain service or information, please call 866-554-6688 or send email to service@kalamera.com Product contents and specifications may change without notice. Copyright © 2023 Kalamera Inc www.kalamera.com...
Need help?
Do you have a question about the K-Kitchen KBG-3104SC and is the answer not in the manual?
Questions and answers