Table of Contents
Advertisement
Quick Links
Advertisement
Table of Contents

Summary of Contents for Ferguson ARIVA 102 cable
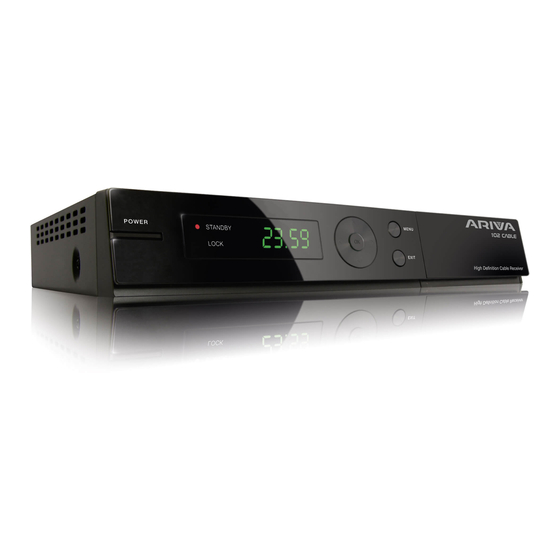
- Page 1 102 cable User manual...
- Page 2 WARNING !!! Ferguson cable receivers support recording on external hard disk drives (HDDs) and flash memories (pendrives). In all instances, the correct operation of the recording function depends on the type of connected memory! You must read the following limitations.
-
Page 3: Table Of Contents
Table of contents SAFETY MEASURES.........................5 DOWNLOADABLE SOFTWARE......................5 ABOUT THE INSTRUCTION MANUAL....................6 MARKINGS AND SIGNS APPLIED TO THE RECEIVER................6 BASIC INFORMATION ABOUT THE RECEIVER..................7 1. Main features.........................7 2. Contents of box........................7 3. Important instructions concerning handling of the receiver............7 4. Remote control........................8 4.1 Installation of batteries.....................9 5. - Page 4 How do I add to the group of favourites?................32 How do I change a channel name?..................33 16.2 Radio channel list......................34 16.3 Delete all........................34 16.4 Favorite........................34 17. Basic functions supported by the remote control..............35 17.1 GUIDE.........................35 17.2 FIND...........................35 17.3 TXT - teletext.......................36 17.4 AUDIO.........................36 17.5 SUBTITLE........................36 17.6 REC - recording......................37...
-
Page 5: Safety Measures
• DOWNLOADABLE SOFTWARE Ferguson has taken every effort to provide users with software updates in order to ensure that the parameters of the cable television receiver are up to date. Ferguson reserves itself the right to amend, change or modify the software used in the cable television receiver as it shall choose and without prior notification. -
Page 6: About The Instruction Manual
Ferguson Sp. z o.o. has made every effort to provide the most current information about its products. Ferguson Sp. z o.o. does not grant any guarantee as to the contents of the present instruction manual and disclaims any implied guarantees concerning market value or suitability for specific purposes. -
Page 7: Basic Information About The Receiver
BASIC INFORMATION ABOUT THE RECEIVER 1. Main features ✔ Reception of high definition channels ✔ Scaling of PAL signals to a resolution of 720p or 1080p ✔ Availability of 32 programmable timers ✔ Separate lists of favourite, TV and Radio channels ✔... -
Page 8: Remote Control
4. Remote control Due to the standardization of Ferguson equipment, the majority of these devices use the same remote control unit, i.e. RCU540. This means that not all keys are used by this equipment model! POWER Turns the receiver on and sets it in standby mode. -
Page 9: Installation Of Batteries
4.1 Installation of batteries Remove the cover of the battery compartment on the rear panel of the remote control unit; slide it downwards and put it aside. Insert two AAA (R03) batteries into the compartment, observing the indicated polarity. Do not mix old and new batteries, or batteries of different types. -
Page 10: Rear Panel
6. Rear panel LOOP OUT: Output of the signal to another cable receiver. CABLE IN: Input of the antenna cable. SPDIF: Digital audio output. SCART output, for connection to a television. RS232: RS232 port for communication with a PC computer. HDMI: Digital image and sound output. -
Page 11: Connecting The Cable Receiver
7. Connecting the cable receiver The following illustrations show cable connections for a television and other devices connected with the receiver. If you require any assistance in connecting individual devices, contact your local technician. Before connecting or altering cabling, disconnect the receiver from the mains !!! 7.1 Connection by means of an HDMI cable (recommended) 1. -
Page 12: Connection By Means Of The Yprpb (Component) Sockets
7.2 Connection by means of the YPrPb (component) sockets 1. Connect the antenna to the Cable IN socket of the receiver. 2.Connect the video and audio by means of five cinch cables to the television set. Three cables, coloured green, blue and red, are used to send the three colour components. -
Page 13: Connection Of An Audio System
7.4 Connection of an audio system 1. Digital sound (including surround sound, if broadcast) may be obtained through SPDIF. The following figure presents the SPDIF connection. 2.Stereo sound may be obtained by connecting cinch cables (white and red) for the left and right channels 7.5 Connection of an external memory 1. -
Page 14: Connection To The Lan Local Network
7.7 Connection to the LAN local network In order to connect the receiver to a local network, use an RJ45 cable. We recommend that you restart the receiver whenever the network settings are changed. 7.8 Connection to the computer by means of an RS232 Null Modem cable For connection to a computer, use a Null Modem cable. - Page 15 5. When using a submenu, the OK button is used to confirm your selection; a green background informs that a function is active.
-
Page 16: Installation Wizard
8. Installation wizard To set the main STB settings just follow the installation wizard. When You have set any settings in installation wizard window, You can choose the auto search option or go to the main menu to set any other detail STB settings. 9. -
Page 17: Main Menu
9.1 Auto Search 1. Area: Press keys to select the area. 2. Press OK on search button to star searching program. 9.2 Quick Search You have to define such options as: 1. Frequency/channel number 2. Symbol Rate. 3. QAM. 4. Network search 5. -
Page 18: Simple And Advanced Menu
11. Simple and advanced menu The main menu was splittet into two menus: simple and advanced. The table below shows the structure of both menus. To activate the advanced menu follow the click path: Menu-> System setup-> Other-> Show advanced settings-> ON (all points, which belong to the advanced menu have been written with bold italic). -
Page 19: System Settings
12. System settings 12.1 Language This menu is used to define the language in which the receiver's menu is displayed. The preferred and second language options refer to audio soundtracks. If a given channel supports more than one audio soundtrack, the receiver will by default search for soundtracks in the selected languages in this order. -
Page 20: Display Setting
12.3 Display setting This menu is used to adjust the image displayed by the receiver. You can change the brightness, contrast and colour saturation. By default, all of these values are set to 50. 12.4 Local time settings This menu is used to set the time and date. The receiver can automatically download the time and date from the signal. -
Page 21: Osd Settings
12.6 OSD settings In this menu you can define the basic parameters of the on-screen menu (OSD). The first option concerns support for the subtitles. If the subtitles are turned on, the receiver will display them for channels that transmit such subtitles. By default, they are displayed in the language specified in the language selection menu for the subtitles. - Page 22 Note: only if the clock in standby mode is off the receiver draws less than 1W of energy!!! Radio Equalizer enables or disables the audio graphic equalizer display while listening to radio stations. Auto Standby run this option will automatically turn off the receiver after 3 hours of inactivity.
-
Page 23: Tools
13. Tools 13.1 Information In this menu you can obtain detailed information about your software version. The software structure is divided into a number of independent databases. The most important of these from the point of view of the user is the userdb, which archives current settings and channel lists. The receiver's software version is a symbol placed next to maincode. -
Page 24: Conditional Access
13.4 Conditional access In this menu you can obtain additional information about the subscriber's card in the card reader. The information presented depends on the type and version of your card. 13.5 Upgrade by USB This menu is used to update the receiver. The latest software is available on the manufacturer's website. -
Page 25: Upgrade By Network
13.7 Upgrade by network The receiver allows you to update software over the Internet. Detailed information about current connection parameters can be found on the manufacturer's website. -
Page 26: Games
14. Games The receiver has three factory-installed games: Tetris (classic arranging of successive levels using blocks of various shapes). • Othello (a logical game, which consists in the placement of your colour on a board and • changing your opponent's colour; the person whose colour dominates, wins). Sudoku (the game consists in completing diagrams with numbers from 1 to 9 in such a •... -
Page 27: Dvr Configuration
15.2 DVR configuration In this menu you can adapt preferences concerning recording to an external USB memory device. In the first option you decide whether you want to use the time shift option. This mode makes it possible to stop the current transmission at any moment by pressing the PAUSE button and resume it after a break by pressing the PLAY button. -
Page 28: Media Player
Select the event that you want to programme and press OK. Set the timer activation frequency. Select the channel (press OK to display the simplified channel list). Next set the date, start time and duration. Select ‘record’ to return to the events list. A new item has been added. 15.4 Media Player The receiver is equipped with a simple multimedia player. -
Page 29: Video
Video In this tab, you can play back movie files. Also high resolution files can also be played back. Recognized multimedia file extensions are listed below. Not all files with those extensions are playable - some files may include not supported codecs and/or settings. Video files containers: AVI, MKV, MPEG, MPG, M2TS, VOB, TS, TRP, MP4, DVR (default record format) -
Page 30: Recordings
Recordings This tab is used to play back recordings made using the receiver. Each recording may be blocked by a password, deleted, or its name changed. Options available during playback (subtitles, teletext, audio soundtracks) depend on the selected recording format!!! During playback, press the INFO button in order to display the information bar. -
Page 31: Edit Channels
16. Edit channels 16.1 TV channels list In this menu you can edit the list of television channels. Editing is effected by means of the coloured buttons on the remote control unit. The raised colour function is active - select OK on the selected channel in order to use it. -
Page 32: How Do I Delete A Channel
How do I delete a channel? Proceed to the editing of channel lists. Select a channel and press OK in order to see a preview in a small window. Press the blue button in order to pass to the channel edition menu. Press the blue button in order to switch on the channel delete function and OK on the channel that you want to remove. -
Page 33: How Do I Change A Channel Name
How do I change a channel name? Proceed to the editing of channel lists. Select a channel and press OK in order to see a preview in a small window. Press the blue button in order to pass to the channel edition menu. Press the green button in order to switch on the channel name change function. -
Page 34: Radio Channel List
16.2 Radio channel list In this menu you can edit the list of radio channels. Editing is effected by means of the coloured buttons on the remote control unit. The raised colour function is active - select OK on the selected channel in order to use it. -
Page 35: Basic Functions Supported By The Remote Control
In order to change a name, select the favourites group and press OK. Next use the numerical and coloured buttons to input the name. Confirm the changes by pressing the yellow button on the remote control. 17. Basic functions supported by the remote control 17.1 GUIDE This function displays a programme guide. -
Page 36: Txt - Teletext
17.3 TXT - teletext This function displays the teletext, provided that it is broadcast by the selected television station. Keep in mind that the correct code page (diacritical marks) is displayed depending on the language settings made in the language settings menu! 17.4 AUDIO The green audio button displays a window with available audio... -
Page 37: Rec - Recording
17.6 REC - recording This function is available only when an external USB memory device is correctly connected!!! 1. Select a channel and press the REC button. The present ● channel will now be recorded. 2. If you press the REC button again, a list of options will be displayed, where you can determine the duration of the recording (by default, this is 2 hours). -
Page 38: Pause - Time Shift
From the moment you switch on the time shift mode, the Ferguson receiver will constantly record the signal from the cable provider in a buffer. The buffer is created automatically on the external USB memory device. -
Page 39: Info
Recording the time shift buffer 1. This option is available only if previously switched on in the receiver's menu. 2. Switch on the time shift mode by pressing PAUSE. 3. Press REC in order to record the existing buffer and continue recording the channel. -
Page 40: Attachment A - Glossary Of Terms
ATTACHMENT A - GLOSSARY OF TERMS CA - Conditional Access – a coding system used in order to protect transmitted data against unauthorised access. Access protected channels is available only to subscribers. DVB-C - stands for Digital Video Broadcasting - Cable and it is the DVB European consortium standard for the broadcast transmission of digital television over cable. -
Page 41: Specification
SPECIFICATION 1.Main Chip Sets CPU frequency 400MHz Flash Memory 1PC 32Mbit/8Mbyte SPI FLASH SDRAM Memory 1PC 64MX16bit/128Mbyte DDR2 2.DVBS Tuner Tuner Type Onboard Tuner TDA18250HN Frequency Range 51 860MHz Input Impedance 44-90dBuV51MHz 860MHz full Band loop through Input Level Range Loop-Through 51MHz 860MHz full Band loop through 3.DVBS Channel Decoder...
Need help?
Do you have a question about the ARIVA 102 cable and is the answer not in the manual?
Questions and answers