Advertisement
Advertisement
Table of Contents

Summary of Contents for FLEET HOSTER RTR01-1000
- Page 1 Installation Guide Router RTR01-1000...
- Page 2 Auxiliary connection cables- In order to connect the router to your Auxiliary camera hardware, you’ll need the correct Cat6 Ethernet cable for the RTR01-1000 unit. These are available in varying lengths and should always be installed securely, with the connections protected from liquid intrusion. You can also use RJ45 to 4-pin cables when attaching the RTR01-1000 to 4-pin connectors of auxiliary cameras.
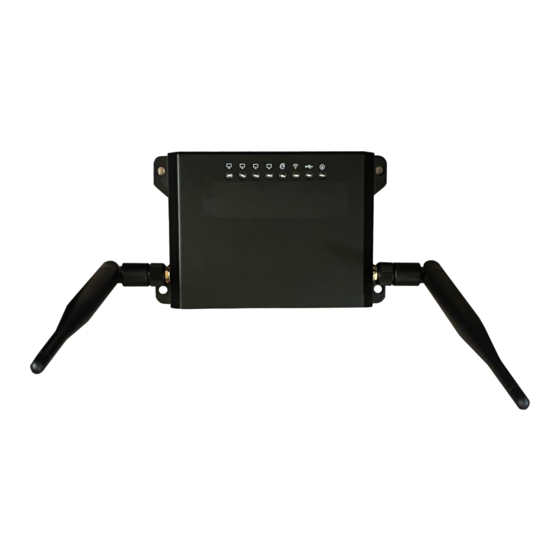
- Page 3 Installation Guide RTR01-1000 Installing the RTR01-1000: Take note of the SSID, MAC ID, and Password printed on the back of the router prior to installation. You will need this for the last step of the installation. 12v fused power supply cable The closer you can install your router to the primary camera, the better your connectivity reliability will be.
- Page 4 Removing the 3 Philips head screws from the outer protective shroud of the auxiliary camera will expose the primary mounting plate and camera angle adjustment screws. This allows for proper fastening to your surface. Please reinstall the shroud when fastening is complete.
- Page 5 Installation Guide RTR01-1000 Connecting auxiliary cameras to the router: Connect the auxiliary camera(s) to the router using weather-rated high speed ethernet cables of appropriate length. Each auxiliary camera should be connected directly to the router with the proper cable. Ensure that connection points are sealed to prevent water intrusion and protected from potential marring or damage.
- Page 6 Figure A1 Figure A2...
Need help?
Do you have a question about the RTR01-1000 and is the answer not in the manual?
Questions and answers