Advertisement
Quick Links
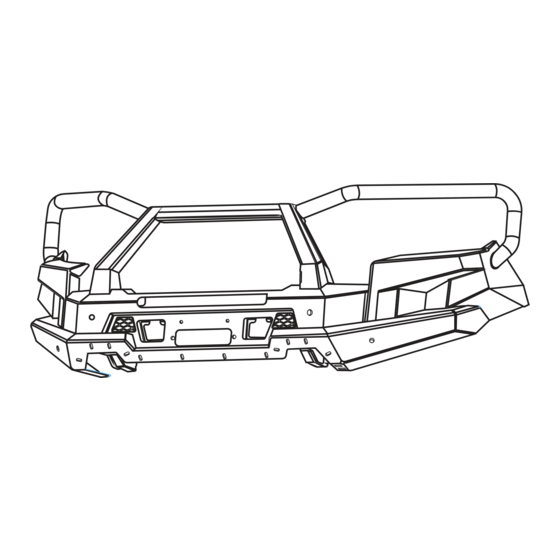
PEAK M1 NIGHTHAWK
Installation Manual
SSANGYONG MUSSO Q200/Q201/Q215/Q250
No Loop SYPEAK0419S / Single Loop SYPEAK0423S / Triple Loop SYPEAK0427S
IMPORTANT :
Bull Bar installations should only be done by a qualified person and it is the responsibility of this
person to ensure correct fitment
This Product Must Not Be Modified
Approx Install Time : 4Hrs
Advertisement

Summary of Contents for Perk PEAK M1 NIGHTHAWK
- Page 1 This Product Must Not Be Modified Approx Install Time : 4Hrs PEAK M1 NIGHTHAWK Installation Manual SSANGYONG MUSSO Q200/Q201/Q215/Q250 No Loop SYPEAK0419S / Single Loop SYPEAK0423S / Triple Loop SYPEAK0427S IMPORTANT : Bull Bar installations should only be done by a qualified person and it is the responsibility of this...
- Page 2 DISCLAIMER Important Notice Regarding Installation and Warranty Thank you for choosing the PEAK M1 NightHawk. This manual contains essential instructions for proper installation and usage. It is of utmost importance that you carefully read and follow these guidelines. Additionally, we want to emphasize the critical role of experience and expertise in installing this bull bar correctly.
- Page 3 Always ensure vehicle is properly supported when working on it. Do not attempt to fit products whilst supension work is being carried out.Do not work under a vehicle supported only by a jack. Vehicle Support Peak M1 Nighthawk Installation Manual...
-
Page 4: Supplied Hardware
This product or its xing must not be modi ed. Warranty void if label is removed. No accessory or tment shall project forword of this product’s forward pro le. Do OF THE RECOVERY POINT. not use this product on any other vehicle for which it is not designed. Peak M1 Nighthawk Installation Manual... - Page 5 04 M6 x 16 = 4 SET M6 x 16 = 8 SET Wing Support x 01 Front Grill Bracket x 02 M10 x 35-1.50 = 4 SET M6 x 20 = 4 SET Peak M1 Nighthawk Installation Manual...
- Page 6 M6 x 16 = 6 SET STEDI C4 Cube Flood Light x 02 Leather Key Case x 01 Sensor Wire Extensions Fog Light Adapter x 02 x 02 3m Sensor Mounting Tape x 05 Cable Ties x 10 Peak M1 Nighthawk Installation Manual...
- Page 7 Fold back on the rubber seal and place up the engine bay out of the way. Make sure to retain all original screws & bolts as some are to be re purposed for the install of this product. Peak M1 Nighthawk Installation Manual...
- Page 8 Using a Philips head, remove the vertically positioned retainer screw. Repeat for other side. 5. Unclip wheel arch garnish from bumper portion, Unscrew & remove factory bash plate. Peak M1 Nighthawk Installation Manual...
- Page 9 8. Using a Phillips head screwdriver remove plastic bumper retaining brackets from the quarter panels on both sides. 9. Unbolt power steering cooler lines from center reinforcement. 10. Unbolt and remove center reinforcement. Peak M1 Nighthawk Installation Manual...
- Page 10 11. To prevent any damage during the bar installation, take precautionary measures by taping up the headlights and quarter panels. 12. Trim body panel as per photo and cover exposed areas with epoxy based rust resistant paint. Peak M1 Nighthawk Installation Manual...
- Page 11 1. Remove all 4 sensors from their cradles and set aside. 2. Remove Sensor cradles. Outer ones are plastic welded to the bar. Using a narrow scraper or screw driver carefully break the plastic welds. Center ones are held in by two screws each. Peak M1 Nighthawk Installation Manual...
- Page 12 Cut Line Cut Line 4. Clean outer sensor cradles with alcohol and apply provided 3M tape. Reinsert the sensor and set aside. 5. Unclip grill from bumper bar and tape up along cut line. Cut Line Peak M1 Nighthawk Installation Manual...
- Page 13 Cut Line 6. Cut grill along cut line with air hacksaw and clean up all cut edges. 7. Tape up plastic wheel arch garnish and trim flush with the end of the quarter panel. Peak M1 Nighthawk Installation Manual...
- Page 14 2x recovery point warning labels on the outer side of each recovery point. Warranty will be voided immediately if the compliance plate & two warning labels are not correctly applied and installed in their designated positions. Peak M1 Nighthawk Installation Manual...
- Page 15 BOLT SPRING WASHER WASHER Be sure to face the rubber isolator plate with the rubber facing down. Use 1 or 2 supplied washers between the isolator and the bull bar bracket to allow enough clearance. Peak M1 Nighthawk Installation Manual...
- Page 16 5. Place parking sensors & cradle down into position. Once you have positioned the sensor & cradle, lock in with metal bracket by way of tightening 2x m6 bolts. 6. Connect wiring harness to each sensor. Peak M1 Nighthawk Installation Manual...
- Page 17 7. Using supplied adaptors, connect STEDI lights to the wiring loom. 8. Install wing support brackets to bull bar using 1x M10x1.5, 2x flat washers and nylon nut. Peak M1 Nighthawk Installation Manual...
- Page 18 11. Install 16x M6 cage nuts to square cut outs in bar & Install 2x M6 Cage nuts in center for number plate bracket. 12. Affix base plate of number plate bracket to bar using 2x M6x16 bolts. Peak M1 Nighthawk Installation Manual...
- Page 19 Part 4 Bull Bar Installation 1. Tape up headlights and quarter panels to prevent damage when installing bar. Peak M1 Nighthawk Installation Manual...
- Page 20 2. Tape up recovery points on chassis mounts before mounting to vehicle. 3. Affix top part of grill bracket to the bottom headlight screw. Peak M1 Nighthawk Installation Manual...
- Page 21 6xM12x1.5 bolts, M12 woshers and nylon nuts on each side and tighten. 6. Retain lower chassis mount point using supplied crush tubes and M12x120 bolts, M12 wosher for the front and square washer for the rear. Peak M1 Nighthawk Installation Manual...
- Page 22 7. Install the winch cradle/bar mount to the chassis mount using 6x M10x1.5 bolts, M10 washers and nylon nuts per side making sure it is central on the mount, leave these bolts finger tight as cradle might need to be adjusted once the bar is on. Peak M1 Nighthawk Installation Manual...
- Page 23 ANY body mounted parts/ faces. Ensure that • A minimum 25mm gap where the bar meets the quarter panel • Adequate clearance from the bar and body mounted parts is retained Peak M1 Nighthawk Installation Manual...
- Page 24 11. Once correct position is achieved tighten all 6 bolts. 12. Screw bottom grill bracket to grill mounting point from original inner sensor cradle using 2x Phillips head screws from parts bin. Peak M1 Nighthawk Installation Manual...
- Page 25 13. Mount the other side of wing support bracket to chassis mount using 1x M10x1.5, 2x flat washers and nylon nut. Peak M1 Nighthawk Installation Manual...
- Page 26 19. Trim the inner guards to suit the profile of the bar, rest inner guard up to bar and trace profile on to the plastic and trim with ait hacksaw or snips . 20. Affix top part of number plate bracket using M6x16 bolts. 21. Test fog lights and sensors. Peak M1 Nighthawk Installation Manual...
- Page 27 M1 Nighthawk by PEAK www. p eak4x4 .co m . a u info @p ea k4x4 .co m . a u...
Need help?
Do you have a question about the PEAK M1 NIGHTHAWK and is the answer not in the manual?
Questions and answers