
Related Manuals for IPG Photonics LightWELD

Summary of Contents for IPG Photonics LightWELD
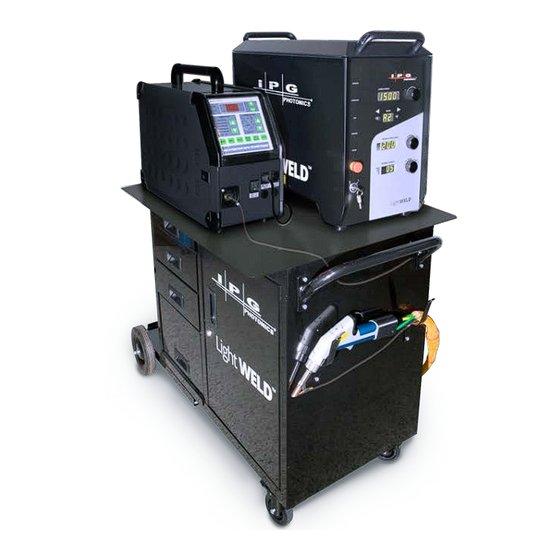
- Page 1 LightWELD Wire Feeder SET-UP GUIDE DOCCHUGMPSEN0005 Version: 1.0 Release Date:2/16/2022...
- Page 2 DISCLAIMER NOTICE Copyright © 2016-2021 IPG Photonics Corporation. All rights reserved. You may not copy, reproduce, transmit, store in a retrieval system or adapt this publication, in any form, in any media or by any means, without the prior written permission of IPG Photonics Corporation (IPG), except as allowed under applicable copyright laws.
-
Page 3: Table Of Contents
Step 3: Install the Spool Step 4: Adjust the Wire and Secure the Drive Rolls Step 5: Feed the Wire Step 6: Syncing the Wire Feeder Unit and the LightWELD Step 7: Attach Adapter to Weld Head Presets Wire Feeder Interface Overview... -
Page 4: Getting Started
This guide describes the parts included in theLightWELD WireFeeder Kit, descriptions about the hard wire and soft wire configurations, how to install the wire into the feeder through the nozzle tip, and instruction to synch with the LightWELD. VIDEO: Part 1 - Getting Started Configuration Options Refer to the sections below to determine the appropriate components for your application. -
Page 5: Soft Wire Configuration
1 Getting Started Soft Wire Configuration Use the soft wire configuration for welding with Corresponding Part Number Aluminum wire or other very soft materials. Wire Diameter U-Drive Roll Requires U-Drive Rolls, Teflon Liners, and 0.030”-0.035” 0.28'' (7mm) Extension. CMMIXXX0002723PX (0.8-0.9mm) 0.047”-0.063”... -
Page 6: Drive Rolls
Groove dimensions are indicated on the face opposite of the groove. When loading the drive rolls into the drive mechanism, ensure the desired groove markings are facing out. Once installed, the visible markings indicate the groove size that is currently in use. LightWELD Wire Feeder Set-Up Guide... -
Page 7: Assembling The Wire Feeder Attachment
1 Getting Started Assembling the Wire Feeder Attachment Once the components (Drive Rolls, Liner, Contact Tip, and Extension) have been selected according to the application, the wire feeder unit and equipment can be assembled. VIDEO: Part 2 - Assembly Step 1: Prepare the Liner and Housing Tube Insert the Liner into the Housing Tube and feed it through, until about an inch (25.4mm) of liner extends out from the tube. -
Page 8: Step 2: Connect The Weld Head Adapter And Components
Tighten the Nut on the Weld Head Adapter using a 12mm wrench. Push the Housing Tube over the barbed end of the Nut. Move the housing tube back and forth while simultaneously pushing, until it is flush with the nut. LightWELD Wire Feeder Set-Up Guide... -
Page 9: Step 3: Connecting The Wire Feeder Adapter And Components
The photo below is what will be referred to as the Wire Feeder Attachment. This connects the Wire Feeder Unit to the LightWELD Weld Head. The Wire Feeder Attachment can be disassembled and reassembled according to the hard or soft wire configurations. -
Page 10: Setting Up The Wire Feeder Unit
The groove size corresponds with the wire diameter. The groove sizes are marked on the faces of the drive rolls. Insert the Drive Rolls into the drive roll mechanism, with the desired groove label facing outward. LightWELD Wire Feeder Set-Up Guide... - Page 11 1 Getting Started Screw the Drive Roll Caps on to secure the drive rolls.
-
Page 12: Step 2: Connect The Wire Feeder Attachment To The Unit
Locate the Wire Feeder Attachment. Insert the Wire Feeder Adapter into the wire feeder unit as far as possible without it touching the drive roll. Warning: There should be a slight space between the adapter and drive roll to ensure it does not get scratched and worn out. LightWELD Wire Feeder Set-Up Guide... - Page 13 1 Getting Started Using a Phillips Head Screwdriver, tighten the set screw to secure the connection between the wire feeder attachment and wire feeder unit.
-
Page 14: Step 3: Install The Spool
Unscrew the plastic Spool Cap. Insert the corresponding Wire Spool for your application. Ensure the spool is installed so the wire will feed from the bottom. Screw the Spool Cap back on to secure the wire spool. LightWELD Wire Feeder Set-Up Guide... -
Page 15: Step 4: Adjust The Wire And Secure The Drive Rolls
1 Getting Started Step 4: Adjust the Wire and Secure the Drive Rolls Locate the start of the wire. The start of the wire is usually tied off on the outer panels of the spool. Note: Maintain tension on the wire to prevent the spool from unraveling. Remove the start of the wire from the spool. - Page 16 Ensure that the wire is pushed into the correct grooves, which are furthest from you. The outward face of the drive roll will have the size of the groove labeled on it. LightWELD Wire Feeder Set-Up Guide...
- Page 17 1 Getting Started Secure the wire by pushing the drive roll covers down (1) and pushing the knobs back up into place (2). Note: The tension on the wire can be adjusted by twisting the knobs on the drive roll mechanism. For example, if the wire is slipping then you will need to tighten.
-
Page 18: Step 5: Feed The Wire
Wire Feeder Attachment is straightened across floor Unscrew the Contact Tip from the Weld Head Adapter. This is to prevent any potential jamming on the initial feed. LightWELD Wire Feeder Set-Up Guide... - Page 19 1 Getting Started Press the ‘Manual Feed’ Button to feed the wire through the Wire Feeder Attachment until it comes out of the Weld Head Adapter. Continue to manual feed until about 2” (50.8 mm) of the wire is exposed. Then, screw the Contact Tip back into the Weld Head Adapter.
-
Page 20: Step 6: Syncing The Wire Feeder Unit And The Lightweld
Attach the Synch Cable to the 'TORCH' port located on the front of the Wire Feeder. Connect the synch cable wires to the 12-pin I/O connector on the back of the LightWELD unit as shown below. Ensure the wires are attached to pins 9 & 10. -
Page 21: Step 7: Attach Adapter To Weld Head
After the wire feeder tip assembly is complete and the synch cable is attached, the wire tip assembly can be added to the weld head from the LightWELD. Connect the Grooved Nozzle tip, proper size Extension for configuration, and 2.283’’... - Page 22 Too much tension of the wire against the grooved tip will feed the wire in a curved pattern. To fix this adjust the Weld Head Adapter’s positioning on the 2.283'' (58mm) tube. LightWELD Wire Feeder Set-Up Guide...
- Page 23 1 Getting Started Ensure the guide beam is centered. If the guide beam is off center, it needs to be adjusted at the LightWELD Interface. See "Centering the Guide Beam " on page 23 for instructions. Use wire cutters to trim the wire where it intersects the guide beam to remove excess wire if...
-
Page 24: Presets
Wire Feeder Interface Overview Set wire feed speed for the welding job on the wire feeder interface panel, referring to the Mode Table Chart attached to the LightWELD as a guide. Be sure to enter the corresponding program on the (DOCCHRDMPSXX0025) LightWELD unit before starting a job in order to calibrate the laser. -
Page 25: Lightweld Interface Overview
1 Getting Started LightWELD Interface Overview The LightWELD program/mode should match the wire feed rate setting of the Wire Feeder. Refer to Mode Table Chart for recommended presets. (DOCCHRDMPSXX0025) Find IPG recommended wire welding programs on the Mode Sheet attached to the (DOCCHRDMPSXX0025) LightWELD. - Page 26 ) to move the guide beam to the right. terclockwise ( ) to move the guide beam left. To save the beam position, press and hold Both Buttons simultaneously for 3 seconds. Once the display stops blinking the program is saved. LightWELD Wire Feeder Set-Up Guide...
-
Page 27: Ready To Weld
1 Getting Started Ready to Weld Once the wire feeder is setup and the desired settings are entered, the LightWELD is ready for use. Weld Head Overview Please refer to the LightWELD User Guide for more details and safety descriptions. Feature... -
Page 28: Welding Process Overview
Visit us online for more resources about using the LightWELD: LightWELD 1500 Portal Download PDF manuals and view videos about how to setup and use your LightWELD devices, including the wire feeder and LightWELD 1500. This portal requires a registered serial number for your machine. -
Page 29: Replacement Parts
2 Replacement Parts 2 Replacement Parts Visit the IPG Web Shop to order parts 24/7: IPG Photonics Shop Wire Feeder Assembly Item # Part Number Part Name QTY. DOCCHUGMPSEN0005 GUIDE CMMIXXX0003694PX WIRE FEEDER UNIT CEU0000305710MXU SYNCH CABLE LightWELD Wire Feeder Set-Up Guide... -
Page 30: Adapter Nozzle Assembly
2 Replacement Parts Adapter Nozzle Assembly Item # Part Number Part Name QTY. CMUS0010223XXXXU WELD HEAD ADAPTER P40-009401 SCREW CMUS0008398002XU GROOVED NOZZLE TIP CMUS0010359XXXXU 0.28'' (7mm) EXTENSION CMUS0008377XXXXU 0.4'' (10mm) EXTENSION CMUS0008259XXXXU 2.283'' (58mm) TUBE CMUS0010224XXXXU CMUS0010225XXXXU WIRE FEEDER ADAPTER CMMIXXX0002848PX HOUSING TUBE ... -
Page 31: Contact Tip
0.047'' (1.2mm) CONTACT TIP CMUS0010319XXXXU 0.063'' (1.6mm) CONTACT TIP Drive Roll Item # Part Number Part Name QTY. CMMIXXX0002723PX 0.030”-0.035” (0.8-0.9mm) U-DRIVE ROLL CMMIXXX0002722PX 0.047''-0.063'' (1.2-1.6mm) U-DRIVE ROLL CMMIXXX0002838PX 0.030”-0.035” (0.8-0.9mm) V-DRIVE ROLL CMMIXXX0002839PX 0.045''-0.063'' (1.1-1.6mm) V-DRIVE ROLL LightWELD Wire Feeder Set-Up Guide... -
Page 32: Liner
2 Replacement Parts Liner Item # Part Number Part Name QTY. CMUS0010362X01XU ORANGE TEFLON LINER CMUS0010362X02XU TURQUOISE TEFLON LINER CMUS0010363X01XU 0.030''-0.045'' (0.8-1.1mm) STEEL LINER CMUS0010363X02XU 0.045''-0.063'' (1.1-1.6mm) STEEL LINER... -
Page 33: Wire Configuration Kits
HOUSING TUBE CMUS0008259XXXXU 2.283'' (58mm) TUBE CMUS0008398002XU GROOVED NOZZLE TIP CMUS0010223XXXXU WELD HEAD ADAPTER CMUS0010224XXXXU CMUS0010225XXXXU WIRE FEEDER ADAPTER P40-009401 SCREW CMUS0011444XXXXU 0.030'' (0.8mm) CONTACT TIP CMUS0011445XXXXU 0.035'' (0.9mm) CONTACT TIP CMUS0011446XXXXU 0.047'' (1.2mm) CONTACT TIP CMUS0010319XXXXU 0.063'' (1.6mm) CONTACT TIP LightWELD Wire Feeder Set-Up Guide... -
Page 34: Soft Wire Kit - Ceu00003658Xxxxu
2 Replacement Parts Soft Wire Kit - CEU00003658XXXXU Item # Part Number Part Name QTY. CMMIXXX0002723PX 0.030”-0.035” (0.8-0.9mm) U-DRIVE ROLL CMMIXXX0002722PX 0.047''-0.063'' (1.2-1.6mm) U-DRIVE ROLL CMUS0010359XXXXU 0.28'' (7mm) EXTENSION CMUS0010362X01XU ORANGE TEFLON LINER CMUS0010362X02XU TURQUOISE TEFLON LINER CMMIXXX0002848PX HOUSING TUBE CMUS0008259XXXXU 2.283'' (58mm) TUBE CMUS0008398002XU GROOVED NOZZLE TIP CMUS0010223XXXXU... -
Page 35: Reference Videos
3 Reference Videos 3 Reference Videos Part 1 - Getting Started Part 2 - Assembly Part 3 - Process Development LightWELD Wire Feeder Set-Up Guide...
Need help?
Do you have a question about the LightWELD and is the answer not in the manual?
Questions and answers
How do u bypass interlock
The interlock on IPG Photonics LightWELD is engaged by touching the wire and nozzle to the workpiece, which allows the laser to be activated. There is no information in the provided context about bypassing the interlock.
This answer is automatically generated
@Martin Best
@Martin Best cheers