Advertisement
Westin Escape Cam user manual
Congratulations on your purchase of our Westin Escape Cam! Before you start using it, we kindly ask
you to take a few moments to read this user manual.
3 Tubes
Escape Cam
8 g. weight insert
Y-Fin
First remove the end cap by twisting it counterclockwise. Use the Cap Tool if it is hard to turn. To avoid
damage please do not use your teeth or any random tools.
ON/OFF button
It is operated by turning
the end cap only.
LED light
Status indication for
charging. Located be-
hind the back plate.
1. What´s in the box?
Dive Lip
2. Under the end cap
Micro sd card slot
Insert a quality brand
micro sd card up till
256GB.
Cap Tool
USB-C port
For charging and data
transfer.
LED light
Status indication for
charging. Located be-
hind the back plate.
Accessory Box
Spare O-ring
3 Tube beads
3 Quick-change swivels
3 Anti tangle tubes
On The Go USB-C
Micro sd card reader
On The Go Lightning
Micro sd card reader
Advertisement
Table of Contents

Summary of Contents for Westin Escape Cam
- Page 1 Westin Escape Cam user manual Congratulations on your purchase of our Westin Escape Cam! Before you start using it, we kindly ask you to take a few moments to read this user manual. 1. What´s in the box? Accessory Box...
- Page 2 3. How to record video Before first time use, please follow these steps: 1. Make sure the cameras battery is fully charged. Do this by removing the end cap and inserting the USB-cable in the USB-C port on the back of the camera and connecting it to a suitable charger. The camera will boot up showing a series of flashes and then a solid blue light will indicate the camera is charging.
- Page 3 4. LED Lights explained The camera has two LED lights one in each side. They are visible through the end cap. Status LED for Status LED for charging camera Charging the camera The camera led will flash red indicating that the camera is booting up. The charging LED will display a solid blue light during charging.
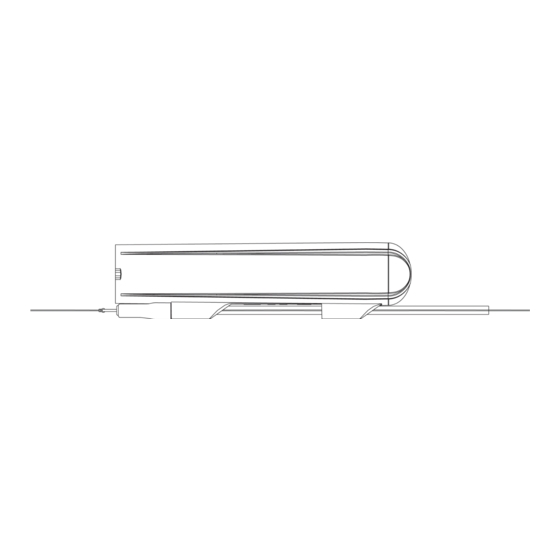
- Page 4 5. Basic mounting of the camera 1. The tube end with the rim is pushed into the tube bead until it clicks in place. This only needs to be done once. Section view 2. Thread your mainline through the tube guides on the camera. Then thread the mainline through the tube and tube bead.
-
Page 5: Camera Mounting
6 Camera mounting It can be time saving, and more practical to make a setup where there also is a swivel behind the camera. Used this way it is just a matter of tying a single knot, and the camera is ready to use. It is also useful when there is a risk of fish biting the camera where a longer lenght of wire will combat the risk of the line being bit off by a fish.The choice of material and the length of it can be optimized to fit the fishing situation. - Page 6 7. How and when to use the Dive Lip The Dive Lip makes the camera dive and keeps it underwater during retrieve, much like the lip on a lure. It is mounted on the rear end of the camera and can be used on it´s own or in combination with the Y-Fin. When mounted on it´s own it makes the camera go deeper than when used together with the Y-Fin.
- Page 7 8. How and when to use the Y-fin The Y-fin keeps the camera stable. This is especially true when using bigger lures or lures with an aggressive movement. When fishing at higher speeds is advisable to add the fin in order to get stable videos. It is mounted on the front end of the camera and can be used on it´s own or in combination with the Dive Lip.
- Page 8 9. View and share your videos On The Go In the box are two On The Go micro sd card readers. One is a lightning type that fits Apple iPhones and iPads. The other is a USB-C that fits Android phones and tablets. It can also be used for Windows and Mac computers. Important! All the below information may change when the operating system on a device is updated! To get the most correct information do a web search for “how to use OTG card reader on (insert device name)”...
-
Page 9: Changing The Camera Settings
10. Connect the camera to a PC You can also connect the camera directly to a PC with the supplied cable. Once the camera is recognized by your PC, you should be able to access the sd card’s contents. You can usually find it in the File Explorer (Windows) or Finder (macOS) under “This PC”... -
Page 10: Camera Specifications
14. Camera specifications Weight 40 g. /1.4 oz Dimensions 106x22x27mm 4.2 x 0.9 x 1.1inch Video resolution 1080p full HD Video frame rate 30 or 60 fps Depth rating 200m / 650 feet Battery life 2.5 Hours in 30 fps (20°C / 68F) Battery capacity 4,35V / 720 mAh Power supply...
Need help?
Do you have a question about the Escape Cam and is the answer not in the manual?
Questions and answers