
Related Manuals for SELFSAT MWR 5550


Summary of Contents for SELFSAT MWR 5550
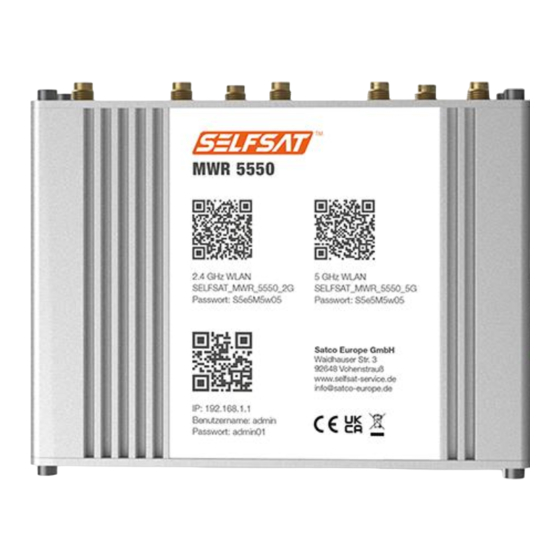
- Page 1 SELFSAT MWR 5550 4G / LTE / 5G & WiFi internet router set with up to 3,3 Gbps incl. 5G roof antenna Installation and User Manual...
-
Page 3: Table Of Contents
Contents 1. General Information 1.1 Intended use 1.2 Safety instructions 2. Installation 2.1 Scope of supply 2.2 Optional accessories and spare parts available 2.3 Connections, signals and controls 2.4 Installation of external antenna 2.5 Installation of router 2.6 Connecting the external antenna with the router 2.7 Connecting the WiFi inside antenna with the router 3. -
Page 4: General Information
1. General Information Thank you for selecting the SELFSAT MWR 5550 Internet Router Set. Please carefully read this user guid before installing and starting up the product. Follow the described steps when operating the user interface of your internet router accordingly. -
Page 5: Safety Instructions
1.2 Safety instructions Please handle the product and its accessories with care and protect them from moisture and dust. The product and its accessories contain small parts. Make sure that small children do not have access to it, so as not to swallow it or injure themselves on Mount the router only in places where sufficient heat dissipation or ventilation can take place, since the product may heat up. -
Page 6: Installation
2 SIM card adapters for Micro SIM or Nano SIM to Mini SIM incl. SIM card removal tool 1,5 m Ethernet cable SELFSAT external antenna (see front page for picture) Thread extension WiFi interior antenna Hook-and-loop self-adhesive dots for the WiFi interior antenna... -
Page 7: Optional Accessories And Spare Parts Available
D) Surface montage-Kit E) 2 SIM card adapters E) 1,5 m Ethernet cable for Micro SIM or Nano SIM to Mini SIM incl. SIM tray removal tool H) Thread extension I) WiFi interior antenna J) Hook-and-loop self- adhesive dots for WiFi interior antenna 2.2 Optional accessories and spare parts available: - Roof mounting plate for external antenna (art. - Page 8 - 12 Volts DC car power supply (art. no. 13841) - EU 2-pin power supply 100 – 240 Volts AC (art. no. 13843) - WiFi interior antenna (art. no. 13848) - 1,5 m Ethernet cable (art. no. 13842) - 2 SIM card adapters incl. SIM tray removal tool (art. no. 13846) - Thread extension (art.
-
Page 9: Connections, Signals And Controls
2.3 Connections, signals and controls Upside Downside Assignment power connector... -
Page 10: Installation Of External Antenna
1 m: 13826; SELFSAT item number 2 m: 13827). The roof mounting plate including roof cable entry gland is also available as a set with the 1 m extension cable (SELFSAT item number: 13831) or as a set with the 2 m extension cable (SELFSAT item number: 13832). - Page 11 When mounting on a somewhat thicker, so-called sandwich roof, you usually need the thread extension included in the scope of delivery in order to screw the external antenna inside the vehicle and to insert the antenna cable into the interior of the mobile home or caravan. In this case, you must drill a 3.5 cm hole in the sandwich roof in a suitable position (preferably directly above the spot where you want to mount the router later, e.g.
-
Page 12: Installation Of Router
If the thread extension is screwed onto the antenna thread, the total length of the screw connection is 6.5 cm. 2.5 Installation of router The scope of delivery includes a surface mounting kit for attaching the router to a suitable location inside your motor home or caravan. Before connecting the external antenna to the router, attach the two mounting kit plates to the router using the screws provided. -
Page 13: Connecting The External Antenna With The Router
2.6 Connecting the external antenna with the router The router's external antenna is equipped with several individual antennas inside and can be used with all SELFSAT MWR routers. Therefore it has 6 antenna cables. 1 cable for WiFi, 4 cables for cellular and 1 cable for GPS. -
Page 14: Connecting The Wifi Inside Antenna With The Router
2.7 Connecting the WiFi inside antenna with the router Connect the indoor WiFi antenna to the router. To do this, use the connection marked red in the "Upside" connection sketch. The WiFi antenna has a magnetic base. If you have a magnetic surface inside your motorhome or caravan, you can attach the internal WiFi antenna there. -
Page 15: Starting Up
3. Starting up Connect the router to the power supply using the 12 volt cigarette lighter cable or the 100 – 240 volt EU power adapter. If there is no permanent power supply on the socket for the 12 volt cigarette lighter cable, please switch on the ignition of your vehicle. -
Page 16: Connecting With The Wifi Of The Router
3.1 Connecting with the WiFi of the router You can connect with the longer range 2.4 GHz WiFi or with the more stable and faster 5 GHz WiFi (recommended) of the router. You have the option to connect to the router’s WiFi by using one of the QR codes printed on the router the first time, or to search the router’s WiFi networks and connect manually with a password using your smartphone, tablet, laptop or smart TV in their settings. - Page 17 Alternatively, you can also use the QR codes shown here: 2.4 GHz WiFi 5 GHz WiFi (SELFSAT_MWR_5550_2G) (SELFSAT_MWR_5550_5G) Your smartphone or tablet will now connect to the router. You can close the QR code app or the camera function. As soon as the connection is established, you can recognize it in your display with the appearing WiFi signal logo.
-
Page 18: Accessing The User Interface Of The Router
3.2 Accessing the user interface of the router You have two options to open the router's user interface. With the smartphone or tablet by using a QR code To do this, open a QR code scanner app again on your smartphone or tablet and hold the camera over the lower QR code for the IP address. - Page 19 The login screen for the router's user interface will now open in your web browser. Please enter Benutzername: admin (please pay attention to the small first letter) Passwort: admin01 and press „ANMELDEN“. The user interface then switches to the settings page. PLEASE ALWAYS ALLOW YOUR ROUTER SUFFICIENT TIME TO CARRY OUT THE CHANGES AFTER ENTERING OR CLICKING,...
- Page 20 The user interface opens where you can select a language by clicking on the button with the flag. In order to be able to offer you the SELFSAT routers at an attractive price, the SELFSAT routers of a model series are all delivered with the same passwords ex works.
- Page 21 Please note that the password for the WiFi network must consist of 8 to 32 characters. You can display your entries by tapping the eye symbol. Pressing the eye symbol again hides the password again. Make a note of your passwords, you will need them to register other devices on your router and to open the user interface again.
- Page 22 The 2.4 GHz WiFi (SELFSAT_MWR_5550_2G) and the 5 GHz WiFi (SELFSAT _MWR_5550_5G) of your router is displayed there. Select the SELFSAT WiFi network you want to connect with (2.4 GHz or 5 GHz). Your smartphone, tablet or laptop should now tell you after a while that the WiFi password is incorrect and asks you to enter the correct, new, personal WiFi password that you have just assigned.
- Page 23 This WiFi network is then displayed again as a new WiFi network in the WiFi settings. You can now reconnect to the 2.4 GHz WiFi (SELFSAT_MWR_5550_2G) or the 5 GHz WiFi (SELFSAT_MWR_5550_5G) of your router. When asked for the password, enter the new, personal WiFi password that you have just assigned. Now you can open the user interface again via the QR code on the right on your router or by entering the IP address 192.168.1.1 in the input bar of the browser of your smartphone, tablet or laptop.
-
Page 24: Connecting With A Wifi
Alternatively, you can create a bookmark in your Internet browser or save the login page of the user interface as a favorite. Now log in with the user name admin and your personal router password that you previously assigned in the router's user interface. 3.3 Connecting with a WiFi Please always use the "Connect"... - Page 25 In the "WiFi" field, press "Scan for WiFi". The router now searches for available WiFi networks. The SELFSAT routers always search for a 2.4 GHz WiFi network. The available WiFi networks are then displayed. Select the desired WiFi network, enter its password and press the "Connect" button. If no password is...
- Page 26 If you press the eye icon, you can view the entered password. Pressing the eye symbol again hides the password again. If you have accidentally selected a WiFi, you can close the input window for the password by pressing the cross at the top right. You can return to the main interface page by pressing the house icon in the top right corner.
-
Page 27: Using A Sim Card
In the case of a WiFi with a login page (captive portal), you must now enter selfsat-service.com in the address line (preferably in a new browser window). The WiFi login page is then displayed, where you can e. g. agree to the terms of use and can then use websites or apps. - Page 28 use one of the two matching SIM card adapters that are included in the scope of delivery. If you had already inserted the SIM card before connecting the router to the power supply, it is now necessary to enter the PIN of the SIM card for the first time.
- Page 29 short time the connection status in the "SIM" field is displayed (green: connected; orange: disconnected).
-
Page 30: Using A Second Sim Card Or A Foreign Sim Card
There is now a connection to the internet and all devices and their apps or programs that you have connected to your router via WiFi or LAN cable can be used and access the internet like at home or in a hotel. If you press "Logout"... - Page 31 If you did not insert the second SIM card before connecting the router to the power supply, but only now, press "Switch SIM" in the "SIM" field. The change is completed when "SIM 2" is displayed in the "SIM" field. If the display persists after a long time after pressing "Switch SIM"...
- Page 33 If you have already inserted the 2nd SIM card before connecting the router to the power supply, now press "Switch SIM" in the "SIM" field. The display changes to "Loading SIM". "SIM 2" will then appear in the "SIM" field. If the display persists after a long time after pressing "Switch SIM"...
- Page 35 There is now a connection to the internet and all devices and their apps or programs that you have connected to your router via WiFi or LAN cable can be used and access the internet like at home or in a hotel. If you press "Logout"...
-
Page 36: Connecting Devices To Lan By Ethernet Cable
3.6 Connecting devices to LAN by Ethernet cable Your router has 4 LAN ports on the underside. Here you can e. g. connect a laptop, a Smart TV or a games console directly. To do this, use the Ethernet cable supplied and plug it into a LAN socket on the router. -
Page 37: Resetting The Router To Factory Settings
In both cases, the router restarts. 5.2 Resetting the router to factory settings Should it ever be necessary to reset your router to factory settings (e.g. because you are selling your motor home or caravan), use the SIM slot needle (included in delivery) and insert it in the place marked RESET on the underside of your router and press the button behind it for at least 11... -
Page 38: Technical Specifications
6. Technical specifications... -
Page 39: Disposal Information
If you require service, please use the contact details given on the back. 9. Conformity We hereby declare that the product complies with Directive 2014/53/EU (RED). You can download the complete CE declaration of conformity here: https://www.selfsat-service.de/ce-documents... - Page 40 Satco Europe GmbH Waidhauser Str. 3 92648 Vohenstrauss Germany Phone: +49 9651 / 924248 – 0 Email: info@satco-europe.de Web: www.satco-europe.de Technical changes and errors reserved Version E02/2023...
Need help?
Do you have a question about the MWR 5550 and is the answer not in the manual?
Questions and answers