
Related Manuals for Espedeo Supra Supra-5000

Summary of Contents for Espedeo Supra Supra-5000
- Page 1 Supra-5000 Digital Cinema and Secured Media Projection System Installation Manual August 02 , 2023 Before installing and operating the projector unit, please read this Installation Manual thoroughly...
-
Page 2: Table Of Contents
Strong / Weak Power Cabling (Power cord, signal cable, network cable, TMS, SMS automation system cabling) ............................31 4.2. Tools required for Installation ................. 32 Espedeo Supra-5000 Digital Cinema and Secured Media Projection System August 02 , 2023 - 2 -... - Page 3 Powering Up the Espedeo Supra-5000 ............36 5.1. Starting the Projector ....................36 5.2. Controlling and Operating the Espedeo Supra-5000 ..........36 5.3. Overview of Supra Command Center Home Screen ..........37 Switching ON the Laser Light Source ..................... 39 Projecting a Test Pattern .......................
- Page 4 11.5. Assembly and Installation ..................103 Height Adjustment ........................113 12. Testing Procedures after Installation ............115 13. Maintenance ..................116 13.1. Preventive Maintenance Recommendations ............116 Espedeo Supra-5000 Digital Cinema and Secured Media Projection System August 02 , 2023 - 4 - Installation Manual...
- Page 5 14. Switching Off the Espedeo Supra-5000 ........... 117 15. Projector Specifications ................118 15.1. Projector Dimensions .................... 118 15.2. Projector Base Dimensions ..................118 15.3. Certifications......................119 Espedeo Supra-5000 Digital Cinema and Secured Media Projection System August 02 , 2023 - 5 - Installation Manual...
- Page 6 Media Projection System from Espedeo Holdings Ltd. To ensure proper operation and to maximize the value of the Espedeo Supra-5000 Digital Cinema and Secured Media Projection System, please review this Manual. It will guide you through all the features and benefits of the Espedeo Supra-5000 Digital Cinema and Secured Media Projection System.
-
Page 7: About This Manual
1.1. Using this Manual We highly recommend that you read this manual before you install and operate the Espedeo Supra-5000 Digital Cinema and Secured Media Projection System. Within this manual, you will find important information regarding safety, installation, maintenance and other important notes which need to be considered while handling and using this unit. -
Page 8: Safety
A person must use a specific tool, lock or key or take other safety measures to access this area. Additionally, access to this area is controlled by the specified agency. Espedeo Supra-5000 Digital Cinema and Secured Media Projection System August 02... -
Page 9: Laser Safety Precautions
▪ Any operation or adjustment not specifically instructed by the Espedeo Supra-5000 Manuals creates the risk of hazardous laser radiation exposure. ▪... -
Page 10: Important Safety Instructions
This protects the projector from being damaged by a lightning strike or AC wire surge. WARNING: A large current leakage may occur. Therefore, the projector must be grounded properly before it is powered ON. Espedeo Supra-5000 Digital Cinema and Secured Media Projection System August 02 , 2023 - 10 -... -
Page 11: Preventing Fire
This is a Class A device that may cause radio interference in a residential environment. In such conditions, the user may need to take practical countermeasures against interference. Espedeo Supra-5000 Digital Cinema and Secured Media Projection System August 02 , 2023... -
Page 12: Preventing Damage To The Projector
Improper grounding, wiring or incorrect use of the projector will result in electric shock. Ground Protection: The equipment shall be connected to a grounded power socket. Before connecting the power supply, check the high-leakage current and ground cable. Espedeo Supra-5000 Digital Cinema and Secured Media Projection System August 02 , 2023... -
Page 13: About Repair
Unauthorized alternatives may result in deteriorated performance and stability, causing fire, electric shock or other hazards. Unapproved alternatives may void the warranty of the projector. Espedeo Supra-5000 Digital Cinema and Secured Media Projection System August 02 , 2023... -
Page 14: Content Of Hazardous Substances
Espedeo Holdings LLC is committed to the quality and safety of our products and consumers and we comply with necessary government requirements accordingly. For more information go to www.P65Warnings.ca.gov. Espedeo Supra-5000 Digital Cinema and Secured Media Projection System August 02 , 2023... -
Page 15: Product Safety Labels
Laser Warning Label: Describe the laser levels and compliance standards. Label Description: III. Label Position: Position of the laser warning label, as seen in Figure 1. Figure 1: Laser Warning Label Espedeo Supra-5000 Digital Cinema and Secured Media Projection System August 02 , 2023 - 15 - Installation Manual... -
Page 16: Product Introduction
‘Transport Warning’ label. Figure 2: Supra-5000 Unboxing procedure NOTE: Please retain the original packaging for possible RMA shipment in the future. Espedeo Supra-5000 Digital Cinema and Secured Media Projection System August 02 , 2023 - 16 -... -
Page 17: Packing List
3.2. Packing List When unboxing the Espedeo Supra-5000 package; please check the contents in the box against the packing list mentioned in Table 2: Sr.No. Part Description Quantity Espedeo ① Projector 1 PCS. Supra-5000 1.28-1.92:1 Lens ② Standard 1 PCS. - Page 18 Table 2 The required plug type for the Supra-5000 power cord can be specified as per regional requirements. Please refer to Section 4.1.4 for further details. 1.28-1.92:1 Standard Lens is mentioned as an example. Please refer to Section 3.3.3 for the other lens options available for Espedeo Supra-5000.
-
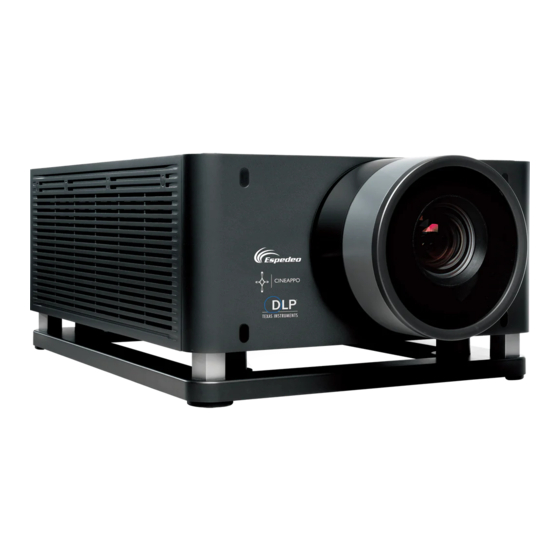
Page 19: Overview Of The Projector
Alternatively, adjust the replacement cycle appropriately according to the on-site usage of the projector (refer to Section 13.2 for more details). Figure 4: Air Filter Espedeo Supra-5000 Digital Cinema and Secured Media Projection System August 02 , 2023... -
Page 20: Projector Status Indicator
The projector is in Standby mode and can Blinking Green Standby Green be woken up by an external device through (slow) mode the network. The blinking frequency is low. Espedeo Supra-5000 Digital Cinema and Secured Media Projection System August 02 , 2023 - 20 - Installation Manual... - Page 21 After the error information is handled, the Red indicator turns OFF. An error has occurred, resulting in a Steady ON Red Error system shutdown. Table 3 Espedeo Supra-5000 Digital Cinema and Secured Media Projection System August 02 , 2023 - 21 - Installation Manual...
-
Page 22: Lens
1940 ± 50g 2340 ± 50g Table 4 ** Applicable for 0.49” DMD only. Measured as the throw distance against the projected area width. Espedeo Supra-5000 Digital Cinema and Secured Media Projection System August 02 , 2023 - 22 -... -
Page 23: Adjustable Foot
Video Source and Interface panels ▪ The Espedeo Supra-5000 can be connected to a Theatre Management System or TMS, using the network interfaces. The GIGABIT Port 1 and GIGABIT Port 2 on the DCMB are connected to the Content and Management Network of the Cinema respectively. The LAN 2 Port on the PIB is connected to the system interface of the projector and the DCMB. -
Page 24: Projector Dcmb (Digital Cinema Media Block) Panel Connections
16/24-bit AES/EBU, 16 channels, 48/96 kHz. AUTOMATION ⑧ 4 x GPIO These ports can be used for controlling automation devices. GPIO Table 5 Espedeo Supra-5000 Digital Cinema and Secured Media Projection System August 02 , 2023 - 24 - Installation Manual... -
Page 25: Pib (Projector Intelligence Board) Panel Connections
3 x LED indicators supply of the PIB. When the PIB power supply is normal, the LASER LED indicator is steady on Green. Espedeo Supra-5000 Digital Cinema and Secured Media Projection System August 02 , 2023 - 25 - Installation Manual... - Page 26 LED indicator blinking: The laser control module is waiting for startup. LED indicator is steady ON: The laser control module III. works properly. Table 6 Espedeo Supra-5000 Digital Cinema and Secured Media Projection System August 02 , 2023 - 26 - Installation Manual...
-
Page 27: Installation Of The Espedeo Supra-5000
4. Installation of the Espedeo Supra-5000 This section describes how to install, connect and optimize the Espedeo Supra-5000 for the best audiovisual quality. The projector supports two types of installation: forward mounting and ceiling mounting. Forward mounting is the installation method in which the projector is horizontally placed on the special base of the projector, with the magnetic cover of the projector facing up. -
Page 28: Espedeo Vm-1140 Vesa Ceiling Mount
The Espedeo VM-1140 is a VESA ceiling mount designed for in-auditorium or in-home installation of Espedeo Supra-5000 Projector. With the help of the VM-1140, the Supra-5000 can be easily mounted to a concrete ceiling or truss. For more details regarding the contents of the ceiling mount kit, dimensions and the installation procedure, refer to Section 11. -
Page 29: Power Requirements
Please check the labeling on the Supra-5000 packing (refer to Table 7) to know which type of power supply has been installed in the projector. Please ensure that the voltage and current rating of the power outlet to which the projector is connected is matched to the power supply installed in the Supra-5000. -
Page 30: Requirements For Projection Window
If the projector cannot be placed in the center window, try to place it in the right window and its down tilt angle must not be > 10º. Espedeo Supra-5000 Digital Cinema and Secured Media Projection System August 02 , 2023... -
Page 31: Requirements For The Screen
> 10º, special instructions are required in the remarks of the ‘Confirmation Form for Installation Requirements of Digital Projector’. Please contact Espedeo Holdings Ltd. for more details. Espedeo Supra-5000 Digital Cinema and Secured Media Projection System August 02 , 2023... -
Page 32: Tools Required For Installation
⑥ Outer hexagon socket 1 PCS. ⑦ ⑧ Adjustable Wrench 8” adjustable wrench 1 PCS. ⑨ Lens Cloth 1 PCS. Table 9 Espedeo Supra-5000 Digital Cinema and Secured Media Projection System August 02 , 2023 - 32 - Installation Manual... -
Page 33: Lens Installation
▪ Test to see if the projection lens is properly installed by trying to rotate it. Figure 10: Lens Installation Espedeo Supra-5000 Digital Cinema and Secured Media Projection System August 02 , 2023 - 33 -... -
Page 34: Instructions For Forward Installation
To ensure optimum optical performance, tilt the projector if necessary. 4.5. Instructions for Ceiling Mounting The Espedeo Supra-5000 projector can be mounted to a concrete ceiling or truss using the Espedeo VM-1140 VESA ceiling mount kit OR an alternative third-party ceiling mount. Please refer to Section 11 for more information related to the Ceiling Mounts including the parts list, assembly instructions and installation procedure. -
Page 35: Network Setup (For Cinema Users)
4.7. Network Setup (for Cinema users) The Espedeo Supra-5000 projector can be connected to the Media/Content and Management network of the Cinema, as depicted in Figure 11 below. Figure 11: Network Setup for Supra-5000 ▪ The LAN 1 port of the PIB and the GIGABIT Port 2 of the DCMB should be connected to the Cinema Management network, via a network switch. -
Page 36: Powering Up The Espedeo Supra-5000
5. Powering Up the Espedeo Supra-5000 5.1. Starting the Projector Before starting the Espedeo Supra-5000 projector, it is essential that you refer to the safety instructions mentioned under Section 2. After connecting the female connector of the power cord (included in the package) to the power socket of the projector and the male plug to a recommended AC power outlet of the correct rating (refer to Section 4.1.4 for more details);... -
Page 37: Overview Of Supra Command Center Home Screen
LAN 2 network port of the PIB. ⑤ Error Information Show the warning and error information of the projector. Espedeo Supra-5000 Digital Cinema and Secured Media Projection System August 02 , 2023 - 37 - Installation Manual... - Page 38 Table 10 NOTE: For more information on the various menu options and corresponding functions of the Supra Command Center web interface, refer to the ‘Espedeo Supra-5000 User Manual’. Espedeo Supra-5000 Digital Cinema and Secured Media Projection System August 02 , 2023...
-
Page 39: Switching On The Laser Light Source
You may also project a Test Pattern to make sure that the Laser Light Source has been switched ON successfully (optional). Refer to Section 5.3.2 for more information on projecting a Test Pattern. Espedeo Supra-5000 Digital Cinema and Secured Media Projection System August 02 , 2023... -
Page 40: Projecting A Test Pattern
Click on the Close Test Pattern button, to clear the test pattern from the screen so that Digital Cinema Package (DCP) content or input from an HDMI source can be projected. Figure 15: Projecting a Test Pattern Espedeo Supra-5000 Digital Cinema and Secured Media Projection System August 02 , 2023... -
Page 41: Switching To Hdmi Playback
For more details on how to connect an HDMI source to the projector and to initiate playback, please refer to the Espedeo Supra-5000 User Manual. Figure 16: Selecting a Macro for HDMI Playback Espedeo Supra-5000 Digital Cinema and Secured Media Projection System August 02 , 2023... -
Page 42: Projector Settings
‘2D-FLAT’, ‘2D-SCOPE’, ‘3D-FLAT’, ‘3D-SCOPE’, ‘HDMI1’ and ‘HDMI2’. Additionally, you can add or edit any custom 2D/3D macros as well. Figure 17: Installation → Macro Settings Espedeo Supra-5000 Digital Cinema and Secured Media Projection System August 02 , 2023 - 42 -... -
Page 43: Editing The 2D-Flat Macro
By default, the Source File and PCF File under this macro are imported and the 3D File cannot be selected. Figure 19: Edit 2D-SCOPE Macro Espedeo Supra-5000 Digital Cinema and Secured Media Projection System August 02 , 2023 - 43 -... -
Page 44: Editing The 3D-Flat Macro
By default, the Source File and PCF File under this macro are imported and the preset 3D File is selected. Figure 21: Edit 3D-SCOPE Macro Espedeo Supra-5000 Digital Cinema and Secured Media Projection System August 02 , 2023 - 44 -... -
Page 45: Creating A Custom 2D Or 3D Macro
‘2D-FLAT’ or ‘2D-SCOPE’ macro. Note that the ‘DCMB’ shall be selected as the Source File and no 3D File is selected. Figure 23: Create Custom 3D Macro Espedeo Supra-5000 Digital Cinema and Secured Media Projection System August 02 , 2023... - Page 46 Figure 24: Create Custom 2D Macro III. You can now view the created macros under Macro Settings as shown in Figure 25. Figure 25: List Custom 2D/3D Macros Espedeo Supra-5000 Digital Cinema and Secured Media Projection System August 02 , 2023 - 46 -...
-
Page 47: Installation → Source File Settings
As an alternative to DCP, you can use ‘HDMI1’ or Source file list ‘HDMI2’ Source file for HDMI content input. NOTE: The Supra-5000 projector supports only 1080p@60Hz HDMI source Table 11 Espedeo Supra-5000 Digital Cinema and Secured Media Projection System... -
Page 48: Installation → Screen File Settings
Click the Close Test Pattern button once the changes are complete. Provide a file name and click on the Save button to create the Screen file. ① New Screen File Espedeo Supra-5000 Digital Cinema and Secured Media Projection System August 02 , 2023 - 48 -... - Page 49 You can also edit or delete the listed Screen files (except ‘FullScreen’) or save any of them as a new Screen file. Table 12 Espedeo Supra-5000 Digital Cinema and Secured Media Projection System August 02 , 2023 - 49 -...
-
Page 50: Installation → Lens File Settings
You can use the edit option to adjust the offset of the position after the ③ Edit Lens file a new lens is created. Table 13 Espedeo Supra-5000 Digital Cinema and Secured Media Projection System August 02 , 2023 - 50 - Installation Manual... - Page 51 Lens file and enter the ‘Auxiliary Click Save ⑧ Save/Cancel Adjustment’ screen (refer to Section 6.4.1). Click Cancel to discard all changes. Table 14 Espedeo Supra-5000 Digital Cinema and Secured Media Projection System August 02 , 2023 - 51 - Installation Manual...
-
Page 52: Auxiliary Adjustment For Lens Files
Save button to save the changes to the Lens File. Figure 31: Auxiliary Adjustment (2) NOTE: In case the Supra-5000 Projector is ceiling mounted, you need to change the Projector to ‘Orthographic’ under the Administrator Settings → Advanced Settings Orientation... -
Page 53: Installation → Color File Settings
② Color file list You can add the desired Color file to a particular macro, under the Macro Settings menu. Table 15 Espedeo Supra-5000 Digital Cinema and Secured Media Projection System August 02 , 2023 - 53 - Installation Manual... - Page 54 Green spectroradiometer to measure the color coordinates of the current screen center and enter values of X and Y based on the color coordinates. Espedeo Supra-5000 Digital Cinema and Secured Media Projection System August 02 , 2023 - 54 -...
- Page 55 3D glasses. ▪ The corrected color files should be differentiated between 2D and 3D and used for the corresponding 2D or 3D macros. Espedeo Supra-5000 Digital Cinema and Secured Media Projection System August 02 , 2023 - 55 -...
-
Page 56: Installation → Light Source File Settings
Light Source file list projector is 50% and 100% respectively. You can create suitable Light Source files according to the actual brightness Table 17 Espedeo Supra-5000 Digital Cinema and Secured Media Projection System August 02 , 2023 - 56 -... -
Page 57: Installation → 3D File Settings
Lists all the 3D files on the projector. ② 3D File List The default 3D file of the projector is ‘DEFAULT-3D’. Table 18 Espedeo Supra-5000 Digital Cinema and Secured Media Projection System August 02 , 2023 - 57 - Installation Manual... -
Page 58: File Settings For Pm-2000B 3D System
3D File Settings for PM-2000B 3D System To configure the Espedeo PM-2000B 3D System with the Supra-5000 projector, go to the 3D File Settings menu and click on New 3D File. Set the values mentioned below for the corresponding parameters and save the 3D file by clicking on Save: ▪... -
Page 59: Installation → Projector Ip Address Settings
NOTE: This setting takes effect only after you restart the projector. ② LAN 2 port The IP Address of LAN 2 port is fixed to 192.168.254.241. Table 19 Espedeo Supra-5000 Digital Cinema and Secured Media Projection System August 02 , 2023 - 59 - Installation Manual... -
Page 60: Administrator Settings → Time Settings
‘NTP Server IP Address’ in the field provided. Click on the Apply button to save the selected time setting. Figure 38: Administrator Settings → Time Settings Espedeo Supra-5000 Digital Cinema and Secured Media Projection System August 02 , 2023... -
Page 61: Administrator Settings → Select Lens
Click the Startup button to initialize the lens. After the Lens initialization is successful, a "Success" message will be shown. Figure 39: Administrator Settings → Select Lens Espedeo Supra-5000 Digital Cinema and Secured Media Projection System August 02 , 2023 - 61 -... -
Page 62: Dcmb Settings
DCMB’s operation. 7.1. DCMB Network Configuration The DCMB of the Supra-5000 projector has two network interfaces: ‘IMB Ethernet 2’ which corresponds to the GIGABIT Port 2 and ‘IMB Ethernet 1’ which corresponds to the GIGABIT Port 1 on the DCMB. The ‘IMB Ethernet 2’ IP Address is set to a default value of 192.168.1.12 as part of the standard configuration. - Page 63 Please make sure the IP Addresses assigned to IMB Ethernet 2 and IMB Ethernet 1 network interfaces of the DCMB are unique and do not conflict with the IP values assigned to other devices in the Cinema. Espedeo Supra-5000 Digital Cinema and Secured Media Projection System August 02...
-
Page 64: Dcmb Storage Configuration
7.2. DCMB Storage Configuration To configure the storage for the Supra-5000 projector, you can follow the steps mentioned below: 1. Login to the DCMB Web UI with ‘Maintenance’ user-level access. 2. Under the Configuration tab, click on the Storage sub-tab. - Page 65 For a non-CA 2.0 setup, please choose either ‘CineCache’ or ‘NAS’ as primary storage in Storage Type as ‘IMB Storage’. along with the Priority Espedeo Supra-5000 Digital Cinema and Secured Media Projection System August 02 , 2023 - 65 - Installation Manual...
-
Page 66: Dcmb Time Zone Setup
7.3. DCMB Time Zone Setup The DCMB of the Supra-5000 projector may or may not have the local time zone set as per your region. In order to change the time zone on the DCMB, you can follow the steps mentioned below: 1. -
Page 67: Content Ingest Management
3. Select the Storage Device name and Drive partition assigned by the DCMB. 4. Click on the OK button to mount the USB drive and select content for ingest. Figure 45: Content Ingest from USB Drive Espedeo Supra-5000 Digital Cinema and Secured Media Projection System August 02 , 2023... -
Page 68: Content Ingest From An Ftp Server
Figure 46: Content Ingest from FTP Server NOTE: For more information regarding browsing the selected ingest source, ingesting content, KDMs and licenses as well live-playing content, refer to the Espedeo Supra-5000 User Manual. Espedeo Supra-5000 Digital Cinema and Secured Media Projection System August 02... -
Page 69: Dcmb Audio Setup
7.5. DCMB Audio Setup The DCMB of the Supra-5000 projector features AES digital audio signal via two RJ-45 Outputs. For compatibility with most audio processors, a standard RJ-45 to DB25 connector (refer to Figure 47) is provided as part of standard packaging. - Page 70 Figure 49: RJ-45→DB25 pinout for CP750/JSD80 audio connector Figure 50: AES Audio RJ-45 pinout Espedeo Supra-5000 Digital Cinema and Secured Media Projection System August 02 , 2023 - 70 - Installation Manual...
-
Page 71: Dcmb Subtitles
It is recommended to use subtitle overlay for subtitle display. To do so, please check Subtitle Overlay Option under the Playback sub-tab of the Configuration tab. Figure 51: Subtitle settings Espedeo Supra-5000 Digital Cinema and Secured Media Projection System August 02 , 2023 - 71 -... -
Page 72: Dcmb Automation Setup
7.7. DCMB Automation Setup The DCMB of the Supra-5000 projector is capable of controlling external devices using its Automation interface. This can be used to automate repetitive tasks for the cinema operator to prevent user error. Automation setup for DCMB GPIO The DCMB GPIO automation device settings can be configured using the steps mentioned below: 1. -
Page 73: Automation Setup For Ecna Devices
‘x’ icon against it. 6. Click Save to save the settings. Figure 53: Automation Setup for eCNA IO Devices Espedeo Supra-5000 Digital Cinema and Secured Media Projection System August 02 , 2023 - 73 -... -
Page 74: Automation Setup For Jnior Devices
Input Min. Pulse Width (ms) Output Pulse Width (ms) values. 5. Click Save to save the settings. Figure 54: Automation Setup for JNIOR Devices Espedeo Supra-5000 Digital Cinema and Secured Media Projection System August 02 , 2023 - 74 - Installation Manual... -
Page 75: Automation Setup For Christie Act Devices
7. Click Save to save the settings. Figure 55: Automation Setup for Christie ACT Devices Espedeo Supra-5000 Digital Cinema and Secured Media Projection System August 02 , 2023 - 75 -... -
Page 76: Automation Setup For Dolby Devices
4. Enter the IP Address of the Dolby CP850 device. 5. Click Save to save the settings. Figure 56: Automation Setup for Dolby Devices Espedeo Supra-5000 Digital Cinema and Secured Media Projection System August 02 , 2023 - 76 - Installation Manual... -
Page 77: Automation Setup For Usl Dax Devices
IP Address of the USL DAX device. 5. Click Save to save the settings. Figure 57: Automation Setup for USL DAX Devices Espedeo Supra-5000 Digital Cinema and Secured Media Projection System August 02 , 2023 - 77 - Installation Manual... -
Page 78: Automation Setup For Usl Jsd Devices
(‘JSD-80’ or ‘JSD-100’) of the device the DCMB is connected to. 5. Select the correct Model 6. Click Save to save the settings. Figure 58: Automation Setup for USL JSD Devices Espedeo Supra-5000 Digital Cinema and Secured Media Projection System August 02 , 2023 - 78 - Installation Manual... -
Page 79: Automation Setup For Aib-2000 Audio Io Box
AIB-2000 device connected to the DCMB. 6. Click Save to save the settings. Figure 59: Automation Setup for AIB-2000 Audio IO Box Espedeo Supra-5000 Digital Cinema and Secured Media Projection System August 02 , 2023 - 79 -... -
Page 80: Dcmb 3D Settings For Pm-2000B 3D System
Reference Delay in the 3D File). 6. Click Save to save the settings. Figure 60: DCMB 3D Settings for PM-2000B 3D System Espedeo Supra-5000 Digital Cinema and Secured Media Projection System August 02 , 2023 - 80 - Installation Manual... -
Page 81: Component Engineering Ta-10 Setup
8. Component Engineering TA-10 Setup The Component Engineering TA-10 can be used for cinema automation with the Supra-5000 projector. It requires that the TA-10 be wired in a particular configuration. A wiring diagram can be seen in Figure 61. The TA-10 is connected to the DCMB using the GPIO input/output port. Configure event labels with the GPIO device to trigger the TA-10. -
Page 82: Espedeo Supra-5000 Input And Output
Relay ON-resistance: Min = 6 / Typ = 10 / Max = 15 ohms Relay Current limit: Min = 300 / Typ = 360 / Max = 460 mA Relay output power dissipation (continuous) = 600 mW Espedeo Supra-5000 Digital Cinema and Secured Media Projection System August 02 , 2023... -
Page 83: Audio Output From The Projector (Dcmb)
9.4. Audio Input to the Projector (PIB) HDMI Input The Supra-5000 allows direct input of 8 channels PCM audio via HDMI IN 1 and HDMI IN 2 ports on the PIB. The HDMI output of the source needs to be set to LPCM audio format. -
Page 84: Examples Of A Complete Audio Input/Output Solution (For 5.1/7.1 Audio Formats)
Note: The DCMB Automation should be used to switch between the analog sources and the 8 channel AES3 output from the DCMB to the AIB-2000 to ensure that the correct source is routed to the sound system. Espedeo Supra-5000 Digital Cinema and Secured Media Projection System August 02 , 2023... -
Page 85: Connection Requirements
A break out cable may be required to allow pins 7 and 8 to be connected to an external 4D system while allowing pins 1-6 which carry AES3 channels 9-14, to be connected to the audio system. Espedeo Supra-5000 Digital Cinema and Secured Media Projection System August 02 , 2023 - 85 -... - Page 86 * Refer to the ‘GDC AIB-2000 User Manual’ for more details. IMPORTANT: Please check and set the levels of the analog input sources to the AIB-2000 appropriately, to avoid any damage to the auditorium speakers. Espedeo Supra-5000 Digital Cinema and Secured Media Projection System August 02 , 2023...
-
Page 87: Audio I/O Solution Using Aib-2000 (Suitable For Connection To Digital Amplifiers)
AIB-2000 as well as between the analog and digital AES3 inputs on the digital Amplifiers to ensure that the correct source is routed to the sound system. Espedeo Supra-5000 Digital Cinema and Secured Media Projection System August 02 , 2023... -
Page 88: Connection Requirements
A break out cable may be required to allow pins 7 and 8 to be connected to an external 4D system while allowing pins 1-6 which carry AES3 channels 9-14, to be connected to the audio system. Espedeo Supra-5000 Digital Cinema and Secured Media Projection System August 02 , 2023 - 88 -... - Page 89 * Refer to the ‘GDC AIB-2000 User Manual’ for more details. IMPORTANT: Please check and set the levels of the analog input sources to the AIB-2000 appropriately, to avoid any damage to the auditorium speakers. Espedeo Supra-5000 Digital Cinema and Secured Media Projection System August 02 , 2023...
-
Page 90: Technical Specifications Of Aib-2000 Audio Io Box
Analog H/I output shares the same channel with AES3 7. Analog V/I output shares the same channel with AES3 When using GDC and Espedeo products, L+R+C monitor is available for DCP or HDMI PCM source Espedeo Supra-5000 Digital Cinema and Secured Media Projection System August 02 , 2023... -
Page 91: Optical Correction
2# screws at the same time or adjusting 3# screw separately. If there is left-right pitching, adjust it by adjusting 1# and 3# screw or adjusting 2# screw separately until the global picture is clear. Espedeo Supra-5000 Digital Cinema and Secured Media Projection System - 91 -... - Page 92 Up/Down/Left/Right buttons to adjust the offset and click the Lens Focus Up/Down buttons to make the image focus clear. Provide a name to the new Lens File and click on Save. Refer to Figure 69. Espedeo Supra-5000 Digital Cinema and Secured Media Projection System - 92 -...
- Page 93 Figure 67: Select Lens and perform Lens Homing Figure 68: Project Test Pattern Figure 69: Create Lens file Espedeo Supra-5000 Digital Cinema and Secured Media Projection System - 93 - August 02 , 2023 Installation Manual...
-
Page 94: Dmd Convergence
Step 2: The convergence adjusting mechanism of the light machine is indicated by the Red circle in Figure 71. It can be adjusted by using the M3 Straight screwdriver. Figure 71: DMD Convergence adjusting mechanism Espedeo Supra-5000 Digital Cinema and Secured Media Projection System - 94 - August 02... - Page 95 Red and Cyan grid patterns overlap up and down. After the adjustment is completed, the pixel convergence should be < 0.5 pixels. Espedeo Supra-5000 Digital Cinema and Secured Media Projection System - 95 -...
- Page 96 After the adjustment is completed, the pixel convergence is < 0.5 pixel. Figure 74: DMD Convergence example - Case 2 Espedeo Supra-5000 Digital Cinema and Secured Media Projection System - 96 - August 02 , 2023...
-
Page 97: Espedeo Vm-1140 Vesa Ceiling Mount
The VM-1140 is robust and capable of carrying a projector with a weight of up to 150 kg / 330 lbs. It can either be used to install the Supra-5000 projector from the ceiling or fasten it to a truss using truss mounting clamps. -
Page 98: Dimensions
11.2. Dimensions Figure 76: VM-1140 Dimensions Espedeo Supra-5000 Digital Cinema and Secured Media Projection System - 98 - August 02 , 2023 Installation Manual... -
Page 99: Packing List
1 PCS. ② Upper Tube 1 PCS. ③ Lower Tube 1 PCS. ④ Top Plate 1 PCS. ⑤ Middle plate 1 PCS. Espedeo Supra-5000 Digital Cinema and Secured Media Projection System - 99 - August 02 , 2023 Installation Manual... - Page 100 Anchor Bolt ⑪ 10 PCS. (10x60/M8) Safety Cable with ⑫ 1 PCS. 2 PCS of Quick Links ⑬ Hex key 6 1 PCS. Espedeo Supra-5000 Digital Cinema and Secured Media Projection System - 100 - August 02 , 2023 Installation Manual...
- Page 101 Table 23, have been illustrated in Figure 77 below. The remaining parts ⑫ to ⑭ have been illustrated separately in Step 3B and Step 13 under Section 11.5. Figure 77: VM-1140 Parts Espedeo Supra-5000 Digital Cinema and Secured Media Projection System - 101 - August 02...
-
Page 102: Safety Instructions
User should inspect the bolts on a regular basis to ensure all bolts are secure. Espedeo Supra-5000 Digital Cinema and Secured Media Projection System - 102 - August 02... -
Page 103: Assembly And Installation
The steps mentioned below explain how to assemble and mount the VM-1140 to a ceiling or truss as well as how to attach and secure the Supra-5000 projector to it. The numbers (① to ⑭) mentioned in these steps refer to the parts listed under Table 23. - Page 104 2. Fasten the safety anchor ⑦ near the ceiling plate ① by using the anchor bolts ⑪ (4 pcs.), as shown in Figure 81. Figure 81: Step 3A-2 Espedeo Supra-5000 Digital Cinema and Secured Media Projection System - 104 - August 02...
- Page 105 Figure 82. Figure 82: Step 3B-1 2. Hook the truss clamps to the truss structure, as shown in Figure 83. Figure 83: Step 3B-2 Espedeo Supra-5000 Digital Cinema and Secured Media Projection System - 105 - August 02 , 2023...
- Page 106 Figure 84: Step 3B-3 Step 4: Slide the top plate ④ over the lower tube ③, as shown in Figure 85. Figure 85: Step 4 Espedeo Supra-5000 Digital Cinema and Secured Media Projection System - 106 - August 02 , 2023...
- Page 107 Figure 86: Step 5 Step 6: Slide the middle plate ⑤ over the lower tube ③ and top plate ④, as shown in Figure 87. Figure 87: Step 6 Espedeo Supra-5000 Digital Cinema and Secured Media Projection System - 107 - August 02...
- Page 108 Step 8: Insert the lower tube ③ into the upper tube ②. Please note that for correct alignment/installation of the upper and lower tubes, the rectangular holes must match, as shown in Figure 89. Figure 89: Step 8 Espedeo Supra-5000 Digital Cinema and Secured Media Projection System - 108 - August 02...
- Page 109 Step 9: Tighten the lower tube ③ to the upper tube ② by using the bolts ⑧ (4 pcs.) at the desired height/drop, as shown in Figure 90. Figure 90: Step 9 Step 10: Attach the projector plate ⑥ to the Supra-5000 projector using the projector mounting kit ⑩ (4pcs.), as shown in Figure 91. Figure 91: Step 10...
- Page 110 Step 12: Tighten the projector plate ⑥ to the middle plate ⑤ by using the clamping handles ⑨ (4 pcs.), as shown in Figure 93. Figure 93: Step 12 Espedeo Supra-5000 Digital Cinema and Secured Media Projection System - 110 - August 02...
- Page 111 Conduit the other end of the safety cable ⑫ into the upper tube ② and lower tube ③, as shown in Figure 95. Figure 95: Step 13B Espedeo Supra-5000 Digital Cinema and Secured Media Projection System - 111 - August 02...
- Page 112 Step 14: Attach the other end of the safety cable ⑫ to the projector plate ⑥ using a quick link, as shown in Figure 96. Figure 96: Step 14 Espedeo Supra-5000 Digital Cinema and Secured Media Projection System - 112 - August 02...
-
Page 113: Height Adjustment
In case a lower height/drop is required, simply cut the upper tube ② and lower tube ③ along the two lines: Cut Line A and Cut Line B (refer to Figure 98). Figure 98: Cut lines for Upper and Lower Tube Espedeo Supra-5000 Digital Cinema and Secured Media Projection System - 113 - August 02... - Page 114 The VCTUB XL Universal Projector mount can either be directly ® sourced from Legrand or you can check with your local Espedeo supplier. Espedeo Supra-5000 Digital Cinema and Secured Media Projection System - 114 - August 02 , 2023...
-
Page 115: Testing Procedures After Installation
12. Testing Procedures after Installation After the installation has been completed, it is necessary to test the following to ensure that the Supra-5000 Projector has been properly installed: 1. Test the video playback capabilities of the Supra-5000. 2. Test the audio playback capabilities of the Supra-5000 and verify that all the macros are working. Also, check for any static noises. -
Page 116: Maintenance
NOTE: Only trained projectionists or qualified maintenance personnel are allowed to perform routine maintenance operations on the Espedeo Supra-5000 projector. Espedeo Supra-5000 Digital Cinema and Secured Media Projection System - 116 - August 02 , 2023... -
Page 117: Switching Off The Espedeo Supra-5000
14. Switching Off the Espedeo Supra-5000 To switch off the Espedeo Supra-5000 digital cinema and secured media projection system, please follow the power down sequence depicted in Figure 101: • From the Supra Command Center, click the Laser Off button on the top menu bar to turn OFF the Laser Light Source. -
Page 118: Projector Specifications
15. Projector Specifications 15.1. Projector Dimensions Figure 102: Projector Dimensions 15.2. Projector Base Dimensions Figure 103: Projector Base Dimensions Espedeo Supra-5000 Digital Cinema and Secured Media Projection System - 118 - August 02 , 2023 Installation Manual... -
Page 119: Certifications
15.3. Certifications Item Compliance Standards and Requirements DCSS/CTP IEC60825-1:2014 (Class 1) ,IEC62471-5:2015 (RG2) Laser safety HDMI HDMI 1.4b Table 24 Espedeo Supra-5000 Digital Cinema and Secured Media Projection System - 119 - August 02 , 2023 Installation Manual... - Page 120 Espedeo Website Contact Us Technical Support Worldwide Offices Copyright © 2023 Espedeo Holdings Ltd. | All rights reserved. All trademarks listed on this website are properties of their respective owners. Specifications are subject to change without notice due to ongoing product development and improvement.
Need help?
Do you have a question about the Supra-5000 and is the answer not in the manual?
Questions and answers