Table of Contents
Advertisement
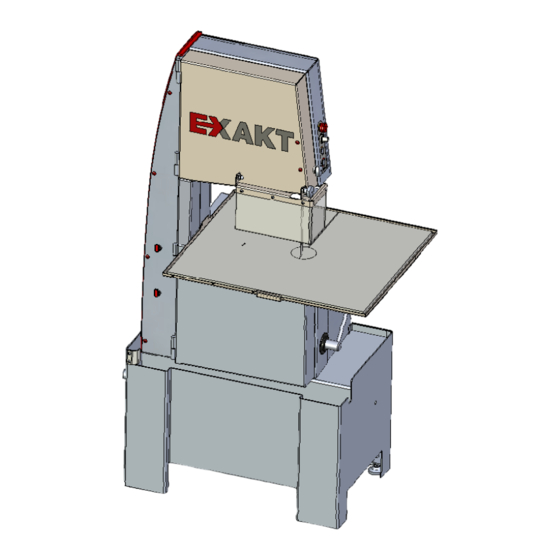
Operating instructions
Diamond Pathology Saw
EXAKT 312
Edition 10_2010 - 38891EN-900-AB
It is imperative you read the operating instructions prior to placing the unit
in operation for the first time! Follow safety instructions!
Translation of original operating instructions (for the end user)
E
English
N
Advertisement
Table of Contents

Related Manuals for Exakt 312


Summary of Contents for Exakt 312
- Page 1 Operating instructions Diamond Pathology Saw EXAKT 312 Edition 10_2010 - 38891EN-900-AB It is imperative you read the operating instructions prior to placing the unit in operation for the first time! Follow safety instructions! Translation of original operating instructions (for the end user)
- Page 2 Layout: WBS/TR06 Text layout: WBS/TR06 Illustrations: EXAKT Advanced Technologies GmbH, WBS/TR06 This documentation is copyrighted by EXAKT. Without prior written approval, the documentation may not be copied or be used contrary to the legitimate interests of EXAKT. Subject to change without notice!
- Page 3 Contact addresses Manufacturer's address: EXAKT Advanced Technologies GmbH Robert-Koch-Strasse 5 22851 Norderstedt Germany Tel: +49 (0)40 52 95 60-0 Fax: +49 (0)40 5 24 99 59 E-mail: info@exakt.de http://www.exakt.de Dealer's address and service address: Note: In case of enquires related to service and to order spare parts, please contact the dealer from whom you purchased the unit.
-
Page 4: Table Of Contents
Description of the unit ....................15 4.1 Scope of delivery ....................15 4.2 Optional accessories .................... 16 4.3 An overview of the EXAKT 312 ................18 Front view ......................18 Right side view ....................19 Rear and left side view..................20 Front view, doors removed ................ - Page 5 Connecting the EXAKT 312 to the drainage system ........31 Connecting the EXAKT 312 to the water supply..........31 Connecting the EXAKT 312 to the power supply..........32 Placing in operation for the first time ............... 32 6.1 Undertaking a test run ..................33 6.2 Ending a test run ....................
- Page 6 11.2 Disposing of unit ....................58 12 Technical data ......................59 13 Spare parts and consumables ................... 60 13.1 Spare parts list, EXAKT 312 diamond pathology saw ........... 60 13.2 Consumables ....................... 61 13.3 Optional accessories .................... 61 14 Glossary ........................62 15 Index ..........................
-
Page 7: Safety
Safety 1.1 General safety instructions Every individual who is tasked with setting up, placing in operation, operation, maintenance and care of the EXAKT 312 and the related components must have read and understood these instructions, in particular the Safety chapter. - Page 8 Attention – incorrect mains voltage! If the mains voltage is incorrect, the EXAKT 312 may be damaged. Only connect the EXAKT 312 to the mains voltage stated on the type plate. Attention – damage due to very powerful permanent magnets Hazard due to magnetic fields for –...
-
Page 9: Safety Devices
To start the cutting band, press the start button. Nip guard The nip guards protect against unintentional entanglement in the rotating pulleys. Acknowledge button After any action that interrupts the safety circuit on the EXAKT 312, the Edition 10_2010 - 38891EN-900-AB... -
Page 10: Door Lock
Safety acknowledge button must be pressed prior to restarting the EXAKT 312. Door lock An electronically controlled safety circuit ensures the pulleys stop automatically within 6 seconds on opening the doors. Lockable main switch By attaching a padlock the EXAKT 312 can be secured against unauthorised usage. -
Page 11: About These Instructions
About these instructions About these instructions In these operating instructions graphic symbols help you to use all functions correctly and optimally. 2.1 Warning and danger symbols The symbols listed below warn of a possible risk of injury as well as damage. -
Page 12: Conventions
About these instructions 2.3 Conventions Symbol Significance Note Important note This symbol identifies important additional information. Tool This symbol indicates that a certain tool or consumable is required. • Bullet-point list Properties of the unit or individual components are given as a list of points. -
Page 13: Description Of Function
(e.g. soft aluminium, copper), as the chip clearance on the cutting band can quickly become clogged on cutting such materials. The EXAKT 312 is only intended to be used in medical pathology. In this application only the original components supplied may be used. Any other usage beyond that stated is considered incorrect use. -
Page 14: Features
Description of function 3.4 Features The EXAKT 312 is equipped with the following parts as standard: • Integrated, adjustable water flushing/cooling • Height-adjustable cutting band guide • Cutting band speed control • Splash guard • Safety devices: – Emergency-stop pushbutton –... -
Page 15: Description Of The Unit
Scope of delivery • Optional accessories • An overview of the EXAKT 312 4.1 Scope of delivery The scope of delivery of the EXAKT 312 diamond pathology saw includes the following components: • Saw base unit • Cutting band (as required) •... -
Page 16: Optional Accessories
Description of the unit 4.2 Optional accessories To make the work easier, the following accessories can be ordered for the EXAKT 312 (for order numbers see section 13.3 Optional accessories): Accessory Description Rip fence For straight and parallel cuts on tissue samples a rip fence can be installed on the work table. - Page 17 Description of the unit Table illumination A LED-ledge gives permanent illumination of the work table. Optimum illumination of the sample during cutting with low energy consuption (approx. 5W) Large splash guard Better cover of the sample especially for large samples or when working with high cooling flush.
-
Page 18: An Overview Of The Exakt 312
Description of the unit 4.3 An overview of the EXAKT 312 Front view Abb. 2 Front side of unit Splash guard Door, bottom Door, top Cutting band Drain pan to drain off the waste water Work plate (plastic) Drain nozzle for the water... -
Page 19: Right Side View
Description of the unit Right side view Abb. 3 Right side of unit Emergency-stop pushbutton to stop the cutting band within approx. 4 seconds Cutting band speed control Start button to start the cutting band Stop button to stop the cutting band after 6 seconds Tensioning lever for tensioning and relieving the tension on the cutting band Clamping bolt for the top cutting band guide... -
Page 20: Rear And Left Side View
Description of the unit Rear and left side view Abb. 4 Rear and left side of unit Adjusting lever (outer) to adjust the pulley for cutting band centring Acknowledge button to restart the unit after interruption Main switch to switch on and off the mains voltage Water connection for cooling and flushing Locking lever (inner) to lock the pulley setting Edition 10_2010 - 38891EN-900-AB... -
Page 21: Front View, Doors Removed
Description of the unit Front view, doors removed Abb. 5 Front of unit, open Pulley, top Cutting band guide, top, with nip guard Cutting band guide, bottom Pulley, bottom Holder for cleaning gun (option) Adjustment foot on each leg Edition 10_2010 - 38891EN-900-AB... -
Page 22: Installation
The installation location must give access to a water connection, drain and power supply with splash-proof socket. Note The drain nozzle on the EXAKT 312 is at a height of 330 mm. To ensure waste water can flow away, there must be a continuous gradient to the drain. -
Page 23: Installing The Exakt 312
Installation Abb. 6 Top view – dimensions and workplace EXAKT 312 5.3 Installing the EXAKT 312 You will need an open-end spanner AF 17 and the spirit level supplied to be able to undertake this step. The EXAKT 312 diamond pathology saw is setup as follows: Place the EXAKT 312 on a flat surface. -
Page 24: Assembly Of The Work Table, 1St Part
Installation Assembly of the work table, 1st part – Fitting the work table tray You need an open-end spanner AF 14 for the 6 collared nuts. Abb. 7 Base unit with base plate Abb. 8 Work table tray mounted on base plate Abb. -
Page 25: Fitting The Top Pulley
Fitting the cutting band Caution – injuries and damage due to untensioned cutting band! An untensioned cutting band can jump off the pulleys when the EXAKT 312 starts and cause injuries or damage. It is imperative you conclude the Fitting the cutting band work step with the tensioning of the cutting band. - Page 26 Installation Note The following cutting bands are suitable for the EXAKT 312: Item number Cutting band 34621 Cutting band 0.3/D151/E312 Abb. 12 Preparing to fit the cutting band Remove work plate (plastic), cutting band guide, work table and run- off plate.
- Page 27 Installation Abb. 13 Cutting band relieved Abb. 14 Cutting band tensioned Pull tensioning lever 18 on the saw base unit forward (toward the user) so that the bottom pulley is moved upward. Abb. 15 Cutting band in top cutting band Abb.
-
Page 28: Centring The Cutting Band
The cutting band centres itself on the pulleys. For exact centring of the band, there is an adjusting lever and a locking lever on the rear of the EXAKT 312 diamond pathology saw. Abb. 17 Locking lever and adjusting lever for the top pulley Turn the locking lever 21 (inner lever) counter-clockwise and in this way unlock the setting. -
Page 29: Fitting The Doors
On opening and closing the doors, do not grasp the edge of the door. The doors on the EXAKT 312 are simply hung in the angles on the saw base unit. A permanent magnet is used as a door catch. -
Page 30: Mounting The Splash Guard
Installation Abb. 19 Band guide, work table Insert the work table's cutting band guide 5 from above into the work plate – the slot opening points to the front. Abb. 20 Run-off plate Abb. 21 Run-off plate fitted Attach the run-off plate 7 under the work table tray 6. While doing so slide the run-off plate into the guide grooves provided. -
Page 31: Connection To Water And Power Supply
Push over the clip and tighten using a screwdriver. Push the other end of the water drain hose onto the drain. – The drain nozzle on the EXAKT 312 is at a height of 330 mm. To ensure waste water can flow away, there must be a continuous gradient to the drain. -
Page 32: Connecting The Exakt 312 To The Power Supply
Have a damaged mains cable replaced by a service engineer. Attention – incorrect mains voltage! If the mains voltage is incorrect, the EXAKT 312 may be damaged. Only connect the EXAKT 312 to the mains voltage stated on the type plate. Connect the mains plug to a splash-proof socket. -
Page 33: Undertaking A Test Run
The EXAKT 312 is ready for operation. Press the start button 16 and increase the cutting band speed to approx. 30%. Leave the EXAKT 312 to run for around half a minute so that the cutting band can centre itself. 6.2 Ending a test run Press the stop button 17. -
Page 34: Checking The Cutting Band Centring
Placing in operation for the first time 6.3 Checking the cutting band centring Note Only open the top door once the cutting band has come to a complete stop. Abb. 23 Visual inspection of the cutting band centring Open top and bottom door. Make visual inspection. -
Page 35: Routine Operation
Use suitable disinfection methods in accordance with applicable statutory provisions and guidelines, and the hygiene regulations. Warning – injuries! You may suffer injuries while working with the EXAKT 312. Do not touch the cutting band in operation. Wear safety glasses. -
Page 36: Undertaking Routine Operation
You may suffer injuries if you adjust the top cutting band guide with the cutting band running. Switch off the EXAKT 312. Wait until the cutting band has come to a stop. For an optimum cutting result, the top cutting band guide can be adjusted to the height of the sample. -
Page 37: Adjusting The Cutting Band Speed
Routine operation Set the top band guide 26 to the height of the sample. Tighten the clamping bolt 19 of the top cutting band guide. Adjusting the cutting band speed To ensure an optimum cutting process and a clean cut, the cutting band speed can be adjusted as required. -
Page 38: Cutting The Sample
Routine operation Cutting the sample Danger! If the EXAKT 312 is used improperly, injuries and damage may be caused. Always cut samples separately. Always press the sample onto the work plate during cutting. Do not tilt the sample. Do not slow down the cutting band by applying pressure to the side. -
Page 39: Cleaning
Secure against unintentional placing back in operation by others. Warning – risk of slipping! Injuries due to slipping. Keep the floor around the EXAKT 312 as dry as possible. Wear non-slip shoes. Danger – biological contamination! Risk of infection. -
Page 40: Cleaning Schedule
Cleaning 8.3 Cleaning schedule Always keep the working area of the EXAKT 312 in a clean condition. The following table provides an overview of all cleaning tasks required with recommendations for the cleaning intervals. Applicable guidelines and hygiene regulations are to be followed as a matter of priority. -
Page 41: Cleaning Agents
Cleaning 8.4 Cleaning agents Attention – damage! Damage to the external surfaces due to cleaning agents containing chlorine and aggressive cleaning agents. Do not use disinfectants containing chlorine or aggressive disinfectants such as acetone or nitro thinner. Only use alcohol-based disinfectant. You can use the disinfectants usually found in laboratories, provided they are alcohol-based, such as: •... -
Page 42: Disinfecting
Cleaning Abb. 27 Work table components Lift the work plate 4 and pull it out of the work table tray 6. Clean the rear side. Pre-disinfect both sides of the work plate. Press the cutting band guide upwards 5 out of the work plate, clean and pre-disinfect. -
Page 43: Disinfecting The Top Pulley
Cleaning Abb. 28 How to hold Abb. 29 Turn into a figure of eight Abb. 30 Push together Abb. 31 Cutting band folded – Hold the cutting band in a loose circle using both hands. Left hand: thumb on the inside, index and middle finger on the outside. -
Page 44: Disinfecting The Bottom Pulley
Cleaning Abb. 32 Belt, yellow Lift the top pulley out of the mounting and disinfect the rear side. If necessary, change the yellow belt, see section 9.4 Annual maintenance. Disinfect the guide groove and the yellow belt. The top pulley has now been disinfected. Disinfecting the bottom pulley The yellow belt on the bottom pulley can also be cleaned with the work table fitted. -
Page 45: Disinfecting The Cutting Band Guide
Cleaning Disinfecting the cutting band guide The cutting band guide can be removed from its bracket for cleaning and disinfecting. Abb. 33 Cutting band guide removed Completely undo the clamping bolt of the cutting band guide 19 (counter-clockwise). The slide 50 can now be removed from the bracket 52 to the left and then to the front. -
Page 46: Disinfecting The Internal And External Housing
Cleaning Disinfecting the internal and external housing Disinfect all internal and external surfaces. Remove the splash guard and soak in disinfectant solution. Then rub the splash guard dry. 8.7 Re-fitting removed components Re-fit the components in the following order: • Cutting band guide •... -
Page 47: Maintenance
Contaminated samples and contaminated water can cause infections. For work in the laboratory, wear stipulated protective clothing and safety glasses. EXAKT units are, provided they are operated properly, reliable and low maintenance. At regular intervals the components should be checked by visual inspection. -
Page 48: Fitting The Cutting Band
Fitting the cutting band Attention – damage due to incorrect cutting bands! The use of cutting bands that have not been recommended by EXAKT can impair the safety and function of the EXAKT 312. Only fit the recommended original EXAKT diamond cutting bands. - Page 49 Maintenance Abb. 35 Cutting band relieved Abb. 36 Cutting band tensioned Pull the tensioning lever 18 on the saw base unit forward (toward the user) so that the bottom pulley is moved upward. Abb. 37 Cutting band in top cutting band Abb.
-
Page 50: Band Guide, Top
Maintenance the cutting band. Manually turn the top pulley clockwise approx. 5-10 x to centre the cutting band on both pulleys. During this process pay attention to correct running of the pulleys and the cutting band guides! Close the doors. Carefully move the work plate along the cutting band and place in the work table tray. -
Page 51: Maintenance Every Six Months
Maintenance 9.3 Maintenance every six months Checking the Cooling water hose cooling water Regular replacement of the cooling water hose is recommended to hose prevent soiling. Open the top door. Check the cooling water hose for leaks. Replace if necessary. Abb. -
Page 52: Replacing The Cooling Water Hose
Adjust the adjustment feet using the open-end spanner AF 17 to level out any unevenness. Place the spirit level on the base plate longitudinally and cross-wise to check the EXAKT 312 is level. Re-adjust adjustment feet if necessary. See section 5.3 Installing the EXAKT... -
Page 53: Annual Maintenance
Maintenance 9.4 Annual maintenance It is recommended to change the yellow belt at least once a year. On changing the yellow belt, it is recommended to have a colleague help with the fitting, as the new yellow belt will be stronger. Abb. -
Page 54: Maintenance As Required
Maintenance 9.5 Maintenance as required Replacing a fuse Replacing a faulty fuse Danger – electric shock! Death or serious injuries may be the consequence. Prior to replacing the fuse, set the main switch to OFF and unplug the mains plug. Secure against unintentional placing back in operation by others. - Page 55 Maintenance Undertaking a function check Plug in the mains plug. Set the main switch to ON. Press the acknowledge button. Press the start button. The cutting band should now start. Edition 10_2010 - 38891EN-900-AB...
-
Page 56: Faultfinding And Troubleshooting
The electronic speed Press the stop button for control has a fault (e.g. approx. 3 sec. overload). The EXAKT 312 cannot Start the motor again. be started. The fuse is faulty. Check the fuse, replace if necessary (see section 9.5 Maintenance as required). - Page 57 Faultfinding and troubleshooting Fault description Cause of fault Fault rectification The cutting band is soiled. Clean the cutting band. See section Cleaning a soiled cutting band using a whetstone in chapter 9 Maintenance. The cutting band is worn. Replace the cutting band. See chapter 9 Maintenance.
-
Page 58: Disposal
Disposal 11 Disposal 11.1 Disposing of packaging The packaging of the EXAKT 312 comprises cardboard, polystyrene and plastic sheet. To dispose of the packaging, follow the regulations for your communal waste disposal system. 2 mm spacing 11.2 Disposing of unit Within the EU this symbol indicates that this product is not allowed to be disposed of in household waste at the end of its service life. -
Page 59: Technical Data
Technical data 12 Technical data Dimensions EXAKT 312 Unit dimensions width x height x depth 924 x 1527 x 625 [mm] Weight 150 kg Working height Approx. 900 mm Cut height Max. 210 mm Cut width Max. 350 mm Pulley diameter... -
Page 60: Spare Parts And Consumables
Spare parts and consumables 13 Spare parts and consumables You can order all spare parts, consumables and accessories from your dealer. 13.1 Spare parts list, EXAKT 312 diamond pathology saw Item number Description 36370 Main fuse, 8 A/T Cutting band guide for band flushing, bottom 38204 Flushing sleeve, band flushing incl. -
Page 61: Consumables
Spare parts and consumables 13.2 Consumables Item number Description 34621 Cutting band 0.3 mm D151/E312 36140 Band, yellow, for pulleys Cutting band guide, top 38200 Cutting band guide, work table 38202 34950 Whetstone 13.3 Optional accessories Item number Description 38070 Cleaning gun 38072 Rip fence... -
Page 62: Glossary
Tape to protect the pulleys and the cutting band against damage. Cooling water control Control to set the cooling water flow rate. Emergency-stop Button for switching off the EXAKT 312 within approx. 4 seconds in pushbutton case of emergency. Cross-pin Pin on the top pulley for mounting on the saw base unit. -
Page 63: Index
Clamping bolt 19, 36 Cleaning gun 16, 21 Cleaning intervals 40 Emergency-stop pushbutton 9, 19, 62 Cleaning slot 62 EXAKT 312 13 Cleaning tool 62 Contamination, biological 8 Flush water control 18, 36, 38, 62 Cooling water control 18, 36, 38, 62... - Page 64 Index Packaging 58 Table illumination 17 Permanent magnet 7, 29 Tensioning lever 19, 27, 62 Power supply 31, 32 Test run 32 Pulley Thorough cleaning 39 bottom 21, 44 top 21, 25, 43 Visual inspection 34, 47, 62 Pulley mount 25 Waste water 31, 36 Rip fence 16 Water connection 20...
-
Page 65: Declaration Of Conformity
EC directives. This declaration will be rendered void in case of modification of the machine without our agreement. Name of the machine: EXAKT 312 diamond pathology saw Serial number: from 312-00013 Year of manufacture: from 2010 The machine also complies with all the provisions of the EMC directive (89/336/EEC) and Low voltage directive (73/23/EEC).
Need help?
Do you have a question about the 312 and is the answer not in the manual?
Questions and answers