Table of Contents
Advertisement
Advertisement
Table of Contents

Related Manuals for Samsung NX60A6511SB


Summary of Contents for Samsung NX60A6511SB
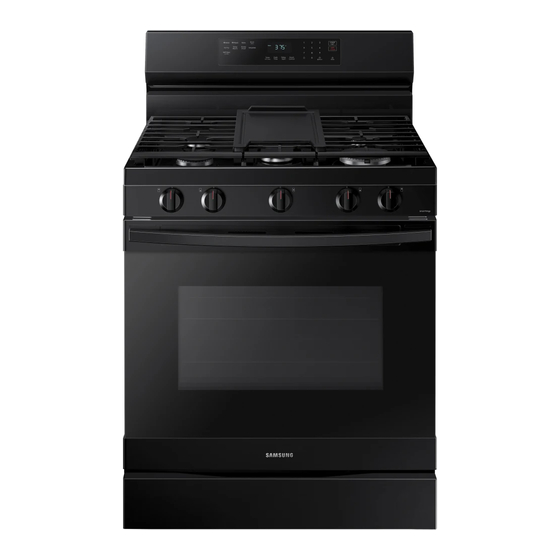
- Page 1 Gas Free-Standing Range User manual NX60*65**S*...
- Page 2 ANTI-TIP DEVICE WARNING WARNING: To reduce the risk of tipping the range, the range Never Operate the Top Surface Cooking Section of this Appliance Unattended. must be secured by a properly installed Anti-Tip device. AFTER THE RANGE HAS BEEN INSTALLED, CONFIRM THAT THE ANTI-TIP •...
- Page 3 Regulatory Notice 1. FCC Notice WARNING CAUTION Do not step, lean, or sit on the oven door of the range. You can cause FCC CAUTION: Any changes or modifications not expressly approved the range to tip, resulting in burns or serious injuries. by the party responsible for compliance could void the user’s Confirm that the Anti-Tip device is installed properly.
- Page 4 Regulatory Notice FCC STATEMENT: FCC RADIATION EXPOSURE STATEMENT: This equipment has been tested and found to comply within the This equipment complies with FCC radiation exposure limits set limits for a Class B digital device, pursuant to Part 15 of the FCC forth for an uncontrolled environment.
- Page 5 Bigger is better General safety instructions With a capacity of 6.0 cubic feet, this Samsung gas oven range offers This unit has been tested and found to comply with the limits for a class B digital device, pursuant to Part 18 of the FCC rules. These...
-
Page 6: Table Of Contents
Contents Important safety information Troubleshooting Checkpoints Overview Information codes Layout Warranty (U.S.A) What’s included Control panel Warranty (CANADA) Before you start Open Source Announcement Clock Oven vent/cooling vent Cooktop Ignition Cookware Griddle Gas oven Using the oven racks Cooking mode Air Fry mode Cooking options Special features... -
Page 7: Important Safety Information
Important safety information Read all instructions before using this appliance California Proposition 65 Warning • All electrical and gas equipment with moving parts can be dangerous. Please WARNING read the important safety instructions for this appliance in this manual. The Cancer and Reproductive Harm - www.P65Warnings.ca.gov instructions must be followed to minimize the risk of injury, death, or property damage. - Page 8 Important safety information • Do not store any object of interest to children on the cooktop or backguard of the Fire safety range. Children climbing on the range to reach items could be killed or seriously injured. WARNING • Do not operate the range if the range or any part of the range is damaged, To reduce the risk of fire, electric shock, personal injuries, and/or death, observe malfunctioning, or missing parts.
- Page 9 Gas safety Electrical and grounding safety WARNING WARNING To reduce the risk of fire, electric shock, personal injuries, and/or death, observe To reduce the risk of fire, electric shock, personal injuries, and/or death, observe the following precautions. the following precautions. •...
- Page 10 Important safety information Installation safety • Installation of this range must conform with local codes or, in the absence of local codes, with the National Fuel Gas Code, ANSI Z223.1/NFPA.54, latest edition. In Canada, installation must conform with the current Natural Gas Installation Code, WARNING CAN/CGA-B149.1, or the current Propane Installation Code, CAN/CGA-B149.2, and To reduce the risk of fire, electric shock, personal injuries, and/or death, observe...
- Page 11 • Make sure the wall coverings around the range can withstand heat up to 200 °F • Do not place any objects other than cookware on the cooktop. (93 °C) generated by the range. • This cooktop is designed for use with a wok or wok ring attachment. •...
- Page 12 Important safety information • Before moving cookware full of fats or oils, make sure it has completely cooled. Oven safety • To prevent delayed eruptive boiling, always allow heated liquids to stand at least 20 seconds after you have turned off the burner so that the temperature in the WARNING liquid can stabilize.
- Page 13 Storage drawer safety Self-cleaning oven safety WARNING WARNING To reduce the risk of fire, electric shock, personal injuries, and/or death, observe To reduce the risk of fire, electric shock, personal injuries, and/or death, observe the following precautions. the following precautions. •...
-
Page 14: Overview
(5) * Griddle (1) * NOTE If you need an accessory marked with an asterisk (*), you can buy it from the Samsung Contact Center (1-800-SAMSUNG (726-7864)). 01 Display 02 Oven vents 03 Surface burners 04 Surface burner knobs... -
Page 15: Control Panel
Before you start Control panel You should know about the following features and components before you use your range for the first time. Clock You must set the clock correctly to ensure the automatic features work properly. To set the clock time 01 Oven modes: Activates each 10 Smart Control: Activates the Easy oven modes (Convection Bake,... -
Page 16: Oven Vent/Cooling Vent
Before you start Cooktop STEP 1 NOTE You can set/change the clock or the kitchen timer before you start a cooking mode Put all ingredients into a cooking container or while most cooking modes are operating. However, you cannot set or change (pan, pot, etc). -
Page 17: Ignition
Gas burners Ignition Each burner has a corresponding knob CAUTION that lets you to set the flame level from LO to HI. In addition, each burner knob has a Make sure all surface burners are properly Lite setting. Turning a knob to Lite ignites installed. -
Page 18: Cookware
Cooktop Manual ignition Cookware If there is a power failure, you can ignite the burner manually. Use caution when doing this. Requirements 1. Hold a long gas grill lighter to the surface burner you want to light. • Flat bottom and straight sides. 2. -
Page 19: Griddle
Size limitations Griddle The removable coated griddle provides an extra cooking surface. This is useful CAUTION especially when cooking meat, pancakes, or other foods requiring a large cooking • Do not place a small pan or pot with a area. bottom diameter of about 6 inches or less The griddle can be used only with the on the center grate. - Page 20 Cooktop Gas oven STEP 1 CAUTION Put all ingredients in a heat-safe container. • Do not remove the griddle until the cooktop grates, surfaces, and griddle itself cool down. • If you leave the griddle on the cooktop, it may become very hot when you use the cooktop or oven.
-
Page 21: Using The Oven Racks
Using the oven racks NOTE • The Oven Rack Settings table is for reference only. • We recommend cooking pizza and pies using the 2nd rack position for crispy The rack positions bottoms. Your oven range comes with 2 racks and 7 rack positions. The rack positions are delineated by rack guides which support the racks. -
Page 22: Gas Oven
Gas oven Rack and Pan placement Cooking mode Centering the baking pans in the oven • Make sure to close the door before you as much as possible will produce better start cooking. results. If baking with more than one pan, •... - Page 23 Baking and Roasting Convection cooking The convection fan at the back of the oven circulates hot air evenly throughout the oven cavity so that food is evenly cooked and browned in less time than with regular heat. NOTE • When using convection cooking, always pre-heat the oven for the best results. 1.
- Page 24 Gas oven Broiling Broiling guide Broiling uses the oven broil burner at the top of the oven to cook and brown NOTE food. Meat or fish must be put on a broiling grid in a broiling pan. Preheating for • This is for reference only. 5 minutes before broiling is recommended.
-
Page 25: Air Fry Mode
Air Fry mode Air Fry mode guide This feature uses hot air for crispier and healthier frozen or fresh foods without Item Amount Temperature Time any or less oil than normal convection modes. For best results, use this mode in Potatoes single oven mode and place the Air Fry tray in position 3. -
Page 26: Cooking Options
Gas oven Cooking options Item Amount Temperature Time Poultry CAUTION Fresh Drumsticks 35 - 45 oz 425 °F - 450 °F 27 - 32 min Food that can easily spoil, such as milk, eggs, fish, poultry, and meat, should be Fresh Chicken Wings 30 - 35 oz 425 °F - 450 °F... - Page 27 Cook Time Delay Start Cook Time sets the oven to cook foods at a set temperature for a set length of The Delay Start function lets you use the kitchen timer to automatically start time. The oven automatically turns off when it finishes. and stop another cooking program.
-
Page 28: Special Features
Gas oven Special features Bread Proof The Bread Proof function automatically provides the optimum temperature for the bread proof process, and therefore does not have a temperature adjustment. Keep Warm If you press Bread Proof when the oven temperature is above 100 ˚F, Hot will Keep cooked food warm at a low temperature for up to 3 hours. - Page 29 Dehydrate The Sabbath Option Dehydrate dries food or removes moisture from food via heat circulation. After (For use on the Jewish Sabbath and Holidays) drying the food, keep it in a cool and dry place. For fruit, adding lemon or Use this option only for baking on the Jewish Sabbath and Holidays.
- Page 30 Gas oven 4. Press Bake and Number 1 simultaneously for 3 seconds to display "SAb". Oven lock Once "SAb" appears, the oven control no longer beeps or displays any further Lock the control panel and the door to prevent accidental operations and/or changes.
-
Page 31: Changing Settings
Changing settings Demo mode This is used by retailers for display purposes only. In this mode, the heating Press and hold for 3 seconds to change various settings of the range to your element does not operate. preference. The Setting menu is available only when the oven is off. Setting Description Demo mode... - Page 32 Gas oven Temperature adjust Temperature unit (°F / °C) The oven temperature has been calibrated at the factory. When first using the Change the temperature format of the oven to Fahrenheit or Celsius. The default is oven, follow the recommended recipe times and temperatures. If it appears that Fahrenheit.
- Page 33 Energy saving WI-FI On/Off This will automatically turn off the oven 12 hours after baking starts or 3 hours If you set the Wi-Fi mode to Off, mobile devices cannot connect to the range. after broiling starts. 1. Press and hold for 3 seconds.
-
Page 34: Smart Control
Gas oven Smart control Oven remote control using the SmartThings app Before using Smart control feature, set Wi-Fi mode to on (See the Wi-Fi On/Off on • Turn the oven off remotely. page 33). My Cooking • Once cooking starts, change the set cooking time and temperature remotely. -
Page 35: Voice Control
Here’s how to link SmartThings account into Amazon Alexa or Google Assistant. Bixby SmartThings App and Alexa App(or Google Assistant App) Should be installed on Start conversation with Bixby on SAMSUNG mobile by saying “Hi Bixby” or by your phone. pressing the side key. -
Page 36: Maintenance
Gas Oven Maintenance Cleaning Function “Alexa” “Ok Google” Oven Timer • Set oven[Device name] to • Set oven[Device name] to CAUTION (Cook Time) 3 hours[Time]. 3 hours[Time]. Wear the glove during cleaning. • Add 10 minutes/hours[Time] • Add 10 minutes/hours[Time] to the oven[Device name]. - Page 37 Do not remove the inner gasket of the oven door for cleaning. • To purchase the graphite lubricant, contact us at 1-800-SAMSUNG (726-7864). • Use soap and water to thoroughly clean • For online shopping, visit http://www.samsungparts.com/Default.aspx and search Don’t hand...
- Page 38 Maintenance Door outer side Cooktop surface • Outer surface: Follow the cleaning instructions for the stainless steel surface in The porcelain-enameled cooktop surface needs to be kept clean. We recommend the previous section. that you remove food spills immediately after they take place. •...
- Page 39 Burner grates and components NOTE Turn off all surface burners and make sure they have all cooled down. • After cleaning, confirm that the burner port openings aren't plugged. 1. Remove the center burner grate(C) • Shake out any excess water and then let burner heads and caps dry thoroughly. following both sides grates.(L/R) Placing the center burner upside down will allow the water to drain out more 2.
- Page 40 Maintenance Round burner head Burner Cap 1. Orient the burner head so that the 1. Match the burner caps to the burners by opening for the electrode lines up with size, and then reinstall the caps on the the electrode. burner heads.
-
Page 41: Self-Cleaning
Self-cleaning To perform the self-cleaning cycle Make sure the door lock is released. Remove all racks from the oven cavity. This self-cleaning oven uses high temperatures (well above cooking temperatures) to burn off leftover grease and residue completely, or reduce them to a finely powdered ash that you can wipe away with a damp cloth. - Page 42 Maintenance After self-cleaning NOTE • The door stays locked until the internal oven temperature falls below 400 °F. Make sure all surface burners are off while • When the oven has cooled down, wipe the oven surfaces with a cloth to remove the oven is performing a self cleaning ash residue.
-
Page 43: Replacing The Oven Light
Replacing the oven light Removing and reinstalling the oven door Oven light How to remove the door The oven light is a standard 40-watt appliance bulb. It comes on when you open CAUTION the oven door. • The door is very heavy. Be careful when removing and lifting the door. Do not 1. - Page 44 Maintenance How to reinstall the door How to remove and reinstall the Storage drawer 1. Firmly grasp both sides of the door at the top. 1. Slide open the drawer until it stops. 2. With the door at the same angle as the removal position, slide the indentations 2.
-
Page 45: Troubleshooting
Troubleshooting Surface burner If you encounter a problem with the range, check the tables starting below, and then try the suggested actions. Problem Cause Action Checkpoints All burners do not The power cord is Make sure the electrical plug light. not plugged into the is plugged into a live, properly electrical outlet. - Page 46 Troubleshooting Problem Cause Action Problem Cause Action Very large or The wrong burner orifice Check the burner orifice size. The oven will not The oven is not Make sure the electrical plug yellow surface is installed. Contact your installer if you turn on.
- Page 47 Problem Cause Action Problem Cause Action The oven light The oven door lock is The display will show the Cooking is The fan automatically This is not a product (lamp) will not turn turned on. Lock icon. Hold the oven door finished, but the runs for a certain amount malfunction.
- Page 48 Troubleshooting Problem Cause Action Problem Cause Action Excessive smoking This is the first time the This is normal. The oven will There is steam This is normal. The oven vent is located there. during a self- oven has been cleaned. always smoke more the first or smoke coming More steam is visible when...
- Page 49 Others Problem Cause Action Problem Cause Action Food does not The wrong cooking mode See page 22. bake or roast was selected. The product is not The appliance has been Make sure the floor is level, properly in the The oven racks have not See page 21.
-
Page 50: Information Codes
If the product is located in an area where service by a SAMSUNG authorized servicer is not available, you may be responsible for a trip charge or required to bring the product to a SAMSUNG authorized service center for service. - Page 51 During the applicable warranty period, a product will be repaired, replaced, or EXCLUSION OF IMPLIED WARRANTIES the purchase price refunded, at the sole option of SAMSUNG. SAMSUNG may use IMPLIED WARRANTIES, INCLUDING THE IMPLIED WARRANTIES OF new or reconditioned parts in repairing a product, or replace the product with MERCHANTABILITY OR FITNESS FOR A PARTICULAR PURPOSE, ARE LIMITED TO a new or reconditioned product.
-
Page 52: Warranty (Canada)
Samsung may elect to provide transportation of the product to and from an authorized service center. SAMSUNG will repair or replace this product, at our option and at no charge as stipulated herein, with new or reconditioned parts or products if found to be defective during the limited warranty period specified above. - Page 53 SPECIAL, INCIDENTAL, OR CONSEQUENTIAL DAMAGES CAUSED BY THE USE, MISUSE, OR INABILITY TO USE THIS PRODUCT, REGARDLESS OF THE LEGAL THEORY ON WHICH THE CLAIM IS BASED, AND EVEN IF SAMSUNG HAS BEEN ADVISED OF THE POSSIBILITY OF SUCH DAMAGES.
-
Page 54: Open Source Announcement
The following URL http://opensource.samsung.com/opensource/SMART_TP2_0/ For questions about features, operation/performance, parts, accessories, or service, call seq/0 leads to open source license information as related to this product. 1-800-SAMSUNG (726-7864), or visit our Web site at www.samsung.com/ca/support (English), or www.samsung.com/ca_fr/support (French). Model # Serial # Please attach your receipt (or a copy) to this manual. - Page 55 Memo...
- Page 56 How-to Videos and Live Shows * Requires reader to be installed on your smartphone Please be advised that the Samsung warranty does NOT cover service calls to explain product operation, correct improper installation, or perform normal cleaning or maintenance. QUESTIONS OR COMMENTS?
Need help?
Do you have a question about the NX60A6511SB and is the answer not in the manual?
Questions and answers