Table of Contents
Advertisement
Advertisement
Table of Contents

Related Manuals for King Jim TEPRA PRO

Summary of Contents for King Jim TEPRA PRO
- Page 1 User's Manual Always read this document and the following label editing software user's manuals before using this product. SPC10 User's Manual Describes how to use the "TEPRA Label Editor SPC10" for Windows. TEPRA LINK 2 User's Manual Describes how to use "TEPRA LINK 2" for iOS/Android.
- Page 2 Editor SPC10 from the KING JIM website (https://www.kingjim.co.jp/english/) and refer to the "OSSLicense.pdf" file in the [License] folder. • "KING JIM", "TEPRA" and P TAPE logo are trademarks of KING JIM CO., LTD. • "iOS" and "App Store" are trademarks of Apple Inc.
-
Page 3: Safety Precautions
Safety Precautions The following precautions must always be followed in order to prevent injury to the user and others, and also damage to assets. ● The degree of injury and damage arising from incorrect usage by ignoring the displayed instructions is as follows. - Page 4 Warning Never modify or disassemble this product. Doing so may cause fire or electric shock. Do not carry out any operations not described in this manual, or the product may break or cause injury. If any of the following abnormalities are observed, turn off the power immediately, unplug the AC adapter, and then contact the place of purchase or our Customer Service.
- Page 5 Caution When using the AC adapter and power cable Do not unplug the AC adapter while the product is in operation, otherwise printing may not be successful. Do not use the AC adapter in a small, confined space, or cover it with a cloth. Otherwise, the AC adapter may overheat and deteriorate.
-
Page 6: Other Precautions
■ Do not fill or block the power code jack, USB port, LAN port and tape outlet. ■ Never touch the print head. ■ To ensure maximum performance of this printer, use genuine KING JIM "TEPRA" PRO tape cartridges (4, 6, 9, 12, 18, 24, 36 mm width). We will not take any responsibility for malfunctions caused by non-genuine KING JIM tape cartridges. -
Page 7: How To Read This Document
How to Read This Document This document uses the following symbols in its descriptions. [Symbol] [Description] Indicates operation procedures Check Indicates the reference page of a related topic Describes useful supplementary information Describes things you should pay attention to, such as the limitations, conditions, etc. -
Page 8: Table Of Contents
Table of Contents ● Safety Precautions ........1 ● Troubleshooting ......... 36 Other Precautions ........4 Any lamps lit or flashing? ....... 36 ● How to Read This Document ....... 5 Printer does not print when executing a ● Table of Contents ......... 6 print. -
Page 9: Checking Package Contents
Sample tape cartridge USB Cable User's Manual (with Warranty) This product does not comes with a CD-ROM or the User's Manual of the label editing software. Download them from the KING JIM website (https://www.kingjim.co.jp/english/). An Internet connection is required to download them. -
Page 10: Name And Function Of Parts
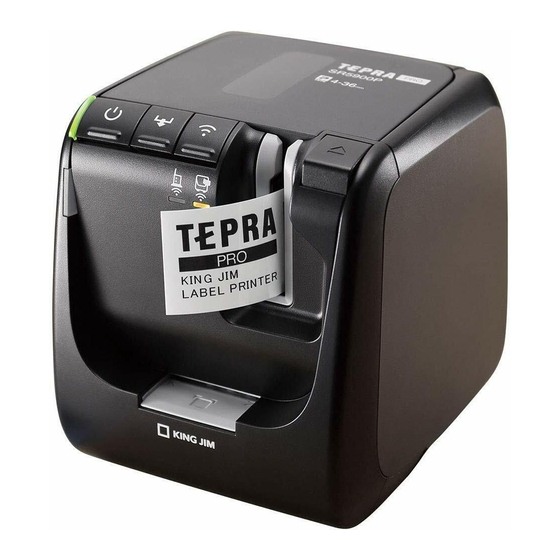
Name and Function of Parts Front Wireless LAN switch button Tape feed button Power button Power lamp (Green LED) Open button Error lamp (Red LED) Infrastructure mode lamp (Orange LED) Access point mode lamp (Orange LED) Tape insertion slot for trimmer Rear CONNECT button USB port... -
Page 11: Printer Setup
Printer Setup Installing the tape cartridge Remove any slack from the ink ribbon. Insert a pen or a pencil into the hole of the tape cartridge to be installed, and gently turn it in the direction of the arrow to remove the slack. Open the top cover. -
Page 12: Connecting The Power Cable
Finger hooks How to take out the tape cartridge For consistency in printing beautiful labels, the tape cartridge is securely fixed to the printer. When removing the tape cartridge, place your fingers on the finger hooks on either side of the cartridge, and lift it straight up to remove. -
Page 13: Turning On The Power
Turning ON the power • When using a USB Cable, a printer driver may not be installed correctly if you connect the printer to a computer and turn the printer power ON before installing the printer driver. Install the printer driver first. • If you connect the printer to a computer using a USB cable before installing the printer driver on the computer, a dialog may appear on the screen indicating that a new hardware is detected. -
Page 14: Execute Demo Printing
Execute Demo Printing Execute demo printing to confirm that the device operates normally. 4 mm width tape cannot be used for demo printing. Keep pressing button for three seconds or more to execute "demo printing". Tape feed button Demo printing is automatically half cut. Do not execute demo printing with tape cartridges for which using half cut is prohibited. -
Page 15: Execute Status Printing
Execute Status Printing Execute a status printing to confirm various printer settings, such as checking the printer network settings. 4 mm width tape cannot be used for status printing. Keep pressing button for three seconds or more to execute "status printing". Wireless LAN switch button Status printing is automatically half cut. -
Page 16: Execute Pin Code Printing
Execute PIN Code Printing Execute a PIN code printing to confirm PIN code during a wireless LAN connection setting in Infrastructure mode. 4 mm width tape cannot be used for PIN code printing. Keep pressing the button on the rear of this printer for three seconds or more to execute "PIN code printing". -
Page 17: Attaching The Label
Attaching the Label Remove the backing sheet from the printed label, and attach the label. Remove the backing sheet. Attach the label by rubbing it firmly. A slit is applied with half cut If you set the tape cutting setting to "Half cut", only the label surface is cut, making it easier to peel off the labels. -
Page 18: Cutting Rounded Label Corners
Cutting Rounded Label Corners Insert the tape in the tape insertion slot for trimmer to round off label corners with the auto- trimmer. Rounded label corners look better and make the label harder to peel off. Each corner of the label is rounded off. Align one side of the label with either guide, and insert it all the way until it stops. -
Page 19: Caring For The Trimmer
Caring for the trimmer Tape scraps are collected within the trimmer cover. Remove the timer cover occasionally to remove the tape scraps. Press the button. Insert the tray back in the printer. The printer turns to power OFF and power lamp (Green LED) changes to unlit. -
Page 20: After Using The Printer (Turning Off The Power)
After Using the Printer (Turning OFF the Power) Press the button to turn the printer power OFF and power lamp (Green LED) changes to unlit. Power lamp (Green LED) Power button Remove USB cable and LAN cable. Remove USB cable and LAN cable from the printer, and then remove these cables from the PC. -
Page 21: Using The Tape Cartridges Properly
Using the Tape Cartridges Properly Follow the setting procedures below in accordance with the tape cartridge that you use. Tape type Setting procedure Do not use the auto Heat-Resistant Label, Iron-on (1) To prevent wear of the cutter cutter. Label, Magnetic Tape, Ribbon blade, set [Cut Setting] to [Don't cut] in the printer settings of the label editing software. -
Page 22: Connecting To A Pc Or Smartphone
• Obtain the following applications with using with a computer. Application Name Source TEPRA Label Editor Label editing software for printing Download from KING JIM website SPC10 out labels arranged in Windows (https://www.kingjim.co.jp/english/) using the "TEPRA" PRO printer. Includes the printer driver for TEPRA and "TEPRA Network... - Page 23 Select a connection method The installation procedure differs depending on the method used to connect this product to a PC. Before installation, select the connection method you will use, and see the corresponding description. Connection method Outline of connection operations Compatible application USB connection This printer is connected to a PC...
-
Page 24: Connect To The Printer With Windows
Turn on your computer and start up Windows. Close running applications if any. Also close any anti-virus or similar software. Download software "TEPRA Label Editor SPC10" from the KING JIM website. (https:// www.kingjim.co.jp/english/) Save the downloaded file to the desktop. And after extracting the file, execute the Setup.exe file in the extracted folder to install it. - Page 25 When the installation screen appears, click [install application and driver]. • If the following message appears, an old version of the application is installed. Be sure to uninstall the old one before installing the new one. • If the following screen appears, either the application or the driver is already installed.
- Page 26 • When connecting via a wired LAN or wireless LAN, it is recommend to also check [TEPRA Network Config Tool] in the [Select Features] screen when installing the application. • When connecting with a USB cable, the "KING JIM SR5900GS" printer driver for USB connections is required. When connecting via wired LAN/wireless LAN, the "KING JIM SR5900GS-NW"...
- Page 27 • Do not use a USB hub. • When connecting two or more printers to one computer, an individual printer driver is required for each printer. Installation of the printer driver for the second or later printers will start automatically when the second (or later) printer is first connected to the computer. Newly installed printer drivers are named as copies of the printer driver.
- Page 28 Select the [TEPRA PRO SR5900GS] as a printer to use, and click [Next]. If the [TEPRA PRO SR5900GS] is not displayed, click [Search again] to display the printer. If you know the IP address of this printer, you can use [Restart the search using a specified IP.] to display...
- Page 29 Make sure if your wireless LAN access point device supports WPS push-button. Refer to the user's manual of your wireless LAN access point device. • Supports WPS push-button → Go to step • Not support WPS push-button Configure connection by setting SSID and password of the wireless LAN access point →...
- Page 30 Select [Configure LAN settings], and click [Next]. To set the SSID and password of the wireless LAN access point to the printer Select [Do not configure LAN settings]. The network printer driver will be installed. Go to step • Require LAN settings configuration when connecting the printer to the new network for the first time.
- Page 31 Press the [WPS] button of the wireless LAN access point, then press the [CONNECT] button of this printer. When entering a PIN code on the wireless LAN access point configuration screen Start the setting utility or similar program for the wireless LAN access point to be used as a base unit so that you are ready to enter the PIN code.
- Page 32 Select the [TEPRA PRO SR5900GS] as a printer to use, and click [Next]. If the [TEPRA PRO SR5900GS] is not displayed, click [Search again] to display the printer. If you know the IP address of this printer, you can use [Restart the search using a specified IP.] to display...
- Page 33 Set the wireless LAN mode of this printer to Access point mode. Press button (Wireless LAN switch) to turn (Access point mode) lamp on. (Immediately after this printer starts up, the lamp flashes for a certain period of time and then lights up.) Click [Next] on the screen and continue until the [Firewall warning] screen is displayed.
- Page 34 Select the [TEPRA PRO SR5900GS] as a printer to use, and click [Next]. If the [TEPRA PRO SR5900GS] is not displayed, click [Search again] to display the printer. If you know the IP address of this printer, you can use [Restart the search using a specified IP.] to display...
- Page 35 Using a fixed IP address (Manually set IP address of wired LAN/wireless LAN) To set a fixed IP address, set the IP address on this printer in the middle of the installation process. In this case, USB connection is required. Select the printer [SR5900GS] listed in [Global model], then click [Next].
-
Page 36: About Tepra Network Config Tool
After finishing the operation described above, configure the network connection settings. Go to any one of the following steps. Connect using a wired LAN cable: P.25 Go to step Connect via Wireless LAN (Infrastructure mode): P.28 Go to step About TEPRA Network Config Tool "TEPRA Network Config Tool"... - Page 37 Click "TEPRA Network Config Tool." For Windows 11/10, select [Start] menu, and click [All programs] - [TEPRA] - [TEPRA NETWORK] - [TEPRA Network Config Tool]. Select the printer name and click [Confirm]. Select [KING JIM SR5900GS]. [TEPRA Network Config Tool] launches.
-
Page 38: Troubleshooting
Troubleshooting This section describes how to resolve printer operation and label printing problems. For label editing software functions, refer to the User's Manual of the label editing software. Any lamps lit or flashing? Check the printer statuses by lamp's condition. Lamp's Lamp Printer status... -
Page 39: Printer Does Not Print When Executing A Print
Printer does not print Have network settings been changed? when executing a print. Install "TEPRA Network Config Tool" and check the network settings. Is there an error message displayed on the Is the power turned on? computer screen? Turn the power on. Printing is not possible if any error has P. -
Page 40: Labels Are Not Cut Automatically
Labels are not cut Are you using 4 or 6 mm wide tape? automatically. You cannot cut 4 or 6 mm wide tape with the trimmer. Is the printer set to [Don't cut]? Is the cutter blade worn? Check if the cut setting is set [Cut Setting] to Prolonged use of the cutter can wear down and [Don't cut] in the printer settings of the label blunt the blade. -
Page 41: Initializing
Initializing. Can power be turned on/off? As this printer is an electronic appliance, a malfunction may occur caused by static electricity or other causes. If the printer cannot be used properly such as being unable to turn the power on/off, follow the steps below to initialize the printer. -
Page 42: Cleaning
Cleaning ■ Dirt and dust on outside of the printer Wipe the printer with a soft, dry cloth. Never use solvents or chemicals such as benzine, paint thinner or alcohol. Never use a chemical cloth. ■ If the printed text has streaks or is faint If dust or grime is stuck to the print head, streaks or smears appear on printouts. -
Page 43: Specifications
Specifications ■ Printer Dimensions Approx. 123 (W) x 153 (D) x 139 (H) (mm) Weight Approx. 1,100 g Supported tape width 4 mm, 6 mm, 9 mm, 12 mm, 18 mm, 24 mm, 36 mm Print head configuration Thermal head 384 dots, 360 dpi (maximum print width: 27.1 mm) Interface USB 2.0 Full-speed, wired LAN (10/100BASE-TX), wireless LAN (Infrastructure mode: IEEE 802.11b/g/n, Access... -
Page 44: Index
Index Symbols (Access point mode lamp) ......8,31,36 Infrastructure mode ..........21,26 Infrastructure mode lamp ( )......8,28,36 (Infrastructure mode lamp)......8,28,36 Iron-on Label ..............19 (Power button) ..........8,11,18 (Tape feed button) .......... 8,11,12 (Wireless LAN switch button) ......8,13 Kraft Label ..............19 AC adapter ..............7,10 Lamp status ..............36 Access point mode ..........21,30 LAN cable ..............22... - Page 45 Tape cartridge ..............9 Proper use .............19 Remove ..............10 Tape cartridge installation area........8 Tape feed button ( ) ......... 8,11,12 Tape insertion slot for trimmer ........8,16 Tape outlet ..............8 Tape passage ..............8,9 TEPRA Label Editor SPC10 ........20,21 TEPRA LINK 2 (iOS/Android) ........20,21 TEPRA Network Config Tool ........34,35 Top cover ..............8,9 Trimmer cover ..............17...
-
Page 46: Post-Purchase Services
If you have any questions or requests concerning post-purchase services, please consult the place of purchase or our Customer Service. Contact Us: https://cwfb.f.msgs.jp/webapp/form/21530_cwfb_6/index.do Manufacturer KING JIM CO., LTD. 2-10-18, Higashi-Kanda, Chiyoda-ku Tokyo, 101-0031 JAPAN https://www.kingjim.co.jp/english/ Label Printer "TEPRA" PRO SR5900GS User's Manual May 2023, First Edition KING JIM CO., LTD. - Page 47 Warranty eligibility clause 1. Repairs are guaranteed during the allotted warranty period as stated in this User's manual for defective or malfunctioning devices only. Any repairs needed outside of warranty's window can be done for the cost of the repair as determined by the manufacturer. Please note that any stored data will be cleared from the device at the time of inspection or repair.
- Page 48 Warranty Product Name Label Printer "TEPRA" PRO SR5900GS 1 year from the date of purchase Warranty Period: Date of Purchase: Month Date Year Customer Details: Name Address Telephone number Product Serial No.: Place of Purchase:...
Need help?
Do you have a question about the TEPRA PRO and is the answer not in the manual?
Questions and answers