Advertisement
Quick Links
Build Document last updated october 2019
Version 1.0 2019
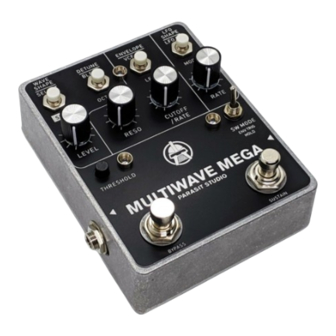
The Multiwave Mega is a monophonic wavetable-based guitar synth with
an analog resonant lowpass filter. It has two oscillators with several
waveshapes that can be blended together and detuned, guitar triggered
filter envelopes, a sustain mode (aka "drone mode") and an LFO with
several waveshapes for modulating both amplitude and frequency.
Happy building and playing!
Note: When first powering up the pedal, the sustain function may be active, so to first get any
sound through the pedal, make sure that the sustain is off (by pressing the sustain
footswitch).
Advertisement

Related Manuals for PARASIT STUDIO Multiwave Mega


Summary of Contents for PARASIT STUDIO Multiwave Mega
- Page 1 Build Document last updated october 2019 Version 1.0 2019 The Multiwave Mega is a monophonic wavetable-based guitar synth with an analog resonant lowpass filter. It has two oscillators with several waveshapes that can be blended together and detuned, guitar triggered filter envelopes, a sustain mode (aka ”drone mode”) and an LFO with...
- Page 2 Controls For more details on the Mega features, please download the user manual from: www.parasitstudio.se/mega BUTTON FUNTIONS The four push buttons has three different functions each: Normal press • Long press (press and hold for at least 500ms) • SHIFT press •...
- Page 3 BUTTON 1 WAVESHAPE - toggles through the waveshapes for the primary oscillator. SELECT - selects the current waveshape for the secondary oscillator. SHIFT - Press and hold, then push one of the other buttons to activate their respective shift functions. BUTTON 2 DETUNE - toggles through 6 different detune setting for the primary oscillator.
-
Page 4: Tech Notes
General builds tips Solder the low profile components first, from short to tall height. Recommended • order: resistors, diodes, IC socket, film-caps, electrolytics, pots and switches. CMOS chips are very sensitive to static charges and can be easily damaged. It's •... - Page 5 1x 200K trimpot (input sens) CLR** 1N5817 3x LED's CLR** 1N5817 1x 128x64 4-pin SPI OLED The PCB from Parasit Studio and the DIY kit from Musikding comes with a • pre-programmed Attiny84 chip. The push buttons are momentary normally open (SPST-no). •...
- Page 6 OLED oscilloscope circuitry. It is are not included or supported by the PCB or DIY kit, and only used for the fully assembled Parasit Studio build (which shares the same PCB layout for my own convenience). Sorry to...
- Page 7 Offboard wiring Note that the DC jack only needs to be connected to the pads at the top of the • PCB. It's not necessary to connect the 9v pads between the PCB and 3PDT board. • The picture shows this connected, but it's not really needed. I personally use ribbon cable between the boards and then it's easier (and looks more tidy) to just include the 9v connection aswell.
- Page 8 Drilling template (1590BB) This template is approximate. Use at your own risk! • Make sure your printer isn't doing any scaling / is set to 100% print size. • The PCB have a top cutout for the DC jack, to have the DC jack mounted in the •...
- Page 9 Schematic Please note that DC filtering, polarity protection, voltage regulation, Vref and the OLED display associated circuit is not shown in this schematic...
- Page 10 Use good solder, and it helps to have a decent soldering station insted of a cheap iron. If you are still having trouble, please visit the madbean forum Parasit Studio subforum section and ask for help there.
Need help?
Do you have a question about the Multiwave Mega and is the answer not in the manual?
Questions and answers