
Related Manuals for Aiphone AC-HOST

Summary of Contents for Aiphone AC-HOST
- Page 1 AC-HOST Quick Setup Guide Table of Contents Getting Started Page 2 Page 2 Assigning a Static IP Address Accessing the System Manager Page 2-3 Setting the Time Page 3 Backing Up the Database Page 4 Page 4-5 Restoring the Database...
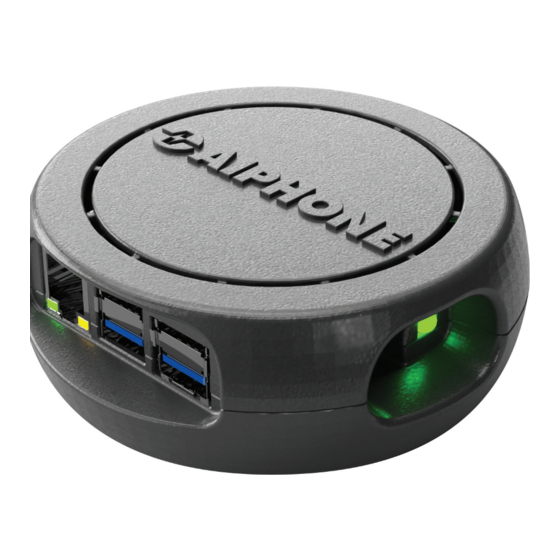
- Page 2 Getting Started Connect the AC-HOST to its USB-C power adaptor and to the network with an ethernet cable. The AC-HOST will power up and the LED status indicator on the right will glow a solid green once it is ready to access.
- Page 3 Accessing the System Manager (continued) This will open up a home screen that provides options to restart or shut down features of the AC-HOST, as well as the device itself. It is a good idea to change the password from the default at this time. Enter the acaccess password, then enter in the new on on the New Password and Confirm Password lines.
- Page 4 Backing Up the Database The AC-HOST can automatically back up its database on a schedule, or manually. This database contains the details of the local AC Nio installation. Connect a USB Drive to one of the USB ports on the AC-HOST, which will store the database going forward.
- Page 5 Resetting to Factory Default This is performed on the AC-HOST hardware itself. Hold down on the reset button next to the green LED. The light will turn off for a few seconds before turning blue. Continue holding down reset button until the light shifts to a lighter shade of blue. Continue to hold the button until the light turns magenta, then release.
Need help?
Do you have a question about the AC-HOST and is the answer not in the manual?
Questions and answers