Table of Contents
Advertisement
Quick Links
Advertisement
Table of Contents

Summary of Contents for FEB HV5120-S Series
- Page 1 High Voltage Energy Storage System Battery HV5120-S Series Product Manual...
-
Page 2: Table Of Contents
This manual introduces HV5120-S from FEB. Please read this manual before you install the battery and follow the instruction carefully during installation process. Please contact FEB immediately for advice and clarification if you have any question. Contents Catalogue 1.Symbol Description ................................3 2.Safety Precautions ................................. -
Page 3: Symbol Description
1. Symbol Description Do not place near open fire or flammable materials. A potential hazard exists when the equipment is working. Wear personal protective equipment during operation. Warning electric shock. Power off the equipment before any operation. Grounding: indicate PE cable connection position. Do not place in areas accessible to children. -
Page 4: Safety Precautions
2. Safety Precautions Alert It is important and necessary to read the user manual carefully (and attachment) before installing or using battery. Failure to do so or to follow any instruction or warning in this document can result in electrical shock, serious injury, and death, or damage battery, potentially rendering it unusable. -
Page 5: Introduction
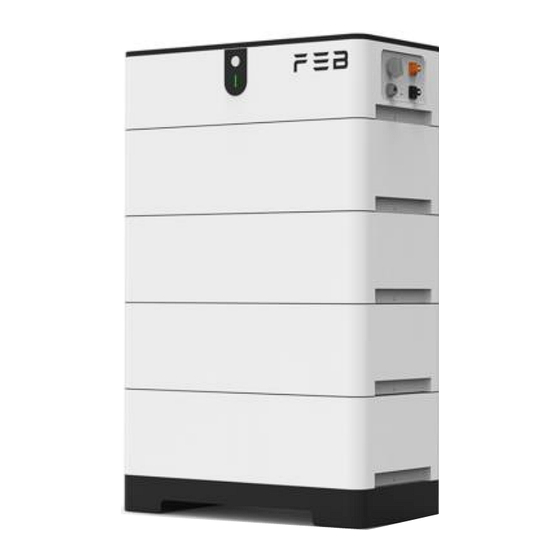
3. Introduction HV5120-S energy storage system battery is a new energy storage product developed and produced by FEB, which can provide reliable power supply for all kinds of equipment or systems. Figure 3-1 3.1 Features Built-in soft-start function to reduce current impact. -
Page 6: Specification
Overvoltage Charging Protection Intelligent Charge Model Under Voltage Discharging Protection Charge/Discharge Current Limit Charge/Discharge Overcurrent Protection Capacity Retention Calculate High/Low Temperature Protection Soft start Short Circuit Protection History Record 3.2 Specification Parameters Items Specification Product Name Rechargeable Lithium Iron Phosphate Module Module Model HV5120-S1 Battery Type... -
Page 7: Equipment Interface Instruction
Figure 3-2 3.3 Equipment interface instruction Figure 3-3 7 / 23... - Page 8 Figure 3-4 Turn on: When battery is dormant, press the START button to start the battery module. Black start: Press and hold the button for 10s to turn on the battery for black start. Blue LED lighting to show the battery system is running or having alarm. Status Mode Run/Alarm...
- Page 9 Green LEDs are used to show the battery’s remaining capacity. State Charging/Discharging Capacity Indicator LED 0~20% 20~40% 40~60% 60~80% 80~95% 95~100% Note The SOC indicator light is off. The SOC indicator light is on. The SOC indicator light is flashing, Duration of indicator on is 0.5s, Duration of indicator off is 0.5s. When you rotate the Isolating Switch to ON position, Positive Power Terminal will connect with the HV+ battery contactor and Negative Power Terminal will connect with the battery HV-, on the other hand, when Isolating Switch is at OFF position both connection will off.
- Page 10 Be used to communicate with inverter or upper battery. Figure 3-7 Definition RJ45 Socket RS485-1A RS485-1B Undefined CAN3-H CAN3-L Undefined CAN1-H CAN1-L RS485-1: Communication with PCS by RS485 CAN3: Communication with PCS by CAN CAN1: Master/slave communication channel CAN communication port with upper computer or display monitor. Figure 3-8 10 / 23...
- Page 11 RJ45 Socket Definition 24V- ADDR_DO Undefined Undefined Undefined Undefined CAN2H CAN2L ADDR_DO: Output signal for Master BCU to arrange the address. 24V- : 24V- signal CAN communication: CAN bus for each rack and upper computer or display monitor. (CAN2H CAH2L). For battery debug usage.
-
Page 12: Safe Handling Of Lithium-Iron Ess Batteries Guide
24V: DC Input (Pin8 connect with 24V+, Pin1&pin7 connect with 24V-). : For Master rack to arrange the address. Master Address DI RS485-2: communication: RS485 for each rack and upper computer or display monitor (RS485-2A RS485-2B). 4. Safe Handling of Lithium-iron ESS Batteries Guide 4.1 Solution Diagram Figure 4-1 4.2 Danger Label... -
Page 13: Safety Gear
Properly use insulated tools to prevent accidental electric shock or short circuits. If tools are not insulated, cover the entire exposed metal surfaces of available tools with electrical tape except their tips. 4.4 Safety Gear It is recommended to wear the following safety gear when dealing with battery pack. Insulated Gloves Safety Goggles Safety Shoes... -
Page 14: Installation And Operation
5. Installation and operation 5.1 Package items Unpacking and check the Package items 1) For battery module package: ⚫ Battery Module 2) For packing box of high voltage box: NOTE: Power and communication cables connect to inverter belongs to the packing box of high voltage box. ⚫... -
Page 15: Installation Location
5.2 Installation Location Make sure that installation location should meet the following condition: The area should be completely water-proof. The floor should be flat and level. No flammable or explosive materials. The ambient temperature is within the range from 0° C to 45° C. The temperature and humidity are maintained at a constant level. -
Page 16: Installation Steps
NOT allowed NOT allowed NOT allowed Figure 5-2 5.4 Installation Steps Warning Follow local electric safety and installation policy, a suitable breaker between battery system and inverter is required. All installation and operation must follow local electric standard and requirements. When battery modules are paralleled, the system should be powered off before installation operation 16 / 23... - Page 17 1. Install the brackets to the base of the battery rack using 2 pcs M4*10 socket head cap screws with locking torque of 2.5N•m. Figure 5-3 2. Install the brackets to the HV Box of the battery rack using 2 pcs M4*10 socket head cap screws with locking torque of 2.5N•m.
- Page 18 Figure 5-6 Place the base against the wall and fix the base to the wall with position of mounting holes on the wall with 2 pcs M6 expansion screws by 8N•m. Figure 5-7 5. Then lay the battery module one by one on the base, and fix all the M4*8 sunk screws on the left side and right side(each module have 4 fixed point)by 2N•m.
-
Page 19: System Turns On
6. Place the HV box on the top of the module and mark the position of mounting holes on the wall. Remove the HV box and put a dust cover over the top of the module and then drill holes using an electric drill to prevent dust from falling off. -
Page 20: System Turns Off
5.6 System turns off When failure or before service, must turn the battery storage system off: Turn off inverter or power supply on DC side. Turn off the switch between PCS and battery system. Switch Isolating Switch to off position. (Switch off the slave battery firstly, finally switch off the master battery) Note 1) One battery system shall just have one master, all the others are slaves. -
Page 21: Remarks
The battery system described in this document complies with the applicable European directives. The certificate is available in the download area of our websites. Far East Battery Jiangsu Co., Ltd No. 8, Keji Avenue, Gaocheng Town, Yixing City, Wuxi City, Jiangsu Province, P.R. China http://en.febbattery.com/ service.feb@feseglobal.com.cn 21 / 23...
Need help?
Do you have a question about the HV5120-S Series and is the answer not in the manual?
Questions and answers