Table of Contents
Advertisement
Quick Links
Advertisement
Table of Contents

Related Manuals for LG V496


Summary of Contents for LG V496
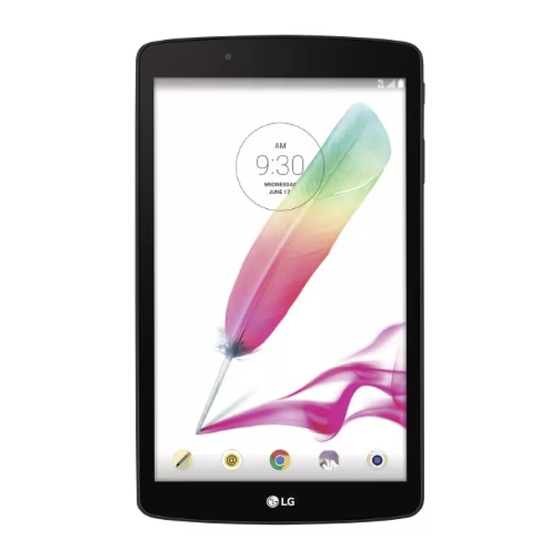
- Page 1 LG-V496 User Guide All screen shots in this guide are simulated. Actual displays and the color of the tablet may vary. Some of the contents in this manual may differ from your tablet depending on the software of the tablet or your service provider.
- Page 2 (5) Upon request from LG, the consumer must provide information to reasonably prove the date of purchase. (6) The customer shall bear the cost of shipping the product to the Customer Service Department of LG. LG shall bear the cost of shipping the product back to the consumer after the completion of service under this limited warranty.
- Page 3 3. WHAT LG WILL DO: LG will, at its sole option, either repair, replace or refund the purchase price of any unit that is covered under this limited warranty. LG may choose at its option to use functionally equivalent re-conditioned, refurbished or new units or parts or any units.
- Page 4 DO NOT RETURN YOUR PRODUCT TO THE ABOVE ADDRESS. Please call or write for the location of the LG authorized service center nearest you and for the procedures for obtaining warranty claims. 7.11 Warranty Laws • The following laws govern warranties that arise in retail sales of consumer goods: •...
-
Page 5: Table Of Contents
Table of Contents About this user guide ......7 QSlide ............35 About this user guide ........7 Capturing a Screenshot ......37 Text Input Methods .........38 Trademarks ..........8 DivX HD ............8 Google account setup .......42 Important notice........9 To set up your Google account ....42 Connecting to Networks and Getting to know your device ...13 Devices ..........43... - Page 6 Restoring tablet data ......102 Google+ ............76 Tablet software update ....104 LG SmartWorld ........76 Tablet software update ......104 Google Applications ......78 LG tablet software update via Over-the-Air About Google applications ......78 (OTA) ............104 Launch Google Maps.......78 Accessories ........106 Play Store ..........80 Troubleshooting .......107...
-
Page 7: About This User Guide
Your content may differ from the final product, or from software supplied by service providers or carriers, This content may be subject to change without prior notice. For the latest version of this manual, please visit the LG website at www.lg.com. •... -
Page 8: Trademarks
About this user guide Trademarks • LG and the LG logo are registered trademarks of LG Electronics. • All other trademarks and copyrights are the property of their respective owners. DivX HD ABOUT DIVX VIDEO: DivX is a digital video format created by DivX, LLC, a subsidiary ®... -
Page 9: Important Notice
Important notice Please read this before you start using your tablet! Please check to see whether any problems you encountered with your tablet are described in this section before taking the tablet in for service or calling a service representative. 1. - Page 10 Important notice 3. Using a Screen Lock > Apps tab > Settings Set an screen lock to secure your tablet. Tap > > Display > Lock screen > Select screen lock and select a desired screen lock from Swipe, Face Unlock, Knock Code, Pattern, PIN and Password. You can create a Backup PIN as a safety measure in case you forget your screen lock.
- Page 11 Turn the tablet off. Press and hold the Volume Down Key first, then press and hold the Power/Lock Key on the right side of the tablet until the LG logo is displayed. Release all of the keys when the LG logo is displayed.
- Page 12 If the screen freezes or the tablet does not respond when you try to operate it: Press and hold the Power/Lock Key for over 8 seconds until the LG logo is displayed to restart your tablet. If it still does not work, please contact the service center.
-
Page 13: Getting To Know Your Device
Getting to know your device Tablet Overview Front-facing camera Power/Lock key Volume keys Earphone jack Infrared (IR) LED SIM card/MicroSD card slot Microphone Charger/USB port Rear-facing camera Speakers NOTE Your tablet is designed to have two speaker openings on the back side for aesthetic reasons. However, the actual sound comes from only one speaker. - Page 14 Getting to know your device Use to take pictures and record videos of yourself. You can Front-facing camera also use this for video chatting. Keep it clean for optimal performance. Press to lock/unlock the screen. Press and hold to turn the Power/Lock key tablet on/off, restart it, activate/deactivate airplane mode, and change the sound settings.
-
Page 15: Charging Your Tablet
If the device is locked and does not work, press and hold the Power/Lock Key for over 8 seconds until LG logo is displayed to restart your tablet. Charging your tablet A USB adapter, which is included with your tablet, is used to charge the battery. Before using your tablet for the first time, make sure the battery is fully charged. -
Page 16: Optimizing Battery Life
Getting to know your device Connect the USB adapter and USB cable. Plug the USB cable (as shown below) into the tablet’s Charger/USB port. Plug the charger into an electrical socket. NOTE The battery must be fully charged initially to improve battery lifetime. Optimizing Battery Life You can extend your battery’s life between charges by turning off features that you don’t need to run constantly in the background. - Page 17 Getting to know your device To extend the life of your battery • Turn off radio communications that you aren’t using, such as Wi-Fi, Bluetooth, or GPS. • Lower screen brightness and set a shorter screen timeout. • Turn off automatic syncing for Gmail™, Calendar, Contacts, and other applications. •...
-
Page 18: Installing The Sim Card
Getting to know your device Installing the SIM card To install the SIM card, locate and open the cover to the slot. Place your fingernail in the cutout and gently pull out the SIM card tray. NOTE There are two slots underneath the cover (the other slot is for a microSD card). Insert the SIM card into the tray with the golden contact facing down. -
Page 19: Inserting A Microsd Card
Getting to know your device Inserting a microSD card Your device supports the use of microSD memory cards of up to 32 GB capacity. Multimedia contents can be saved in the microSD card. Place your fingernail in the cutout and gently pull the memory card slot cover to remove it. -
Page 20: Removing The Microsd Card
Getting to know your device Removing the microSD card To safely remove the microSD card from your tablet, first you need to unmount it. From the Home screen, tap Apps > Settings > Storage > Unmount SD card. Open the microSD card tray and push the card in to release it. Gently pull the microSD card from the slot. -
Page 21: Locking And Unlocking The Screen
Getting to know your device Locking and unlocking the screen If you do not use the tablet for a while, the screen will be automatically turned off and locked. This helps to prevent accidental touches and saves battery power. When you are not using the your tablet, press the Power/Lock Key to lock your tablet. - Page 22 Getting to know your device Unlocking your screen using the Knock Code feature The Knock Code feature allows you to create your own unlock code using a combination of knocks (or taps) on the screen. • While the screen is off, tap the same sequence you established anywhere on the screen.
-
Page 23: Your Home Screen
Your Home screen Touch screen tips Here are some tips on how to navigate on your tablet. NOTE To select an item, touch the center of the icon. Do not press too hard; the touch screen is sensitive enough to pick up a light, yet firm touch. -
Page 24: Home Screen
Your Home screen Home screen canvases by swiping from left to right (and vice versa). Double-tap Double-tap to zoom on a webpage or a map. For example, quickly double-tap a section of a webpage to adjust that section to fit the width of the screen. You can also double- tap to zoom in and out when viewing a picture and when using Maps. - Page 25 Your Home screen Status Bar – Shows device status information, including the time, Wi-Fi signal strength, battery status, and notification icons. Application icons – Tap an icon (application, widget, folder, etc.) to open and use it. Quick Keys – Provide easy, one-touch access to the functions used most often.
-
Page 26: Opening, Switching, And Stopping Apps
Your Home screen Customizing the Home screen You can customize your Home screen by adding apps, downloads, widgets or wallpapers. For more convenience using your tablet, add your favorite apps and widgets to the Home screen. To add items on your Home screen: Touch and hold the empty part of the Home screen. -
Page 27: Using Dual Window
Your Home screen Using Dual Window The Dual Window feature splits the screen to enable multi-tasking, drag and drop interaction, auto-linking and recently used apps. Touch to split the screen or touch and hold the until the app list is displayed. -
Page 28: Customizing App Icons On The Home Screen
Your Home screen To disable the Dual Window feature > Apps > Settings > Dual window. Tap the Dual Window switch to toggle it to OFF. TIP! You can launch two Browser apps at the same time. Customizing app icons on the Home screen You can customize each application icon with images from your Gallery. -
Page 29: Quick Access
Your Home screen To view other Home screen panels • Swipe (or flick) your finger left or right across the Home screen. • Pinch in on the Home screen to display the mini panel view, then tap the Home screen panel you want to view. Quick access To view the quick access items, touch anywhere in the front key area and drag up. -
Page 30: Notifications
Your Home screen Notifications Notifications alert you to the arrival of new messages, calendar events, and alarms, as well as to ongoing events, such as downloads. From the Notifications Panel, you can view your tablet’s current status and pending notifications. When a notification arrives, its icon appears at the top of the screen. Icons for pending notifications appear on the left, and system icons showing things like Wi-Fi or battery strength on the right. - Page 31 Your Home screen Accessing notifications Swipe the Status Bar down to open the Notifications Panel and access notifications. To close the Notifications Panel, swipe the bar that is at the bottom of the screen upwards. Quick Settings Bar – Swipe to the right or left to scroll through the list.
- Page 32 Your Home screen To rearrange Quick Setting options on the Notification Panel Open the Notifications Panel, swipe the Quick Settings to the left, and tap . To rearrange items, drag to the desired location. To add more icons, checkmark the desired functions.
- Page 33 Your Home screen Connected to a Wi-Fi network Wired headset connected Bluetooth is on System warning Vibrate mode is on Silent mode is on Battery fully charged Battery is charging Content sharing is on Downloading data Uploading data An alarm is set GPS is on Data is syncing...
-
Page 34: Multiple Users
Your Home screen New Gmail message New Hangouts message A song is currently playing Tablet is connected to PC via USB cable Battery saver mode is on Multiple Users Only one tablet owner ID can be created, but multiple user IDs can be added so that others can log in and use the tablet independently. -
Page 35: Qslide
Your Home screen • Messages and scheduled calendar events will be sent to notify the specified user ID only. • Once a user starts printing a document using Mobile Print, the print job will continue even if the user ID is changed. •... - Page 36 Your Home screen panel, or directly from the applications that support the QSlide function. Open the Notifications Panel and tap the QSlide Quick Settings to enable the QSlide Apps bar. Then tap the desired app from the QSlide apps section. While using an application that supports QSlide, tap .
-
Page 37: Capturing A Screenshot
Your Home screen Tap to access QSlide. Tap to exit QSlide and return to full window. Tap to adjust the transparency. Tap to close QSlide. Tap to adjust the window size. NOTE The QSlide function can support up to two windows at the same time. QSlide only supports the following applications: Video, Browser, Calendar, Email, File Manager, and Calculator. -
Page 38: Text Input Methods
Your Home screen Press and hold both Volume Keys at the same time. Using Capture plus to capture a screenshot of the browser This feature allows you to capture a portion of the screen in the default Internet browser. Open the Browser app and navigate to the page you want to capture a screen shot Tap the Menu icon >... - Page 39 Tap to select the keyboard language. Only available when multiple languages are enabled. Tap to access the LG keyboard settings. Touch and hold to access the Clip Tray. Tap to enter a space. Tap to create a new line in the message field.
- Page 40 Your Home screen the split keyboard, place both thumbs on the keyboard and slide them apart. To change the keyboard height Adjust height of keyboard to show more of the screen and to control keyboard more easily. • > Keyboard height and layout > Keyboard height > Tap and drag the icon to adjust the keyboard height.
- Page 41 Your Home screen Touch and hold text and images while viewing or editing them and tap Clip Tray. Touch and hold the text input field and select Clip Tray. You can also access the Clip Tray by touching and holding >...
-
Page 42: Google Account Setup
Google account setup When you first turn on your tablet, you have the opportunity to activate the network, to sign into your Google Account and select how you want to use certain Google services. To set up your Google account •... -
Page 43: Connecting To Networks And Devices
Connecting to Networks and Devices Wi-Fi With Wi-Fi, you can use high-speed Internet access within the coverage of the wireless access point (AP). Enjoy wireless Internet using Wi-Fi, without extra charges. Connecting to Wi-Fi networks To use Wi-Fi on your tablet, you need to access a wireless access point or ‘hotspot’. Some access points are open and you can simply connect to them. -
Page 44: Bluetooth
Bluetooth menu as on most other mobile phones and tablets. NOTE LG is not responsible for the loss, interception or misuse of data sent or received via the Bluetooth wireless feature. Always ensure that you share and receive data with devices that are trusted and properly secured. - Page 45 Connecting to Networks and Devices NOTE Depending on the type of device, you may have to enter matching codes, confirm matching codes, or the devices may automatically pair. Once pairing is successful, your tablet will connect to the other device. NOTE Your tablet doesn't support Handsfree Profile.
-
Page 46: Smartshare
Connecting to Networks and Devices SmartShare You can use the SmartShare feature easily in the Gallery, Music, and others. Enjoying the content via a variety of devices You can share your tablet's content with a variety devices. Tap or tap >... -
Page 47: Qpair
Connecting to Networks and Devices Searching other devices Tap Nearby devices, then you can see the DLNA-supported devices. Connect to the device to view the content. QPair By connecting your tablet and mobile phone via QPair, you can sync incoming calls, messages, and social networking notifications between your tablet and mobile phone. - Page 48 Connecting to Networks and Devices NOTE QPair works with phones running Android 4.1 or later. Some features may be limited depending on your phone model. Since QPair uses the Bluetooth function, it may not work normally if you change the Bluetooth settings while QPair is in use.
-
Page 49: Pc Connections With A Usb Cable
Connect your tablet to a PC using a USB cable. If you haven't installed the LG Android Platform Driver on your PC, you will need to manually change the settings. To change the settings, slide the Status Bar down and tap the current USB connection mode >... - Page 50 Connecting to Networks and Devices Synchronize with Windows Media Player Ensure that Windows Media Player is installed on your PC. Use the USB cable to connect the tablet to a PC on which Windows Media Player has been installed. Select the Media sync (MTP) option. When connected, a pop-up window will appear on the PC.
- Page 51 Connecting to Networks and Devices Connect your tablet to your computer, and double click the AFT (Android File Transfer program) application to start it up. You can view the media contents, drag and drop the media file to and from the tablet (or PC).
-
Page 52: Contacts
Contacts You can add contacts on your tablet and synchronize them with the contacts in your Google Account or other accounts that support syncing contacts. Searching for a contact From the Home screen, tap Contacts to open your contact list. Tap the Search contacts box and enter the contact's name. -
Page 53: Creating A Group
Contacts Tap a contact to view its details. Tap the star to the right of the contact’s name. The star turns gold and the contact is added to your favorites. To remove a contact from your favorites list From the Home screen, tap Contacts to open your contacts. -
Page 54: Email
Email You can use the Email application to read emails from services like Yahoo!, MSN, and AOL. The Email application supports the following account types: POP3, IMAP and Exchange. Your service provider or system administrator can provide you with the account settings you need. -
Page 55: Working With Account Folders
Email Working with account folders Open the Email application and tap the Menu icon and select Folders. Each account has an Inbox, Outbox, Sent and Drafts folder. Depending on the features supported by your account’s service provider, you may have additional folders. Composing and sending email While in the Email application, tap Compose Enter an address for the message’s intended recipient. - Page 56 Entertainment Camera To open the Camera application, tap Camera on the Home screen. Getting to know the viewfinder Clean view – Touch to show or hide the camera menus on the view finder. Swap camera – Switch between the back-facing camera lens and the front–facing camera lens.
- Page 57 Entertainment NOTE Please ensure the camera lens is clean before taking pictures. Using the advanced settings In the viewfinder, tap to open the advanced options. Selects the photo and video resolution. If you choose a high resolution, the file size will increase, which means you will be able to store fewer photos and videos in the memory.
- Page 58 Entertainment To zoom in or out When taking a picture or recording a video, place two fingers anywhere on the screen and spread them apart to zoom in. To zoom back out, pinch them together. Gesture shot The Gesture shot feature allows you to take a picture with a hand gesture using the front camera.
- Page 59 Entertainment Touch to edit the photo. Touch to access the camera. Touch to send your memo to others or share it via social networking services. Touch to delete the photo. Touch to access more options. Touch to add the picture to your favorites. TIP! If you have a social networking account and set it up on your tablet, you can share your photo with your social networking community.
- Page 60 Entertainment Add location – To add the location information. Rename – Touch to edit the name of the selected photo. Print – Allows you to print the picture. Details – Displays more information about the picture. Viewing your saved photos You can access your saved photos when in camera mode.
- Page 61 Entertainment Watching your saved videos Access your saved videos from video camera mode by tapping the image preview by the capture button. In the viewfinder, tap the image preview by the capture button. Your Gallery will appear on the screen with your most recent recorded video displayed.
- Page 62 Entertainment Viewing pictures Launching the Gallery app displays your available folders. When another application, such as Email, saves a picture, the Downloads folder is automatically created to contain the picture. Likewise, capturing a screenshot automatically creates the Screenshots folder. Tap a folder to open it. Pictures are displayed in order by creation date.
- Page 63 Entertainment Setting as wallpaper When viewing a photo, touch the Menu icon > Set image as and select Home screen wallpaper, Lock screen wallpaper or Wallpaper. Slideshow You can view your photos in a slideshow by album or by selecting all of your photos. From the Home screen, tap Gallery •...
- Page 64 Entertainment Touch access QSlide and display the video in small window. Touch to share your video via the SmartShare function. Touch to access more options. Touch to manage the video volume. Touch and hold to rewind in 3 second increments. Tap once to rewind 10 seconds.
- Page 65 Entertainment To change the volume while watching a video, press the Volume Keys on the right side of the tablet. Touch and hold a video in the list to access the following options: Share, Delete, Trim, Rename and Details. TIP! While watching a video, slide up and down along the left side of the screen to adjust the screen brightness.
- Page 66 Entertainment Touch to share your music via the SmartShare function. Touch to set the current song as a favorite. Touch to see the Now playing playlist. Touch to access more options. Touch to set shuffle mode. Touch to set repeat mode.
- Page 67 Entertainment Touch to manage the music volume. Touch to go back to the beginning of the song. Touch twice to return to the previous song. Touch and hold to rewind 3 seconds. Touch to pause playback. Touch to skip to the next track on the album or in the playlist. Touch and hold to fast-forward 3 seconds.
- Page 68 Tools QuickMemo+ The QuickMemo+ feature allows you to create memos and capture screen shots. Capture screens, draw on them, and share them with family and friends with QuickMemo+. Creating a memo From the Home screen, tap QuickMemo+ , then tap to create a new memo.
- Page 69 Tools Saves the memo in QuickMemo+. Touch to access more options. Allows you to set a reminder notification for an event. Allows you to insert weather information into the memo. Allows you to add location information using GPS. Capturing a screen shot for your QuickMemo To access the QuickMemo+ feature, slide the Status Bar downwards and touch Press both of the Volume Keys at the same time for one second.
- Page 70 Tools NOTE Please use a fingertip while using the QuickMemo+. Do not use your fingernail. QuickRemote QuickRemote turns your tablet into a Universal Remote for your home TV or cable box. NOTE QuickRemote may not be available for some devices and areas. To open and configure QuickRemote From the Home screen, tap the Apps >...
Need help?
Do you have a question about the V496 and is the answer not in the manual?
Questions and answers