Table of Contents
Advertisement
Quick Links
OWNER'S MANUAL
VACUUM CLEANER
Before beginning installation, read these instructions
carefully. This will simplify installation and ensure that the
product is installed correctly and safely. Leave these
instructions near the product after installation for future
reference.
ENGLISH
A9T-LITE
MFL71880945
Rev.00_082923
Copyright © 2023 LG Electronics Inc. All Rights Reserved.
www.lg.com
Advertisement
Table of Contents

Related Manuals for LG A9T-LITE


Summary of Contents for LG A9T-LITE
- Page 1 This will simplify installation and ensure that the product is installed correctly and safely. Leave these instructions near the product after installation for future reference. ENGLISH A9T-LITE www.lg.com MFL71880945 Rev.00_082923 Copyright © 2023 LG Electronics Inc. All Rights Reserved.
-
Page 2: Table Of Contents
OPERATION Getting Started ....................18 Charging the Battery ..................20 Using the Mop Nozzle ..................21 Using the Nozzles and Tools................25 SMART FUNCTIONS Using LG ThinQ Application................28 Smart Diagnosis Function................30 MAINTENANCE Cleaning the Appliance ...................32 Cleaning the Nozzles ..................36 TROUBLESHOOTING Before Calling for Service................40... -
Page 3: Safety Instructions
SAFETY INSTRUCTIONS SAFETY INSTRUCTIONS READ ALL INSTRUCTIONS BEFORE USE The following safety guidelines are intended to prevent unforeseen risks or damage from unsafe or incorrect operation of the appliance. The guidelines are separated into ‘WARNING’ and ‘CAUTION’ as described below. Safety Messages This symbol is displayed to indicate matters and operations that can cause risk. - Page 4 If the appliance is not working as it should, has been dropped, damaged, left outdoors, or dropped into water, return it to an LG Electronics service centre. • Do not pull or carry by cord, use cord as a handle, close a door on cord, or pull cord around sharp edges or corners.
- Page 5 SAFETY INSTRUCTIONS • When disposing of this appliance, follow regulations for disposal of rechargeable lithium-ion batteries. • Follow all local ordinances and regulations when handling or disposing of the battery. • Prevent unintentional starting. Ensure the switch is in the off position before connecting to the battery pack, picking up or carrying the appliance.
- Page 6 • Never attempt to operate this appliance if it is damaged, malfunctioning, partially disassembled, or has missing or broken parts, including a damaged cord or plug. Take it to an authorized LG Electronics service centre or dealer for assistance. • Do not apply excessive force to the power cord to bend it, or place it under a heavy object as this will damage it.
- Page 7 • Do not cover the power cord with a rug or carpeting. • Push the power plug firmly into the wall outlet so that it is not loose. • If the product has been submerged, contact an LG Electronics service centre or dealer for instructions before resuming use.
- Page 8 • If the earth leakage breaker is tripped when the product is put on the charging station, immediately remove the appliance from the charging station. Contact an LG Electronics customer service centre. • Use extra care when cleaning on stairs.
- Page 9 SAFETY INSTRUCTIONS Maintenance • Make sure to unplug the power cord when cleaning or maintaining the charging station. • Do not wash the inlet port or the dust bin with water or detergent. • Do not use detergents, polishes or air fresheners to clean the dust bin.
-
Page 10: Caution
SAFETY INSTRUCTIONS CAUTION CAUTION • To reduce the risk of injury to persons, malfunction, or damage to the product or property when using the appliance, follow basic safety precautions, including the following: Operation • This appliance has a built-in safety device to prevent damage from overheating. - Page 11 SAFETY INSTRUCTIONS • Do not use the mop nozzle to clean the same spot repeatedly for an extended period of time. The water injection at the mop nozzle may cause water to get into the dust inlet and damage the appliance. •...
-
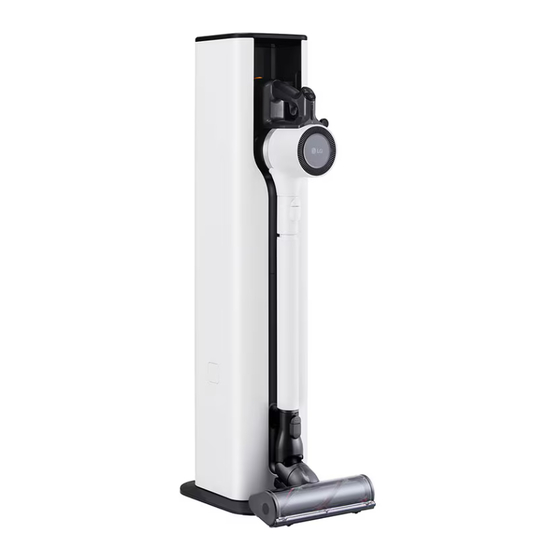
Page 12: Installation Product Overview
INSTALLATION INSTALLATION Product Overview The images in this guide may be different from the actual components and accessories, which are subject to change by the manufacturer without prior notice for product improvement purposes. Front View *1 This feature is only available on some models. Product Body Extension Pipe Nozzle... - Page 13 INSTALLATION NOTE • Use the vacuum cleaner only with the provided charging station. Using a charging station other than the one designed to be used with the vacuum cleaner, as improper sealing of the chagring station may result and dust not being emptied from vacuum cleaner.
- Page 14 Mop Pads for General Cleaning Cleaning Brush Measuring Cup Nozzles NOTE • The mop pads, batteries, exhaust filter and the pre-filter will eventually need to be replaced. Contact an LG Electronics customer service centre. Multi-Surface Nozzle Slim Hard Floor Nozzle Bedding Nozzle...
-
Page 15: Storing The Accessories
Individually measured data would be different from a lab test result. • Battery run time is the result of using a fully charged battery according to the LG Electronics test standard. Results may be different depending on actual use environment and period of use. - Page 16 INSTALLATION • To detach the extension pipe, press the • To open the nozzle hooks, press on the right side. Be careful not to pinch fingers when extension pipe release button opening. Put the product body on the charging station. •...
- Page 17 INSTALLATION Open the right door and insert the combination tool , the crevice tool and the cleaning brush for storage. NOTE • Before moving the product, unplug it and remove the vacuum cleaner, nozzles, and accessories. • To carry the product, open both doors and hold the areas shown.
-
Page 18: Operation Getting Started
Please contact LG they click into place. The nozzles and tools can Electronics customer information centre if the also be attached to the end of the extension problem persists. - Page 19 • Press the Power button to activate Normal mode. • This indicator blinks when the appliance is connecting to the LG ThinQ application or Suction Power Up (+) Button / Turbo Mode home Wi-Fi network, and the indicator lights • Press the + button to increase the suction up when the connection is complete.
-
Page 20: Charging The Battery
OPERATION • As the product is charging, bars light up on charging station only after removing the the battery level indicator to indicate the level combination tool or the crevice tool, if either of charge. happens to be fitted • Once the battery is fully recharged, 3 bars will •... -
Page 21: Using The Mop Nozzle
• Do not use a soiled mop pad to clean floors. • Use only authorized LG Electronics mop pads. • Empty the dust bin and clean the exhaust filter and the pre-filter after using the mop nozzle. - Page 22 OPERATION • Do not put liquid other than water and hot CAUTION water in the water tank. • Do not assemble or disassemble the nozzle while the appliance is turned on. Doing so may result in injury. • Set the water adjustment button to the STOP position when not using the appliance for an extended period of time.
- Page 23 OPERATION • Attaching and using mop pads while they • STOP: Press the Low Mode or High Mode are dry may affect the cleaning results. button halfway to toggle back to the STOP position. This stops the supply of water so you can go over areas that are already wet.
- Page 24 OPERATION • Keep the water tank after water is CAUTION completely empty and dry. Moisture or residual water in the tank may cause odour. • Do not add detergent, vinegar or baking soda to the water tank when washing. It is not easily removed in the water tank, which may soil the floor.
-
Page 25: Using The Nozzles And Tools
OPERATION Using the Nozzles and Pet Nozzle Tools It is suitable for soft surfaces and pet hair removal. Before Using the Nozzles and Tools Some accessories are only available on some models. Specialized attachments can help you clean more effectively. Tools and nozzles can be attached to the product body or the extension pipe. - Page 26 OPERATION Hard Dirt Tool • Use it with the Turbo mode to clean pet hair out of furniture, mats, or tight areas like corners. Firm bristles remove solidified dirt from hard surfaces. Clean up hair or foreign objects that are entangled in carpets or rugs.
- Page 27 OPERATION • To convert back to the crevice mode, press in on • The flexible hose extension cannot be used with the power drive Nozzle. the brush release button and slide the brush Adjusting the Length To adjust the length of the tool, press and hold the Using the Kompressor Lever release button on the side of the tool.
-
Page 28: Smart Functions
- Guide to cleaning the filters. • Smart Diagnosis™ Run the LG ThinQ app and sign in with your - This function provides useful information for existing account or create an LG account to diagnosing and solving issues with the sign in. - Page 29 Internet service provider or refer to your The appliance is connected to Wi-Fi. wireless router manual. • LG ThinQ is not responsible for any network The appliance has been connection problems or any faults, disconnected. malfunctions, or errors caused by network Connecting the Appliance Initially connection.
-
Page 30: Smart Diagnosis Function
Equipped with a mop inlet, you can set the default LG Electronics will also provide open source code to mode of operation when starting cleaning. you on CD-ROM for a charge covering the cost of... - Page 31 SMART FUNCTIONS troubleshooting data to a smartphone using the LG ThinQ application. • Launch the LG ThinQ application and select the Smart Diagnosis feature in the menu. Follow the instructions provided in the LG ThinQ application.
-
Page 32: Maintenance
MAINTENANCE MAINTENANCE Cleaning the Appliance battery from the product body and remove the foreign objects before resuming use of the appliance. Before Cleaning the Appliance • Check the inside of the product body, above the To maintain the optimum suction power, the Kompressor working plate, the extension pipe, cyclonic mesh filter, the exhaust filter and the pre- inlets, exhaust filter, pre-filter and cyclonic mesh... - Page 33 MAINTENANCE filter. Clean the dust bin and cyclonic mesh filter Remove the battery from the product body to avoid product damage. before cleaning the dust bin. • Do not force the Kompressor lever down if foreign objects are caught around the working plate of the Kompressor system.
- Page 34 MAINTENANCE • Do not wash the product body or motor with the working plate with the towel-wrapped water. brush handle. Turn the product body over and lift the Kompressor lever up to clean the inside of Cleaning the Filters the working plate with the provided cleaning brush.
- Page 35 MAINTENANCE button in order to separate it from the exhaust direct sunlight for at least 24 hours before filter. reassembling. Align the lock position of the exhaust filter cover with the letter "H" of the PUSH button on the exhaust filter. Lift out the pre-filter from the product body.
-
Page 36: Cleaning The Nozzles
MAINTENANCE Insert the dried pre-filter and rotate the Turn the nozzle upside down and rotate the exhaust filter to the locked position cover lock slot counterclockwise. reassemble it on the product body. Pull the brush cover forward and pull the brush out. - Page 37 MAINTENANCE • Wrap the handle of the cleaning brush with dust from the brush and the bottom of the a wet towel or cloth and use it to clean the nozzle. rotating brush and nozzle. Use a damp towel or cloth to remove any remaining foreign objects and dust from the Slide the brush back into the nozzle and rotate brush and the bottom of the nozzle.
- Page 38 MAINTENANCE Remove the rotating brush while holding down Press the cover of the brush to lock the brush the PUSH button on the nozzle. until a clicking sound is heard. Cleaning the Bedding Nozzle Attach the crevice tool to the product body and use the vacuum to remove foreign objects and dust from the brush and the bottom of the Press the nozzle release button to remove the...
- Page 39 MAINTENANCE objects, debris and hair from all Rollers of the nozzles using tweezers.
-
Page 40: Troubleshooting
TROUBLESHOOTING TROUBLESHOOTING Before Calling for Service Operation Symptoms Possible Cause & Solution The appliance does not Battery is fully discharged. operate. • Charge the battery. Appliance is turned off. • Press the Power button to turn on the appliance. Suction power is too Dust bin is full of dust. - Page 41 LG customer information centre for service. repeatedly. Foreign object is in the product body, extension pipe, inlet port or nozzle.
- Page 42 TROUBLESHOOTING Symptoms Possible Cause & Solution The mop pad Mop nozzle is pressed too hard against the floor. attachment plate does • The mop attachment plate stops automatically to protect the product. This not rotate. is not a failure. Attach the mop pads securely to the mop attachment plate and press the power button to resume use.
- Page 43 Your home appliance Battery is fully discharged. and smartphone are • Charge the battery, then register your appliance on LG ThinQ. not connected to the Wi-Fi network. The password for the Wi-Fi that you are trying to connect to is incorrect.
Need help?
Do you have a question about the A9T-LITE and is the answer not in the manual?
Questions and answers