
Related Manuals for Klinsmann K185

Summary of Contents for Klinsmann K185
- Page 1 ROBOT VACUUM CLEANER K185 USER MANUAL Thanks for your purchasing Please read this manual carefully before using...
-
Page 2: Table Of Contents
Contents 1. Important Safety Instructions ....................3-5 2. Package Contents /Structure introduction ..............6-8 3.Technical Specifications ......................9 4. Instruction for Use ........................10-21 5. Routine Maintenance ......................22-26 6. Troubleshooting .........................27-28... -
Page 3: Important Safety Instructions
1.Important Safety Instructions When using an electrical Appliance, basic 3. If there is a drop off in the cleaning area precautions should always be followed, due to a step or stairs, you should operate including the following: the Appliance to ensure that it can detect READ ALL INSTRUCTIONS BEFORE the step without falling over the edge. - Page 4 1.Important Safety Instructions 16. Do not use Appliance to pick up anything that is 8. Do not use without dust bin and/or filters in burning or smoking, such as cigarettes, matches, place. hot ashes, or anything that could cause a fire. 9.
- Page 5 1.Important Safety Instructions 27. Do not incinerate the Appliance even if it is 21. Do not use with a damaged power cord or severely damaged. The batteries can explode receptacle. Do not use the Appliance or in a fire. Docking Station if it is not working properly, 28.
-
Page 6: Package Contents /Structure Introduction
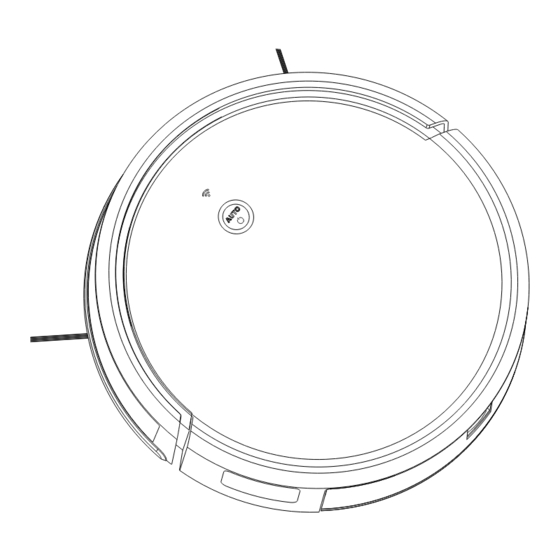
2.1 Package Contents Docking Station Cleaning Brush Adapter Robot ROBOT VACUUM CLEANER K185 USER MANUAL Thanks for your purchasing Please read this manual carefully before using Instruction Manual Remote Control Side Brushes Note: Figures and illustrations are for reference only and may differ from actual... - Page 7 2.Package Contents /Structure introduction 2.2 Structure introduction universal bumper wheel cliff sensor WiFi indicator charging contact charging contact button right side left side brush brush signal window cliff cliff sensor sensor Glass Pannel left wheel right wheel charging socket main brush power dust box battery shell...
- Page 8 2.Package Contents /Structure introduction 2.2 Structure introduction Dust Box & Water Tank Docking Station HEPA HEPA cover supporter dust box filter signal window water tank adapter socket water tank water tank filter lock charging contact water hole water tank plug...
-
Page 9: Technical Specifications
3.Technical Specifications 3.1 Specifiaction Model K185 Working Voltage 14.8V Docking Station KCH217 Model 19V DC, 19V DC, Input Output 0.6A 0.6A Battery 2600mAh Li-ion Rated Power Note:Technical and design specifications may be changed for continuous product improvement... -
Page 10: Instruction For Use
4.Instruction for Use 4.1 Notes Before Cleaning 1.Arrange the furniture neatly 2.Remove unfriendly obstacles 3.Prevent robot from falling Please arrange chair table and Remove the weight scale ,fan It may be necessary to place other objects neatly to leave base and other low objects that a physical barrier at the edge the biggest space before cleaning may affect the robot clean... - Page 11 4.Instruction for Use 4.1 Notes Before Cleaning 4.Block out objects with strong 5.Please stay away from the 6.Avoid touching the water reflective surfaces robot when it's working tank release button Please ensure height 9cm from floor please do not touch the water Please do not stand in narrow without strong reflective surface, tank button when pick up robot,...
- Page 12 4.Instruction for Use 4.2 Docking Station Installation 1.Place the docking station against the wall edge on a flat surface and connect adapter with mains power. More than 0.5m(1.6ft) Note: a. The docking station should have more than 0.5m(1.6ft) of clearance on each side, and more than 1.5m(5ft) in More than 1.5m(5ft) the front.
- Page 13 4.Instruction for Use 4.3 APP Connection 1. Download the Tuya APP Search “TUYA” in the App Store or Google Play, or scan the QR code below, then download and install the app. Follow the app step to register and login. Step 4 Turn on robot, Step 2...
- Page 14 4.Instruction for Use 4.3 APP Connection Step 5 Step 7 Step 6 Press next If the wifi indicator Choose AP mode blinking rapidly Choose EZ mode and wait for connect If the wifi indicator blinking slowly,please follow step 6...
- Page 15 4.Instruction for Use 4.3 APP Connection Note: a. Due to ongoing app development, the actual process may differ slightly from the above description Always follow the instruction given in APP. b. Only support 2.4GHz WiFi. c. If you can't connect your phone to the robot, reset the WiFi, and add your robot as a new device.
- Page 16 4.Instruction for Use 4.4 Function Use 1.Auto Clean Mode Turn on robot, press robot button or remote control OK button or auto button in APP, the robot will start auto clean mode. Please close the door if only clean one room, robot will back to start place after cleaning finish.
- Page 17 4.Instruction for Use 4.4 Function Use 2.Edge Clean Mode 4.Suction Option Mode Press edge button in app or remote control Adjust suction through APP setting Machine along the object edge to cleaning sleep/wake/stop charge return AUTO EDGE SPOT MUTE WIFI 3.Sprial Clean Mode 5.Auto charge Mode Robot will find docking station...
- Page 18 4.Instruction for Use 4.4 Function Use 6.Schedule Clean (set in APP) 1.Enter setting 2.Choose timer 3.Set and save Note: Due to ongoing app development, the actual process may differ slightly from the above description. Always follow the instruction given in APP.
- Page 19 4.Instruction for Use 4.4 Function Use 7.Mopping Function Remove dust box Close plug tightly Remove out water tank Open plug, fill with water Inject Water Slide water tank into robot Put back dust box Wet the cloth, stick it until you hear it lock with Install cloth plate to water tank a click.
- Page 20 4.Instruction for Use 4.4 Function Use 7.Mopping Function Adjust mop humidity Start mopping cleaning in the APP as required Ensure the robot is fully with power and turn on it, press auto button or use the app to start cleanup. Note: a.
- Page 21 4.Instruction for Use 4.4 Function Use 8.Remote Controller 9.Usage of Side Brushes 1、 stopped working, into hibernation 2、 auto trcharge sleep/wake/stop charge return 3、 start / stop cleaning Right Brush Left Brush 4、 direction button central is central is (use when the machine stopped) green front view 5、...
-
Page 22: Routine Maintenance
5.Routine Maintenance 5.2 Water Tank and Cloth 5.1 Main Brush 1.Turn the robot over unlatch and remove the 1.Disassemble Water Tank main brush cover. 2.Take out the main brush, remove and clean its bearings. 3.Use the supplied cleaning brush tool to Remove out remove any dust or entangled hair. - Page 23 5.Routine Maintenance 5.2 Water Tank and Cloth 2.Clean Water Tank 3.Clean Cloth Pour out water Clean and dry it Clean water tank Wipe and dry it...
- Page 24 5.Routine Maintenance 5.3 Dust Box and Filter Part 1.Disassembly dust box 2.Clean dust box 3.Disassembly filter parts 4.Clean dust box cover 5.Rinse the dust box with water 6.Dry these parts gently tap the HEPA...
- Page 25 5.Routine Maintenance 5.5 Firware Update 5.4 Battery Update the robot using the app. The robot is equipped with a high-performance Place the robot on the dock station and ensure lithium-ion rechargeable battery pack. To maintain that the battery level is higher than 20% before battery performance, keep the robot charged.
- Page 26 5.Maintenance 5.6 Other Parts 2.Clean universal wheel 1.Clean cliff sensors Reduce abnormal noise and hair Ensure the sensors are sensitive entanglement cliff sensor universal wheel cliff cliff sensor sensor spindle runner 3.Clean signal window 4.Clean charging contact and signal window charging contact signal window...
-
Page 27: Troubleshooting
6.Troubleshooting Robot will tell you something is wrong with an alarm indicator light and sounds Solution Malfunction Possible Causes Robot is not switch ON. Switch ON robot Robot is not working Charging with adapter The battery is completely no power Be sure that the robot’s charging contacts have connected to docking station pins... - Page 28 6.Troubleshooting Solution Malfunction Possible Causes Universal is tangled with Universal wheel is Clean the universal wheel something abnormal Incorrect home Wi-Fi username or Enter the correct home Wi-Fi username and password password Robot is not within range of your Make sure robot is within range home Wi-Fi signal of your home Wi-Fi signal Turn ON power switch...
Need help?
Do you have a question about the K185 and is the answer not in the manual?
Questions and answers