
Related Manuals for HARDKORR HKPINVAC1000


Summary of Contents for HARDKORR HKPINVAC1000
- Page 1 USER MANUAL PURE SINE INVERTERS WITH AC TRANSFER SWITCH HKPINVAC1000 / HKPINVAC2000 / HKPINVAC3000 V1.0 - 8.2023...
- Page 2 Our aim is for you to be completely satisfied with your purchase, and therefore your new Hardkorr product is backed by a comprehensive warranty and an outstanding after-sales customer service team.
-
Page 3: Table Of Contents
FAULT CODES WARRANTY INFORMATION DISCLAIMER While caution has been taken to ensure the accuracy of the contents of this guide, Hardkorr assumes no responsibility for errors or omissions. Please note that specifications and product functionality may change without notice. For assistance with assembly or installation, parts and service, please visit www.hardkorr.com or... -
Page 4: Safety Instructions
SAFETY INSTRUCTIONS IMPORTANT, RETAIN FOR FUTURE REFERENCE: READ CAREFULLY • Before installing or using the product, ensure you have read and understood all of the warning and safety messages supplied with your product. • Our range of inverters should be installed by licensed professionals only. •... -
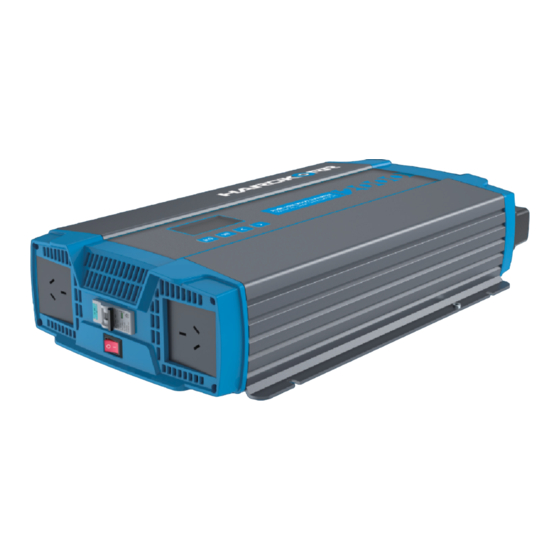
Page 5: Overview
OVERVIEW PURPOSE Our Pure Sine Wave Inverters are designed to convert your 12V power, from your battery system, into safe and reliable 240V power. This allows you to operate appliances you’d usually run off AC/mains power from the comfort of your caravan, camper, or touring setup wherever you’ve decided to set up. The units are equipped with an AC Transfer Switch feature. - Page 6 OVERVIEW INPUT 1000W only OUTPUT 3000W only ITEM DESCRIPTION Positive terminal Direct connection for positive lead from battery. Negative terminal Direct connection for negative lead from battery or shunt if connected. RJ12 port Used for connecting the inverter remote control. IEC-C20 socket Connects inverter to 240V AC power - 2000W &...
- Page 7 OVERVIEW INVERTER REMOTE CONTROL OVERVIEW ITEM DESCRIPTION Power button Press and hold for three seconds to turn the inverter on/off. Power indicator LED The LED will be lit when the inverter is on and will flash when it's off. Fault indicator LED The fault indicator will illuminate when the inverter encounters a fault.
- Page 8 SPECIFICATIONS PRODUCT SPECIFICATIONS SPECIFICATIONS HKPINVAC1000 HKPINVAC2000 HKPINVAC3000 BATTERY TYPE COMPATIBILITY 12V SLA, AGM, Gel, Calcium, LiFePO₄ INPUT VOLTAGE 10.5 - 15.5V OUTPUT POWER 1000W 2000W 3000W OUTPUT PLUG RATING SURGE WATTAGE (2 SECONDS) 2000W 4000W 6000W 220-240V AC, 220-240V AC, 220-240V AC, OUTPUT VOLTAGE &...
-
Page 9: Specifications
SPECIFICATIONS SPECIFICATIONS HKPINVAC1000 HKPINVAC2000 HKPINVAC3000 Over/under-voltage protection, PROTECTIONS short circuit/overload protection, over-temperature protection OVER-VOLTAGE PROTECTION 15.5±0.2V DC UNDER-VOLTAGE PROTECTION 10.5±0.2V DC SHORT-CIRCUIT PROTECTION 1 second shutdown AC TRANSFER SWITCH FUNCTION HKPINVAC1000 HKPINVAC2000 HKPINVAC3000 OUTPUT POWER 2400W 3600W ACCEPTABLE VOLTAGE 220-240V AC AC TRANSFER SWITCH TIME <30ms... -
Page 10: Installation
INSTALLATION MOUNTING REQUIREMENTS The inverter should be mounted in a that fits the following criteria: • STABLE - The inverter must be mounted on a surface capable of holding its weight, using all four mounting points with the appropriate fasteners. •... - Page 11 • In good working order, free from any fault or damage. Additionally, the batteries should be equipped with a high enough continuous discharge rate to cater to the highest draw of the inverter. The guide below details the maximum current draw for each inverter. HKPINVAC1000 HKPINVAC2000 HKPINVAC3000...
- Page 12 FUSE 4 4 0A Mega-fuse Negative cable length TOTAL CABLE LENGTH = POSITIVE CABLE LENGTH + NEGATIVE CABLE LENGTH CABLE GAUGE mm² (AWG) CABLE LENGTH (COMBINED) HKPINVAC1000 HKPINVAC2000 HKPINVAC3000 0 - 1M 35mm² (2) 70mm² (2/0) 95mm² (3/0) 1 - 2M 35mm²...
-
Page 13: Installation - Dc
INSTALLATION - DC INSTALLATION INSTALLATION OF THIS DEVICE MUST BE PERFORMED BY A LICENCED PROFESSIONAL Before wiring the inverter into your system, ensure the inverter switch is on the OFF position and nothing is plugged into the AC outputs. THIS PROCESS MUST BE COMPLETED BEFORE ANY INSTALLATION... - Page 14 INSTALLATION - DC CHASSIS GROUNDING The inverter must be grounded properly before operating. Failure to do so will increase the risk of damage or injury. The Inverter’s dedicated grounding point can be found on the mounting flange of the unit, close to the negative terminal. Ground the unit using a cable with a minimum of 4mm²...
- Page 15 INSTALLATION - DC BASIC SETUP DIAGRAM MEGA-FUSE PLACED TOWARD INVERTER END OF CABLE (OPTIONAL) BUSBARS FOR WIRING ACCESSORIES (OPTIONAL) MEGA-FUSE PLACED BATTERY TOWARD BATTERY MONITOR END OF CABLE SHUNT (MANDATORY) (OPTIONAL) BATTERY...
-
Page 16: Installation - Ac
INSTALLATION - AC WHAT IS AN AC TRANSFER SWITCH? This function allows the inverter to automatically switch from running via 12V to AC/mains power. Particularly useful for conserving your batteries, it is used in scenarios when you have decided to run your setup from a generator or from a powered site at a caravan park. - Page 17 INSTALLATION - AC AC INPUT INSTALLATION The following cables are required prior to connecting the AC input. Note: These are not included in your kit. AC INPUT CABLE HKPINVAC1000 HKPINVAC2000 HKPINVAC3000 INPUT END IEC-C13 IEC-C19 MAINS END TYPE I IEC-C13...
-
Page 18: Installation - Remote
INSTALLATION - REMOTE REMOTE CONTROL INSTALLATION The remote allows the inverter to be operated from an alternate location. This is ideal in installs where the inverter may not be easily accessible. The remote is designed to be flush-mounted onto a suitable surface, such as a canopy wall. -
Page 19: Operation
OPERATION OPERATING THE INVERTER After wiring up the input side, the inverter is now ready to run your 240V appliances. Before operating the inverter, make sure that the appliance/s you intend on running have a total/cumulative wattage that is below the inverter’s rated wattage. -
Page 20: Ac Output
OPERATION AC OUTPUT OVERVIEW STANDARD AC INPUT DANGER: ELECTRICAL SHOCK HAZARD. ONLY LICENCED ELECTRICIANS ARE PERMITTED Each inverter contains standard Type I 240V sockets TO CONNECT LOADS TO THE for appliances. HARD WIRE TERMINAL BLOCK. You can plug the appliance directly into the inverter, or use a powerboard to power multiple appliances HKPINVAC3000 at the same time. -
Page 21: Eco Mode
OPERATION BATTERY RUN TIMES The following chart gives an estimate as to how long Hardkorr lithium batteries can sustain different wattages from our inverters. The times in the chart have been put together with consideration to an 80% Depth of Discharge (DOD), and the inverters performing at an 89% efficiency rate. -
Page 22: Screen Navigation
OPERATION SCREEN NAVIGATION MAIN SCREEN VIA DC INPUT The main screen will display key information about the inverter’s inputs and outputs. When using with 12V, you have access to the input voltage, output voltage (V), outgoing current (A), outgoing volt-amps (kVa), and the inverter’s load capacity (%load). - Page 23 ICON FUNCTION / DESCRIPTION This indicates the inverter is running on ECO mode. This indicates the inverter is running via an Uninterrupted Power Supply (UPS). This will turn on when running from an AC input. This indicates that you are in the settings menu. Once in the settings menu, this indicates that you are changing the alarm on or off.
- Page 24 Internal fault. /1 SECS consult that Hardkorr technical team for repairs/replacement. Do not attempt to disassemble the unit. Call the Hardkorr technical team and consult a licenced electrician Current leakage. TRIPPED before resetting the RCD switch or operating the inverter.
-
Page 25: Fault Codes
If the inverter still fails to work normally, Internal fault. consult that Hardkorr technical team for repairs/replacement. Do not attempt to disassemble the unit. Call the Hardkorr technical team and consult a licenced electrician Current leakage. TRIPPED before resetting the RCD switch or operating the inverter. -
Page 26: Warranty Information
(e.g. completing and returning your warranty card if applicable). TO BEGIN A WARRANTY CLAIM: If you believe your Hardkorr product is defective, it must be returned to Hardkorr for inspection by our warranty claims department. - Page 27 DISCONTINUED ITEMS Discontinued items that are still under warranty will be reviewed by Hardkorr. If a discontinued item is covered under warranty it may be replaced by an equivalent or superior item. If an equivalent item is not...
- Page 28 WWW.HARDKORR.COM...
Need help?
Do you have a question about the HKPINVAC1000 and is the answer not in the manual?
Questions and answers