Table of Contents
Advertisement
Quick Links
Advertisement
Table of Contents

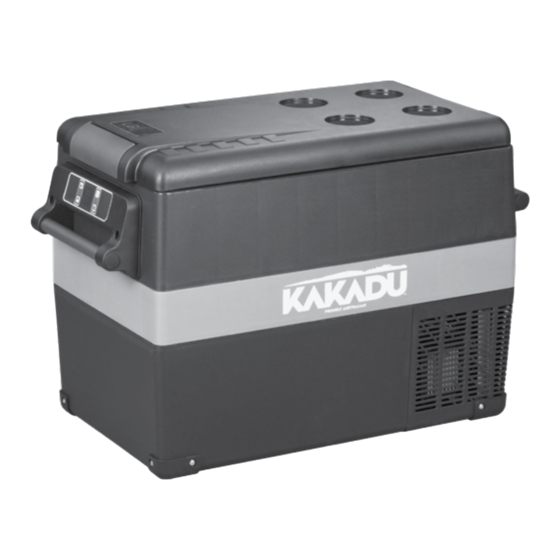
Summary of Contents for KAKADU 45L Transit Fridge
- Page 1 ™ 45 LITRE TRANSIT FRIDGE FRIDGE OR FREEZER OWNERS MANUAL Part No. 10001052...
-
Page 2: Table Of Contents
CONTENTS General Information & Safety Instructions..3 Assembly and Parts ........4 Getting Started ..........5 Operating your Fridge/Freezer ......6 Temp Control/General Operation ....8 Using with Solar Panel or Generator .....11 Tips, Maintenance & Service ......12 Troubleshooting ..........13 Error Code .............14 Specifications ..........14 Warranty Details ..........16... -
Page 3: General Information & Safety Instructions
GENERAL INFO AND SAFETY INSTRUCTIONS Read This Manual Thoroughly Before First Protect the power cable. Do not kink or Use, even if you are familiar with this type damage the power cable. Do not wrap it of product. The safety precautions enclosed around the appliance. -
Page 4: Assembly And Parts
ASSEMBLY AND PARTS SINGLE ZONE FRIDGE OR FREEZER 1. Internal Basket 5. Air Flow Vent 2. Control Panel 6. Power Input Panel 3. Single Lid 7. AC Power Cable (Page 7.) 4. Carry Handle 8. DC Power Cable (Page 7.) -
Page 5: Getting Started
The values indicated on the digital display are related to the middle of the cabinet. The 45L Transit Fridge or Freezer is designed to either refrigerate or freeze food. The Dairy Section (small compartment at rear) will only chill food, will never freeze. -
Page 6: Operating Your Fridge/Freezer
OPERATING YOUR FRIDGE/FREEZER POWER REQUIREMENTS 12/24V DC Power Requirements If your Fridge/Freezer is cutting out prematurely, it The Fridge/Freezer is designed to operate on could be due to: AC or DC voltage. 1. The battery voltage protection being set AC input 110-120V AC at 60Hz to AC adaptor too high on the Battery Monitor (refer to page (e.g. - Page 7 OPERATING YOUR FRIDGE/FREEZER OPERATING WITH AC ADAPTOR Plug the AC power adaptor & cable into the Fridge power socket (Fig. 3) on the end of the Fridge/Freezer and then connect to a suitable AC power source. The Fridge/Freezer will automatically turn on, there is no requirement to switch the appliance on.
-
Page 8: Temp Control/General Operation
TEMP CONTROL/GENERAL OPERATION When your Fridge/Freezer is first connected to the AC or DC power input the appliance will automatically switch on and the LCD control panel will display the current cabinet temperature, battery monitor and Eco setting as well as the current input voltage. The Temperature Controller provides the ability to set the desired temperature level and display the current cabinet temperature. - Page 9 CONTROL OPERATION 1. Power On/Off Button 2. Settings Button 3. Temp Decrease Button 4. Temp Increase Button 5. Temp Display 6. Battery Protection Display 7. Compressor Speed Display Battery Monitor – Setting 1. Adjust by pressing & holding the SETTINGS button for 3 seconds until battery monitor setting flashes.
- Page 10 CONTROL OPERATION BATTERY MONITOR – SETTING 1. Adjust the setting by pressing the Battery Protection button until desired setting is highlighted on display 12V DC Input Cut Out Cut In HIGH 11.3V 12.6V MEDIUM 10.1V 11.4V 9.6V 10.9V 24V DC Input Cut Out Cut In HIGH...
-
Page 11: Using With Solar Panel Or Generator
USING WITH SOLAR PANEL OR GENERATOR USING WITH SOLAR PANELS USING PORTABLE GENERATORS The power consumption and efficiency of It is important that the correct generator size your Fridge/Freezer makes it ideal to be used is used with your Fridge/Freezer. An incorrect in conjunction with solar panels to provide generator or voltage output may result in recharging of the DC power source. -
Page 12: Tips, Maintenance & Service
TIPS, MAINTENANCE & SERVICE TIPS AND SUGGESTIONS MAINTENANCE & SERVICE Fresh and frozen foods should not be stored Your Fridge/Freezer will be delivered cleaned right beside each other in the cabinet. Doing from the factory – you nevertheless should so may cause a fresh food to freeze and/or clean prior to initial use. -
Page 13: Troubleshooting
TROUBLE SHOOTING ISSUE POSSIBLE SOLUTIONS Check the unit is switched ON – Press the power button to turn on Check the power source (voltage may be too low) The Fridge/Freezer will not turn on Check the power cable and all connections from the power source to Fridge/Freezer The temperature has been set too low, therefore increase the temperature The contents of the fridge are freezing... -
Page 14: Error Code
ERROR CODE INFORMATION ERROR POSSIBLE CAUSE SOLUTION CODE DC - Increase voltage of DC power source/Check all connections Low voltage to fridge AC - Replace defective 240V AC Power adaptor Condensor Fan Faulty Replace condensor fan Compressor over pressure Disconnect power to fridge for 20 minutes & attempt re-start Compressor not kicking in Replace compressor control module Over Temperature of the compressor &... - Page 15 NOTES...
-
Page 16: Warranty Details
LIMITED WARRANTY 1. This warranty will apply only if you have purchased from us or our authorized dealer, and will apply only to the original purchaser who acquires the product for his or her own use. 2. WARRANTY PERIOD: we warrant that this product will be free from defects in materials and workmanship under normal use as described in the published product documentation for 36 months and the integrated powerpack for 12 months from the date of original purchase (Limited Warranty).
Need help?
Do you have a question about the 45L Transit Fridge and is the answer not in the manual?
Questions and answers