
Summary of Contents for ZUMMI Halo 204588
- Page 1 Halo Travel System Instruction Manual IMPORTANT: RETAIN FOR FUTURE REFERENCE READ CAREFULLY...
- Page 2 WARNINGS: Read these instructions carefully before assembly and use and keep for future reference. The child may be hurt if you do not follow these instructions. Before using, remove and dispose of any plastic bags and other packaging (e.g. fasteners, fixing ties, etc.) and keep them out of reach of children.
- Page 3 WARNINGS: WARNING! Do not use this product if any part is broken, torn or missing. WARNING! Do not place the product near an open fire or other source of strong heat. WARNING! Use only on a firm, horizontal level and dry surface. WARNING! When using as a tandem, load primary child into the main seat first.
- Page 4 WARNINGS: • Use only replacement parts supplied or approved by the • manufacturer. • Any additional or replacement parts should only be obtained from • the manufacturer or distributer. • Never substitute parts. • Keep the plastic packaging away from children to avoid danger of •...
-
Page 5: Stroller Parts List
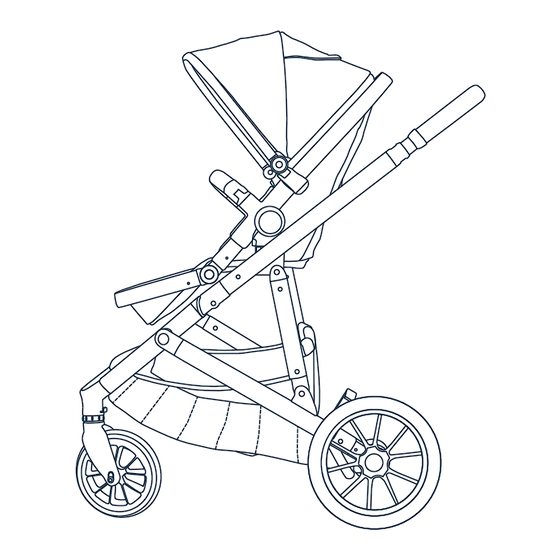
Stroller Parts List: Front wheels x 2 Chassis x 1 Rear wheels x 2 Seat unit x 1 Canopy x 1 Bumper bar x 1 Raincover x 1 Seat liner x 1 Organiser x 1 Cup holder x 1 Car seat x 1... - Page 6 Carrycot Parts List: Lining x 1 Carrycot x 1 Mattress x 1 Canopy x 1 Bumper bar x 1 Apron x 1 Adaptors: Elevate adaptors x 1 set Tandem adaptors x 1 set Car seat adaptors x 1 set Front Front Maxi-Cosi®/ Maxi-Cosi®/...
-
Page 7: Chassis Assembly
Chassis Assembly: Unpack all contents and check that all parts are present before starting assembly. Please refer to the parts list. 1a. Undo the locking catch and lift up the handle to open the chassis (A). 1b. When the chassis is completely open, you should hear a “click”... - Page 8 Chassis Assembly: 2a. Push each rear wheel (C) into the sides of the rear wheel axle until you hear a “click”. Give them a tug to ensure they are attached securely. 2b. To remove the rear wheels, pull and hold the locking pin at the bottom surface of the rear wheel axle and pull the wheel...
- Page 9 Chassis Assembly: 3a. Insert each of the front wheel (B) pins into the center of the socket until you hear a “click”. Give each wheel a firm tug to ensure they’re securely attached. CLICK 3b. To remove the front wheels, push and hold the locking pin and pull the wheel o .
- Page 10 Carrycot Assembly: WARNING! The carrycot is suitable for one child from birth who cannot sit up unaided, roll over and cannot push itself up on their hands and knees (approx. 9kg). 1. Remove the carrycot mattress (M) and unzip the carrycot lining (N) to remove from the carrycot (L).
- Page 11 Carrycot Assembly: 3. Re-zip the carrycot lining (M) onto the carrycot frame and re-insert the carrycot mattress (N). WARNING! Do not add an additional mattress to the carrycot. 4. Attach the canopy (O) to the carrycot. First attach the plastic canopy clips to their respective sides.
- Page 12 Carrycot Assembly: 5a. The canopy can be opened or closed by pulling forward or backward on the canopy rim. 5b. There is also a mesh air vent for maximum air circulation. Lift up the fabric panel at the base of the canopy to reveal the mesh panel.
- Page 13 Carrycot Assembly: 7. Starting from the right, zip the apron (Q) onto the carrycot. Fasten the press studs to the inside of the canopy frame. WARNING! The carrycot is not suitable for overnight sleeping.
- Page 14 Pram Mode: 1. Attach the carrycot to the chassis. Line up the carrycot connectors with the chassis connection points and press downwards. Listen for a ‘click’ to signal correct assembly. CLICK 2. Press the button both sides of the connectors to remove the carrycot from the chassis.
- Page 15 Pram Mode: Suitable from birth in pram mode up to a maximum weight of 9kg or until the child can sit up unaided, roll over or push itself up on its hands and knees. WARNING! Always use pram mode with carrycot parent facing.
- Page 16 Seat Unit Assembly: 1a. Attach the canopy (E) to the seat unit (D). First secure the canopy to the frame with the zip. 1b. Next, attach the plastic canopy clips to their respective sides.
- Page 17 Seat Unit Assembly: 2a. Attach the bumper bar (F) onto the connection posts. Listen for the “click” signalling correct assembly. Give the bumper bar a tug to ensure it’s secured in place. 2b. To remove the bumper bar, simply press the release buttons on either or both sides and lift up.
- Page 18 Pushchair Mode: 1a. Attach the seat unit to the chassis. Line up the seat connectors with the chassis connection points and press downwards. Listen for a “click” to signal correct assembly. CLICK 1b. Press the button both sides of the seat connectors to remove the seat unit from the chassis.
- Page 19 Pushchair Mode: 2a. The seat unit is reversible in pushchair mode. It can be forward or parent facing. parent forward facing facing 2b. Press the button both sides of the seat connectors to remove the seat unit from the chassis. To re-attach the seat unit to the chassis, line up the seat connectors with the chassis connection points and press downwards.
- Page 20 Brakes: Press down the brake pedal on the rear axle to engage the brake. Raise the pedal to release the brake. WARNING! Always apply the parking brake when the pram is not moving. WARNING! Always apply the brake when you are placing and removing the child.
-
Page 21: Swivel Wheels
Swivel Wheels: When travelling along straight surfaces or uneven terrain, the front wheels may spin. Turn the locking mechanism on the front swivel wheels to lock the direction of the wheels. Turn it back to unlock the front swivel wheels. -
Page 22: Backrest Adjustment
Backrest Adjustment: Lift the lever at the back of the seat unit to adjust the seat unit recline. Ensure you hear a “click” as the seat engages at your desired position. CLICK... -
Page 23: Handle Adjustment
Handle Adjustment: Push the button in the middle of the handle bar and pull or push the handle to your desired height. The handle will “click” into place. -
Page 24: Footrest Adjustment
Footrest Adjustment: Press both footrest buttons simultaneously and adjust the footrest to the desired position. Listen for the “click” signalling that the footrest is locked into position. CLICK... - Page 25 Canopy Adjustment: 1. The canopy can be opened or closed by pulling or pushing on the canopy rim. 2. The canopy features an extension panel for maximum sun protection and a window to keep an eye on baby in forward facing position. It also has a pull out visor for further sun protection.
- Page 26 Harness: 1. Insert all buckle clips into the buckle housing until they engage securely in place. Listen for the “click”. CLICK 2. Press the centre button to release child from harness.
- Page 27 Harness: 3. To adjust the harness, move the slides as shown. WARNING! Always adjust the harness to fit your child correctly for their comfort and safety. A loose fitting harness can be very dangerous. 4. The seat unit has 3 shoulder height positions.
- Page 28 Harness: 5. Open the harness and remove the chest pads to adjust the shoulder height position. 6. To increase the shoulder height, feed harness tabs through slots in seat unit. Re-insert the harness tabs through slots at desired height. Pull out from front of seat.
- Page 29 Seat Liner: There is a reversible seat liner (H) included for the seat unit. 1. To attach the liner, undo the harness and remove the chest pads and crotch pad. 2. Thread the harness through the slots in the seat liner allocated for the waist, shoulder and crotch straps.
-
Page 30: Cup Holder
Cup Holder: A cup holder (J) is included and can be easily attached to the side of the chassis. 1. Line up the cup holder connector with the hook on the side of the chassis handle. 2. Push down firmly. To remove, push up and pull the cup holder away... - Page 31 Organiser: There is a pram organiser (I) included for the chassis. Wrap the velcro straps around both sides of the chassis handle and fasten to hold the organiser in place. Max weight for organiser is 2kg.
- Page 32 Raincover: Locate the raincover (G). Pull the raincover down over the pram. Fasten the velcro straps around the chassis to secure. NOTE. The raincover will fit with the carrycot, seat unit and a car seat attached as a single stroller. NOTE.
-
Page 33: Travel System
Travel System: A set of car seat adaptors (R) and car seat (K) are included to complete the travel system. Front Front 1. Remove the bassinet or seat Maxi-Cosi®/ Maxi-Cosi®/ Cybex®/Nuna® Cybex®/Nuna® unit from the chassis to fit the car seat adaptors. Line up the adaptors with the chassis Front Maxi-Cosi®/... - Page 34 Travel System: 3. To remove the car seat, press the buttons located on the sides of the car seat and pull upwards to remove. NOTE. The button position and style may di er depending on the car seat you are using. Front 4.
- Page 35 Elevate Adaptors: A set of elevate adaptors (S) are included. When installed they elevate the carrycot, seat unit and car seat. They also allow more space for when using as a tandem. 1. Line up the CLICK adaptors with the chassis housing and press downwards.
- Page 36 Tandem Adaptors: A set of tandem adaptors (T) are included to convert your single pram into a tandem. NOTE. When using as a tandem always use the elevate adaptors. 1. Hook the adaptors onto the chassis ensuring the rivet inserts into the allocated hole.
- Page 37 Tandem Adaptors: 3. The pram can be used as a tandem with the included seat unit and carrycot. NOTE. The carrycot must be on the bottom of the chassis. WARNING! When using as a tandem, load primary child into the main seat first.
- Page 38 Pram Configurations: Seat unit x1 Carrycot x1 Chassis x1 Chassis x1 Front Car seat x1 Seat unit x1 Car seat adaptors x1 set Chassis x1 Chassis x1...
- Page 39 Pram Configurations: Tandem carrycot x1 (sold separately) Carrycot x1 Seat unit x1 Carrycot x1 Elevate adaptors x1 set Elevate adaptors x1 set Tandem adaptors x1 set Chassis x1 Tandem adaptors x1 set Chassis x1 Tandem seat unit x1 (sold separately) Tandem seat unit x1 (sold separately) Seat unit x1 Elevate adaptors x1 set Seat unit x1 Elevate adaptors x1 set...
- Page 40 Pram Configurations: Tandem seat unit x1 (sold separately) Tandem seat unit x1 (sold separately) Seat unit x1 Elevate adaptors x1 set Seat unit x1 Elevate adaptors x1 set Tandem adaptors x1 set Chassis x1 Tandem adaptors x1 set Chassis x1 Car seat x1 Car seat x1 Seat unit x1 Elevate adaptors x1 set...
- Page 41 Pram Configurations: Car seat x2 (2nd car seat sold separately) Elevate adaptors x1 set Tandem adaptors x1 set Chassis x1 Car seat adaptors x2 sets (2nd set sold separately with 2nd car seat)
- Page 42 Folding: 1. Apply the brake. 2. Always remove the carrycot or car seat to fold the chassis. The chassis can only be folded with the seat unit assembled forward facing. Lower the handle to the shortest height and fold the canopy before folding.
- Page 43 Folding: 3. Pull both release triggers towards you and push handle downwards to fold the chassis. 4. If the seat unit is assembled, adjust the footrest for a more compact fold.
-
Page 44: Care And Maintenance
Care and Maintenance: • This product requires regular maintenance to ensure correct and safe • performance. • All assembly fittings are to be tightened properly. • Always check your pram for loose screws, worn parts, torn material or • stitching. •...
Need help?
Do you have a question about the Halo 204588 and is the answer not in the manual?
Questions and answers
I need replacment for bumper bar. I would like to know where I can purchase/order in Ireladd. I need 2 new bars.
Do you have any answer from them ? I need one too and weels replace but any answer yet..
What size are the rear weels on zummi halo please ,for replace ?