
Related Manuals for JVC LT-55N6105A


Summary of Contents for JVC LT-55N6105A
- Page 1 LT-55N6105A 55" 4K UHD INPUT INFO RECALL HOME GUIDE Q.MENU MENU BACK EXIT SUBTITLE Pg Dn...
-
Page 6: Table Of Contents
WARNING Never place a television set in an unstable location. A television set may fall, causing serious personal injury or death. Many injuries, particularly to children, can be avoided by taking simple precautions such - Using cabinets or stands recommended by the manufacturer of the television set. - Only using furniture that can safety support the television set. -
Page 7: Accessories
Accessories Please make sure the following items are included with your LED TV. If any items are missing, contact your dealer. 1 x remote control 2 x AAA batteries 1 x user manual 2 x Base Legs 4 x Base Screws 1 x 3.5mm to L-R Audio Cable 1 x 3.5mm to Y/V, Pb, Pr Video Cable... -
Page 8: Introduction
Introduction Basic Functions Input terminals used for external equipment connection 1 x ANT. IN input 2 x USB inputs 3 x HDMI inputs 1 x Shared Mini Component and Composite Input 1 x Digital Optical Audio Out 1 x Headphone output 1 x RJ-45 input... -
Page 9: Specifications
Introduction Specifications Model LT-55N6105A Display size 55" Diagonal (max.) LED panel resolution 3840x2160 Speaker output power ≥5Wx2 Power supply 110-240V~, 50/60Hz TV receive system Digital: DVB-T Analog: PAL: BG, I, DK, SECAM: BG, D/K Frequency range Analog: Antenna: 46.25MHz-855.25MHz Digital:... -
Page 10: Stand Instructions (Optional)
Stand instructions (optional) How to assemble the stand If you need to remove or assemble the stand please read the following instructions. - Before attaching/detaching the stand, make sure to turn off the TV. -Lay the TV face down on a soft cloth or a towel to prevent scratches. Assembling instruction: Step2: Before performing work, spread cushioning over the base area to lay the LED TV on. -
Page 11: General Description
General Description General Description General Description Overview of back panel Overview of back panel Overview of back panel You can connect the TV with video devices such as DVD/VCD player, VCR and video camera to enjoy the high quality picture. Headphone ANTENNA YPbPr/V... -
Page 12: Overview Of Front Panel
General Description Overview of front panel The Multifunction Button on the bottom of your TV(see below) can control your TV’s basic features, including the on-screen menu. To use the more advanced features, you must use the remote control. Remote Control Sensor/Power Indicator POWER(power on / key function) Multifunction Button Description VOL+... -
Page 13: Overview Of Remote Control
General Description Overview of Remote Control Œ INPUT Ž INFO RECALL ’ ‘ HOME GUIDE “ ” • MENU Q.MENU BACK EXIT SUBTITLE Pg Dn Note: 1) On average, the batteries should last for about a year. 2) If you don't intend to use the remote control for a long period of time, remove batteries to avoid damage due to leakage. - Page 14 General Description Overview of Remote Control 1. POWER: Turn the TV on or switch it to standby. Œ INPUT 2. INPUT: This button is used to switch among different sources, Select a source and press ENTER button to confirm. Ž...
- Page 15 General Description Overview of Remote Control s pqtu 13. Arrow button : Use to select Œ on-screen menu items and change menu INPUT values. 14. BACK: Return. Ž button: In ATV source , the button is used to set NICAM sound system. In DTV source , the button is used to set the audio language.
-
Page 16: Installing Batteries In The Remote Control
General Description Installing Batteries in the Remote Control Installing Batteries Open the battery compartment cover on the back side. Insert two 1.5V AAA size batteries in correct polarity. Don´t mix old or used batteries with new ones. Point the remote towards the remote control sensor of the TV and use it within 8 meters. -
Page 17: Connecting Vcr
These instructions assume that you have already connected your TV to an antenna or a cable TV system. Skip step 1 if you have not yet connected to an antenna or a cable system. TV Rear Panel VCR Rear Panel AUDIO OUT ANT ANT OUT S-VIDEO VIDEO OUT... -
Page 18: Connecting A Camcorder
The rear panel jacks on your TV make it easy to connect a camcorder to your TV. They allow you to view the camcorder tapes without using a VCR. Each Camcorder has a different back panel configuration. When connecting a Camcorder or DVD, match the color of the connection terminal to the cable. TV Rear Panel Video Cable (Not supplied) Green... -
Page 19: Connecting Dvd Player/Set-Top Box Via Hdmi
External Connection Connecting DVD Player/Set-Top Box via HDMI This connection can only be made if there is an HDMI Output connector on the external device. TV Rear Panel HDMI 1 (ARC) HDMI 2 HDMI Cable (Not supplied) HDMI 3 What is HDMI? HDMI, or high-definition multimedia interface, is an interface that enables the transmission of digital audio and video signals using a single cable without compression. -
Page 20: Connecting Digital Audio System
External Connection Connecting Digital Audio System The rear panel jacks on your TV make it easy to connect a Digital Audio System to your TV. Digital Audio System TV Rear Panel SPDIF ANTENNA YPbPr/V AUDIO OPTICAL OPTICAL HDMI 1 (ARC) 5.1 CH audio is possible when the TV is connected to an external device supporting 5.1 CH. -
Page 21: Supporting Signals
Supporting Signals Input Mode Digital: DVB-T SECAM BG DK CVBS Vertical Input Resolution Frequency 480i 60Hz 480p 60Hz 576i 50Hz Component 576p 50Hz 720p 50Hz/60Hz 1080i 50Hz/60Hz 1080p 50Hz/60Hz 480p 60Hz 576p 50Hz 720p 50Hz/60Hz HDMI 1080i 50Hz/60Hz 1080p 50Hz/60Hz 3840x2160 24Hz/25Hz/30Hz/60Hz... -
Page 22: Basic Operation
Basic Operation Menu Operation Input Setup Press INPUT key on the remote control to enter "INPUT SOURCE" menu. Use t/u key to select an input source and press ENTER key to confirm. Component HDMI 1 HDMI 2 DVBT Component Home HDMI 1 HDMI 2 HDMI 3... - Page 23 Basic Operation Menu Operation ( To increase the volume, press VOL + key; ( To decrease the volume, press VOL - key; Mute Press “MUTE” and the sound cuts off. The MUTE icon will appear in the lower-right corner of the screen.
-
Page 24: Menu System Instruction
Menu system instruction Picture 1. Press MENU key to display the main menu on the screen. 2. Press key to select "Picture" option. 3. Press key to enter "Picture" submenu. Picture Picture Picture Picture Picture Mode Standard Aspect Ratio Sound Sound t Standard u Contrast... -
Page 25: Sound
Menu system instruction Menu system instruction Sound 1. Press MENU key to display the main menu on the screen. 2. Press key to select "Sound" option. 3. Press key to enter "Sound" submenu. Sound Sound Mode Picture You can select the type of the special sound effect t Standard u Sound Mode Sound... - Page 26 Menu system instruction Menu system instruction Sound AD Switch Press p q button to select AD Switch, then press ENTER or u button to enter sub-menu. Sound In it you can turn the AD Switch on or off and set the volume ratio in DTV mode.
-
Page 27: Setting
Menu system instruction Menu system instruction Setting 1. Press MENU key to display the main menu on the screen. 2. Press p q key to select "Setting" option. 3. Press u key to enter “Setting" submenu. Setting Picture Language 1. Press p q key to select “ OSD Language "... - Page 28 Menu system instruction Menu system instruction Setting Off Time In "Off Time” item, press u button or ENTER button to enter the submenu, set the day & time Setting to turn off the TV set. Picture Time On Time Auto Sync Sound In "On Time”...
-
Page 29: Lock
Menu system instruction Menu system instruction Lock The "Lock" feature automatically locks out programming that is deemed inappropriate for children. The user must first enter a Password before any of the lock restrictions can be set up or changed. 1. Press MENU key to display the main menu on the screen. 2. -
Page 30: Pvr Option
Menu system instruction Menu system instruction PVR Option 1. Press MENU key to display the main menu on the screen. 2. Press p/q key to select " VR Option" option. 3. Press u key to enter " VR Option" submenu. PVR Option PVR Option Picture... - Page 31 Menu system instruction Menu system instruction PVR Option Start Timeshift Note: A USB device must be connected to the USB port for this function. In DTV channel, press “ ” key to pause, press it again to resume playback. This is the “Time Shift”. When time shift function is activated, the program is temporarily stored in the USB device.
-
Page 32: Program
Menu system instruction Program 1. Press MENU key to display the main menu on the screen. 2. Press p/q key to select " rogram" option. 3. Press u key to enter " rogram" submenu. Program Picture Auto Tuning Press ▲/▼ key to select "Auto Tuning" option. The Auto Tuning Sound number of searched channels will be shown on the... - Page 33 Menu system instruction Program Signal Information (Used only in DTV) 1. Press p/q key to select “Signal Information" option. ”or u key, you can see the information of the DTV channel. 2. Press “ ENTER NOTE: Signal Quality/Signal Strength (DTV Only): Unlike analogue channels, which can vary in reception quality, digital channels must have perfect reception quality or you will not receive them at all.
-
Page 34: Network
Menu system instruction Network 1. Press MENU key to display the main menu on the screen. 2. Press p/q key to select "Network" option. Network 3. Press u key to enter "Network" submenu. Picture Wi-Fi Wi-Fi Not Connected Sound To connect to Wi-Fi using "Autoscan", select "Autoscan" option and press key to select your Wi-Fi network. -
Page 35: About
Menu system instruction About 1. Press MENU key to display the main menu on the screen. 2. Press p/q key to select "About" option. About 3. Press u key to enter "About" submenu. Picture Netflix Netflix Netix Deactive Sound Netflix Deactive Terminate Netix Setting 1.Press p/q key to select “Netflix Deactive”... - Page 36 Menu system instruction About System information 1.Press p/q key to select "System information" option. 2.Press u or " ENTER " key to display system information. Net Ready Information 1.Press p/q key to select "Net Ready Information" option. 2.Press u or " ENTER "...
-
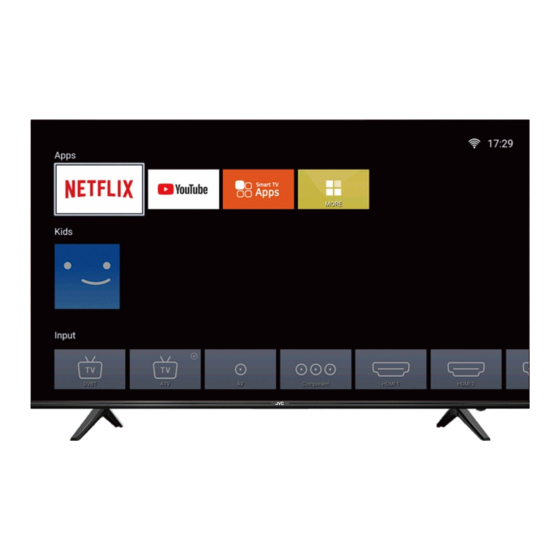
Page 37: Home Operation
Home Operation Setup wizard Press “HOME” key to enter home interface. SOURCE setup Press arrow key to select a input source and press ENTER key to confirm. Component HDMI 1 HDMI 2 DVBT Component Home HDMI 1 HDMI 2 HDMI 3 HOME APP setup NETFLIX... - Page 38 Home Operation Œ Use arrow key to Select YouTube icon, then press “ENTER” key to enter Youtube. Use arrow button to select one video and press “ENTER” key to play. Press “MENU” key to exit playing. Ž Press key to open or close control menu when playing. Screencast This function is for ANDROID smart phone sharing screens with TV.
-
Page 39: Digital Media Player
Digital Media Player Introduction This TV is embedded with USB port digital media player. It can find the devices that support USB1.1/2.0,including flash disk, USB hard disk and digital camera. It supports functions as: Display pictures. Play music files, Play video files. Notice: For a good viewing experience, use a short, good-quality USB cable. -
Page 40: Troubleshooting
Troubleshooting This section summarises a few common problems you may encounter when using your TV. If the trouble persists, please contact Customer Service for assistance. Symptoms Possible solutions Please check if the power cord is plugged in and that the power outlet works. - Page 41 Troubleshooting Troubleshooting Please check connecting USB cable and power supply is connected. USB not playing Hard drive has not been formatted. Please make sure USB disk is compatible and the multimedia data formats are supported. Picture is distorted Compression of video contents may cause distortion especially on fast moving pictures such as sports and action movies.
Need help?
Do you have a question about the LT-55N6105A and is the answer not in the manual?
Questions and answers
Looking for the IR Profile number for JVC LT-55N6205A? Connected a firestick but the volume and on/off buttons on firestick remote not working!?