
Subscribe to Our Youtube Channel
Related Manuals for Casselin 500U


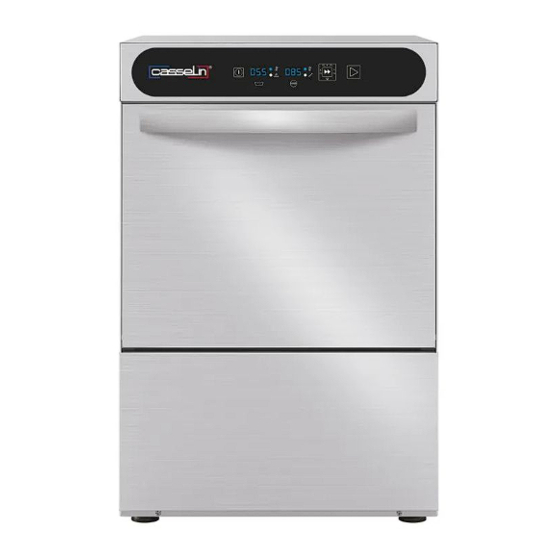
Summary of Contents for Casselin 500U
- Page 1 LAVE VAISSELLE Version originale CLVA50U- CLVA50UPV - CLVA50UPVA – CLVA50UPVAT- CLVA60UPV SAS CASSELIN 83 rue Marcel Mérieux 69960 Corbas FRANCE Tél : +33 (0)4 82 92 60 00 - Mail : contact@casselin.com...
- Page 2 LÉGENDE SYMBOLES MISES EN GARDE PREMIÈRE PARTIE 1. But des informations contenues dans la PREMIÈRE PARTIE 2. Normes de référence 3. Applicabilité 4. Transport 5. Instructions pour le transport, le stockage, le déballage et l’assemblage 6. Identification du lave-vaisselle et marquage DEUXIÈME PARTIE 1.
- Page 3 LÉGENDE SYMBOLES 3.4 Limites d'utilisation 3.5 Opérateur 4 Instructions pour l’usage du lave-vaisselle avec afficheur numérique 4.1 Contrôle général du fonctionnement 4.2 Organes de sécurité 4.2.1 Sécurités générales 4.2.2 Signaux d’alarme 4.2.3 Indicateurs et signalisations 4.2.4 Dispositifs de blocage 4.2.5 Protecteurs et protections réglables et amovibles 4.3 Mesures de sécurité...
- Page 4 LÉGENDE SYMBOLES SYMBOLE DESCRIPTION ATTENTION - DANGER DE BLESSURE Ce symbole s’applique aux informations et aux mises en garde dont le non- respect peut compromettre la sécurité des personnes ou endommager l’appareil. DANGER D'ÉLECTROCUTION Ce symbole s’applique aux informations et aux mises en garde à caractère électrique dont le non-respect peut compromettre la sécurité...
- Page 5 MISES EN GARDE Quelques mises en garde à caractère général ► Cher client, nous vous informons que le produit acheté est un lave-vaisselle ► Cet appareil devra être utilisé pour le lavage de verres, de tasses, d'assiettes et similaires avec de la saleté...
- Page 6 ► Nettoyer entièrement le lave-vaisselle une fois par semaine au moins. ► Contrôler quotidiennement l'état du câble d’alimentation, notamment si la prise d'alimentation avec le réseau électrique n’est pas à côté du lave-vaisselle. ► Le câble d'alimentation fourni avec la machine est de type H07RN-F. Si le câble est endommagé, débrancher le lave-vaisselle du réseau électrique et faire rapidement appel à...
- Page 7 ATTENTION ! DANGER D'ÉLECTROCUTION PREMIÈRE PARTIE 1. But des informations contenues dans la PREMIÈRE PARTIE Le but des informations fournies dans la PREMIÈRE PARTIE est de faire connaître au Client les données nécessaires pour une bonne identification du lave-vaisselle. 2. Normes de référence Le lave-vaisselle a été...
- Page 8 À l'arrivée du lave-vaisselle, contrôler attentivement les titres de transport et identifier les paquets.En cas de non-conformité entre les documents, les colis livrés et leur contenu, rappeler immédiatementle fournisseur. Contrôler attentivement l'état de l'emballage : s'il est défectueux, cassé ou qu'il présente des signes de mauvaise manipulation, informer immédiatement le fournisseur.
- Page 9 2. Enlever les deux vis A qui fixent le lave-vaisselle à la palette de transport (fig. 3) Fig. 3 3. Faire glisser la machine sur la palette jusqu'à libérer deux des quatre trous présents pour y insérer les pieds d'appui (fig.
- Page 10 DEUXIÈME PARTIE 1. But du manuel Le but du présent manuel d’utilisation et d'entretien est de décrire les mesures de sécurité, indispensables pour l'utilisateur, à respecter lorsqu'on utilise le lave-vaisselle. Ce manuel d'utilisation et d'entretien fait partie intégrante du lave-vaisselle. On entend par utilisateur, non seulement l’acquéreur du lave-vaisselle, mais tout le personnel concerné...
- Page 11 les propositions d’amélioration qu’ils estiment opportunes pour améliorer l’utilisation, la lisibilité, laconservation du présent manuel. Pour effectuer ces communications, contacter le fabricant du lave-vaisselle. 1.8. Limites de responsabilité N.B. Le constructeur décline toute responsabilité en cas d'accidents pour les personnes ou les biens dérivant du non-respect des normes citées dans le présent manuel, ou d'une utilisation, d'un entretien ou d'une réparation non-conforme.
- Page 12 • Installation erronée Le lave-vaisselle doit être installé correctement, du point de vue mécanique comme électrique, dans des locaux ne rendant pas l’utilisation difficile pour l’opérateur. Les règles pour une installation conforme, si celle-ci est effectuée par le client, sont indiquées dans le manuel.
- Page 13 2.1 Position et mise à niveau Le lave-vaisselle est expédié par le Constructeur déjà monté et avec tous les accessoires et les éléments auxiliaires prévus pour son fonctionnement. Placer si possible le lave-vaisselle à proximité des points d’alimentation en eau et en électricité. L'appareil doit être placé...
- Page 14 INSTALLATION ÉLECTRIQUE DU LAVE-VAISSELLE MONOPHASÉ Lave-vaisselle monophasé avec prise Schuko 230V+T Si le lave-vaisselle est doté d'une prise schuko, le brancher à la prise murale. Brancher l'appareil au système équipotentiel par le biais de la borne prévue à cet effet à l'arrière du lave-vaisselle. Lave-vaisselle monophasé...
- Page 15 INSTALLATION ÉLECTRIQUE DU LAVE-VAISSELLE TRIPHASÉ Lave-vaisselle triphasé 400V3N+T Les lave-vaisselles 400V triphasés sont toujours équipés de 5 pôles et donc d'un conducteur neutre. Effectuer le branchement comme indiqué ci-après : Fil marron : ligne 1 Fil noir : ligne 2 Fil gris : ligne 3 Fil bleu : neutre Fil jaune/vert : circuit de mise à...
- Page 16 Lave-vaisselle triphasé 230V3+T (en option sur demande) Les lave-vaisselles 230V triphasés 4 pôles sont fournis sur demande explicite au moment de la commande. Une transformation dans un deuxième temps du lave-vaisselle pourrait exiger le remplacement de certains composants. Effectuer le branchement comme indiqué ci-après : Fil marron : ligne 1 Fil noir : ligne 2 Fil gris : ligne 3...
- Page 17 2.3 Mise à la terre Le lave-vaisselle doit être branché au circuit de terre du bâtiment ou à un autre système vérifié approuvé conformément à la réglementation en vigueur en la matière. ATTENTION ! Nous rappelons que, dans tous les cas, le seul branchement à la terre n’est pas en mesure de réduire la tension de contact et qu'il est donc nécessaire de placer des dispositifs actifs en mesure d’interrompre le flux de tension dans les temps voulus, conformément à...
- Page 18 Fig. 8 2.5 Raccordement à la vidange À l’arrière du lave-vaisselle, il y a un tuyau de vidange, facilement orientable en fonction de la position du puits de vidange (fig. 9). En revanche, si la vidange par chute n'est pas possible, demander la version avec pompe de vidange (fig.
- Page 19 Fig. 9 Fig.10 2.6 Version avec pompe de vidange L’extrémité du tuyau de vidange peut être accrochée au bord d’un évier ou bien à un raccord mural de vidange doté d'un évent pour l'air ou, dans tous les cas, d'un diamètre supérieur au tuyau de vidange afin de permettre le passage de l'air.
- Page 20 ATTENTION ! Si l'on accroche le tuyau de vidange au bord d’un évier, placer son extrémité de manière à empêcher à l’eau de vidange d’atteindre des prises ou des appareils électriques. 2.7 Installation lessives Le lave-vaisselle est doté d'un tuyau bleu d'alimentation du liquide de rinçage et d'un tuyau jaune d'alimentation de la lessive.
- Page 21 2.9 Mesurage de la dureté de l’eau (seulement pour lave-vaisselle avec adoucisseur incorporé) Utiliser le kit fourni avec le lave-vaisselle pour mesurer la dureté de l’eau à l’entrée : • Prélever 5 ml d’eau dans le gobelet spécifique • Verser dans l’eau prélevée 1 goutte d’indicateur (flacon bleu) •...
- Page 22 3.3 Types de vaisselle Il est possible de laver : - pour les modèles lave-verres : verres, tasses à café, flûtes, petites assiettes et assiettes à fruit, dans le respect des indications reportées dans le paragraphe relatif aux Limites d’Utilisation (paragr. 1.8.1 –...
- Page 23 En particulier, il faut contrôler périodiquement l’état des tuyaux de jonction et des connexions électriques (voir le chap. 2 – DEUXIÈME PARTIE). 4.2 Organes de sécurité 4.2.1 Sécurités générales Le lave-vaisselle est complètement fermé avec des panneaux métalliques qui ne peuvent être ouverts qu’au moyen d’outils.
- Page 24 4.2.5 Protecteurs et protections réglables et amovibles Les protecteurs et les protections amovibles ne sont pas utilisés car ils ne sont pas nécessaires. 4.3 Mesures de sécurité L’utilisation du lave-vaisselle implique le respect de certaines règles fondamentales : • ne pas déplacer le lave-vaisselle de son lieu d’origine pendant le fonctionnement •...
- Page 25 4.5 Opérations de lavage Une bonne hygiène de la vaisselle exige le respect de certaines règles fondamentales : • enlever les restes de nourriture des couverts avant de les introduire dans le lave-vaisselle pour le lavage (fig. 13) Fig. 13 •...
- Page 26 ATTENTION PRÊTER ATTENTION AU MOUVEMENT D’OUVERTURE ET DE FERMETURE DE LA PORTE/DU CAPOT DU LAVE- VAISSELLE. NE PAS UTILISER LE LAVE-VAISSELLE EN PORTANT DES VÊTEMENTS/OBJETS QUI POURRAIENT ÊTRE PIÉGÉES DANS LES COMPOSANTS DU LAVE-VAISSELLE, EN LIMITANT LA CAPACITÉ NORMALE DE MOUVEMENT. PHASE TYPE DE LAVE-VAISSELLE/FIGURE RÉFÉRENCES Lave-vaisselle à...
- Page 27 PHASE TYPE DE LAVE-VAISSELLE/FIGURE RÉFÉRENCES Avant de commencer le lavage, sélectionner le cycle de lavage à l'aide de la TOUCHE DE SÉLECTION PROGRAMME (6). Appuyer plusieurs fois sur cette touche pour faire défiler les 4 programmes mémorisés et arrêter sur le programme sélectionné.
- Page 28 7. Couper l’alimentation électrique en fermant l’interrupteur général placé en amont du lave-vaisselle ou en débranchant le lave-vaisselle du réseau électrique 8. Enlever et nettoyer le filtre de la pompe de lavage (fig. 17) et, le cas échéant, les filtres cuve éventuels 9.
- Page 29 Fig. 17 4.8 Thermostop Le lave-vaisselle est doté de série de la fonction de thermostop qui garantit le démarrage du cycle de lavage uniquement si la température de l'eau dans la cuve a atteint le minimum configuré (Thermostop de la cuve) et active le rinçage uniquement si le surchauffeur a atteint la température minimum configurée (Thermostop Surchauffeur).
- Page 30 5 Instructions pour le démontage ATTENTION ! DANGER DE BLESSURES DANGER D’ENDOMMAGEMENT DU LAVE-VAISSELLE Le démontage doit être effectué par du personnel spécialisé et certifié. Il est donc conseillé de porter le lave-vaisselle chez le revendeur agrée, si l'on doit démonter le lave- vaisselle totalement ou en partie.
- Page 31 ENTRETIEN FRÉQUENCE NOTES Contrôle de la Contrôler manuellement la bonne rotation du bras de rotation Tous les jours rinçage. du bras de lavage Nettoyage des Tous les 1-2 jours Ne pas utiliser des solvants sur le panneau de commande. parois extérieures Contrôle du Contrôler le fonctionnement du micro-interrupteur de la fonctionnement...
- Page 32 ENTRETIEN FRÉQUENCE NOTES Vérifier le fonctionnement et l’usure de tous les composants, en les remplaçant si besoin Contrôle du nettoyage du surchauffeur (le vider et vérifier la présence de calcaire) Contrôle du joint de la résistance du surchauffeur Contrôle de la présence éventuelle de fuites sur la pompe de lavage Contrôle de l’intégrité...
- Page 33 Le non-respect des contrôles susmentionnés et l’absence de rapports de la part du technicien font déchoir la garantie du produit. Le Fabricant ne répond pas des anomalies de fonctionnement et/ou dommages causés par la négligence ou le non-respect des règles d’entretien périodique reportées dans ce manuel d’utilisation et d’entretien.
- Page 34 Pour le nettoyage des parois extérieures du lave-vaisselle, utiliser uniquement un détergent neutre spécifique pour l'acier et un chiffon doux non abrasif. Attention : le degré de protection du lave- vaisselle est IPx1, aussi il est absolument interdit d'utiliser des jets d'eau directs pour le nettoyage de tout composant du lave-vaisselle.
- Page 35 PROBLÈME CAUSE POSSIBLE SOLUTION Tourner l'interrupteur en amont du L’interrupteur en amont du lave- vaisselle est en position “éteint” lave-vaisselle en position "allumé" La prise ou le câble d’alimentation En cas de dommage à ces éléments, sont endommagés couper la tension du lave-vaisselle sans toucher le câble électrique (porter ATTENTION ! l’interrupteur placé...
- Page 36 PROBLÈME CAUSE POSSIBLE SOLUTION La pression de l'eau d'alimentation S’adresser à l’installateur pour installer une est inférieure à 1,5 bars pompe supplémentaire d’augmentation de la pression de l'eau d'alimentation Le filtre du robinet d'alimentation de Laver et rincer le filtre du robinet l’eau est engorgé...
- Page 37 PROBLÈME CAUSE POSSIBLE SOLUTION Avant de commencer le lavage en tant que tel, attendre que l'eau dans la cuve Le lave-vaisselle n’a pas terminé la de lavage ait eu le temps de chauffer. phase de chauffage de l’eau dans la Lorsque l’eau de la cuve est arrivée à...
- Page 38 PROBLÈME CAUSE POSSIBLE SOLUTION Changer le type de lessive selon les indications fournies au paragraphe 11. Utilisation d'une lessive à haute teneur Enlever la rouille avec des produits en chlore spécifiques sans rayer la surface de l'acier Ne jamais utiliser d'eau de javel. Enlever la rouille avec des produits Utilisation d'eau de javel dans la cuve spécifiques sans rayer la surface de...
- Page 39 Si le VOYANT D’ENTRETIEN DEMANDÉ s’allume (réf.9, fig. 14, paragraphe 4.6), cela signifie qu’un entretien général du lave-vaisselle est exigé. Ce message apparaît quand on atteint 80.000 cycles. Contacter le centre d’assistance pour remplacer les composants sujets à une usure ordinaire. Nous indiquons ci-après les alarmes qui peuvent s'afficher à...
- Page 40 10 Formation du personnel La formation du personnel concerne les opérations de chargement, de déchargement, depréparation à l'utilisation et l'utilisation du lave-vaisselle. Toutes les opérations sont très simples et requièrent une attention normale pour éviter les petits accidents. 11 Indications utiles Voici quelques indications utiles pour le bon fonctionnement du lave-vaisselle : •...
- Page 41 12 Instructions pour l’élimination Informations sur l'élimination d'appareils électriques. Le symbole représenté ci-contre et placé sur l’appareil électrique que vous avez acheté, indique que cet équipement ne doit pas être éliminé comme un déchet ordinaire mais qu'il doit faire l'objet d'un tri sélectif.
- Page 42 DISHWASHER CLVA50U- CLVA50UPV - CLVA50UPVA – CLVA50UPVAT- CLVA60UPV SAS CASSELIN 83 rue Marcel Mérieux 69960 Corbas FRANCE Tel: +33 (0)4 82 92 60 00 - Mail:contact@casselin.com...
- Page 43 LEGEND SYMBOLS WARNINGS FIRST PART 1. Purpose of the information contained in PART ONE 2. Reference standards 3. Applicability 4. Transportation 5. Instructions for transport, storage, unpacking and assembly 6. Dishwasher identification and marking SECOND PART 1. Purpose of the manual 1.1.
- Page 44 LEGEND SYMBOLS 3.4 Usage limits 3.5 Operator 4 Instructions for using the dishwasher with digital display 4.1 General function check 4.2 Security bodies 4.2.1 General securities 4.2.2 Red flags 4.2.3 Indicators and signals 4.2.4 Blocking devices 4.2.5 Adjustable and removable guards and guards 4.3 Security measures 4.4 No-load test 4.5 Washing operations...
- Page 45 LEGEND SYMBOLS SYMBOL DESCRIPTION CAUTION - DANGER OF INJURY This symbol applies to information and warnings which, if not observed, may compromise the safety of persons or damage the device. DANGER OF ELECTROCUTION This symbol applies to information and warnings of an electrical nature, the non-observance of which may compromise the safety of persons or damage the device.
- Page 46 WARNINGS A few general caveats ► Dear customer, we inform you that the product purchased is a dishwasher ► This appliance must be used for washing glasses, cups, plates and the like with food type dirt, the residues of which must be removed beforehand, by soaking them without detergent as explained in the chapter "Instructions for use"...
- Page 47 ► Thoroughly clean the dishwasher once a week at least. ► Check the condition of the power cable daily, especially if the power supply socket with the electrical network is not next to the dishwasher. ► The power cable supplied with the machine is of the H07RN-F type. If the cable is damaged, disconnect the dishwasher from the mains and promptly call an authorized service center to replace the cable.
- Page 48 ATTENTION ! DANGER OF ELECTROCUTION FIRST PART 1. Purpose of the information contained in PART ONE The purpose of the information provided in PART ONE is to inform the Customer of the data necessary for proper identification of the dishwasher. 2.
- Page 49 When the dishwasher arrives, checkcarefully the tickets and identify the packages. In the event of non-compliance between the documents, the packages delivered and their contents, call the supplier immediately. Carefully check the condition of the packaging: if it is faulty, broken or has signs mishandling, inform the supplier immediately.
- Page 50 2. Remove the two screws A which fix thedishwasher to the transport pallet (fig. 3) Fig. 3 3. Slide the machine on the pallet until freeing two of the four holes to insert the support feet (fig. 4). Take one of the supplied feet and screw the screw into one of the two free seats (fig.
- Page 51 SECOND PART 1. Purpose of the manual The purpose of this use and maintenance manual is to describe the safety measures, essential for the user, to be observed when using the dishwasher. This use and maintenance manual is an integral part of the dishwasher. By user is meant not only the purchaser of the dishwasher, but all the personnel concerned with its management, operation, maintenance and control.
- Page 52 Customers are invited to submit, in the spirit and in the letter of theStandard, suggestions and...
- Page 53 the suggestions for improvement that they deem appropriate to improve the use, readability and conservation of this manual. To make these communications, contact the dishwasher manufacturer. 1.8. Limits of liability NB The manufacturer declines all responsibility in the event of accidents for persons or property resulting from non-compliance with the standards cited in this manual, or from the use, maintenanceor a non-conforming repair.
- Page 54 • Wrong installation The dishwasher must be installed correctly, both mechanically and electrically, in premises that do not make it difficult for the operator to use it. The rules for proper installation, if carried out by the customer, are indicated in the manual. •...
- Page 55 2.1 Position and leveling The dishwasher is shipped by the Manufacturer already assembled and with all the accessories and auxiliary elements provided for its operation. If possible, place the dishwasher near water and electricity supply points. The device must be placed horizontally; to do this, act on the four adjustable feet (fig. 6). If the dishwasher is built-in, the side panels and the rear part may stick to the furniture and adjoining walls.
- Page 56 ELECTRICAL INSTALLATION OF THE SINGLE-PHASE DISHWASHER Single-phase dishwasher with Schuko plug 230V+T If the dishwasher has a Schuko plug, plug it into the wall outlet. Connect the appliance to the equipotential system using the terminal provided for this purpose at the rear of the dishwasher. Single-phase dishwasher without 230V+T plug If the dishwasher does not have an electrical outlet, make the connection as follows: Brown wire: line...
- Page 57 ELECTRICAL INSTALLATION OF THE THREE-PHASE DISHWASHER Three-phase dishwasher 400V3N+T Three-phase 400V dishwashers are always equipped with 5 poles and therefore a neutral conductor. Connect as shown below: Brown wire: line 1 Black wire: line 2 Gray wire: line 3 Blue wire: neutral Yellow/green wire: ground circuit If the dishwasher has a three-phase pump motor, check the direction of rotation of the pump...
- Page 58 Three-phase dishwasher 230V3+T (optional on request) 230V three-phase 4-pole dishwashers are supplied upon explicit request at the time of ordering. A subsequent transformation of the dishwasher may require the replacement of certain components. Connect as shown below: Brown wire: line 1 Black wire: line 2 Gray wire: line 3 Yellow/green wire: ground circuit...
- Page 59 2.3 Grounding The dishwasher must be connected to the building's ground circuit or other verified system and approved in accordance with applicable regulations. ATTENTION ! We remember that in any case the only connection to earth is not able to reduce the touch voltage and therefore it is necessary to place active devices able to interrupt the flow of voltage in the time, in accordance with Standard CEI 64-8 or the European Standard for installations in public premises.
- Page 60 Fig. 8 2.5 Drain connection At the rear of the dishwasher there is a drain hose, which can be easily adjusted depending on the position of the drain well (fig. 9). On the other hand, if emptying by dropping is not possible, ask for the version with pump of emptying (fig.
- Page 61 Fig. 9 Fig.10 2.6 Version with drain pump The end of the drain hose can be hooked to the edge of a sink or alternatively to a wall drain fitting that has an air vent or, in any case, of a larger diameter than the drain hose to to allow the passage of air.
- Page 62 ATTENTION ! If hanging the drain hose over the edge of a sink, position its end so that it prevent drain water from reaching electrical outlets or appliances. 2.7 Detergent installation The dishwasher has a blue rinse aid supply hose and a yellow detergent supply hose. Before inserting the hoses into their respective container, it is recommended to fit the end of the hoses with the small ballast and the filter supplied with the dishwasher (fig.
- Page 63 2.9 Water hardness measurement(only for dishwashers with built-in water softener) Use the kit supplied with the dishwasher to measure the inlet water hardness: • Take 5 ml of water in the specific cup • Pour into the water sampled 1 drop of indicator (blue bottle) •...
- Page 64 3.3 Types of dishes It is possible to wash: - for glasswasher models: glasses, coffee cups, flutes, small plates and fruit plates, in compliance with the indications given in the paragraph relating to the Limits of Use (par. 1.8.1 – PART TWO). - for all other models: all types of crockery within the limits of the dimensions of the basket and limited to crockery for everyday use in compliance with everything indicated in the paragraph relating to the Limits of use (par.
- Page 65 In particular, the condition of the junction pipes and connections must be periodically checked. electrical (see chap. 2 – PART TWO). 4.2 Security bodies 4.2.1 General securities The dishwasher is completely enclosed with metal panels that cannot be opened only by means of tools. 4.2.2 Red flags In the event of an anomaly, the display shows an error code (refer to paragraph9.1 Signals and alarms (dishwasher with digital display)
- Page 66 4.2.5 Adjustable and removable guards and guards Protectors and removable protectionsare not used because they are not needed. 4.3 Security measures The use of the dishwasher implies compliance with certain fundamental rules: • do not move the dishwasher from its place of origin during operation •...
- Page 67 4.5 Washing operations Good dishwashing hygiene requires compliance with certain fundamental rules: • remove food remains from cutlery before placing them in the dishwasher to washing (fig. 13) Fig. 13 • frequently replace the water in the tub depending on the number of washing cycles carried out and, in any case, at least 3 times a day •...
- Page 68 ATTENTION PAY ATTENTION TO THE OPENING AND CLOSING MOVEMENT OF THE DOOR/HOOD OF THE WASHINGDISHES. DO NOT OPERATE DISHWASHER WHILE WEARING CLOTHING/OBJECTS THAT COULD BECOME ENTANGLED IN DISHWASHER COMPONENTS, LIMITING NORMAL ABILITY TO MOVE. PHASE TYPE OF DISHWASHER/FIGURE REFERENCES Front Loading Dishwasher Hood dishwasher Check that the tank is completely empty and clean 0.
- Page 69 PHASE TYPE OF DISHWASHER/FIGURE REFERENCES Before starting the wash, select the wash cycle using the PROGRAM SELECTION BUTTON (6). Press this button several times to scroll through the 4 stored programs and stop on the selected program. When scrolling through the programs, the program code is displayed on the LEFT DIGIT LEDs (2), while the program duration in seconds is displayed on the RIGHT DIGIT LEDs (4).
- Page 70 7. Cut off the power supply by turning off the main switch placed upstream of the dishwasher or by unplugging the dishwasher from the electrical network 8. Remove and clean the wash pump filter (fig. 17) and, if applicable, the tank filters possible 9.
- Page 71 Fig. 17 4.8 Thermostop The dishwasher is equipped as standard with the thermostop function which guarantees the start of the washing cycle only if the temperature of the water in the tub has reached the set minimum (Thermostop of the tub) and activates rinsing only if the boiler has reached the set minimum temperature (Boiler Thermostop).
- Page 72 5 Instructions for disassembly ATTENTION ! DANGER OF INJURY DISHWASHER DAMAGE HAZARD Dismantling must be carried out by specialized and certified personnel. It is therefore advisable to take the dishwasher to the authorized dealer, if the dishwasher has to be dismantled.
- Page 73 INTERVIEW FREQUENCY NOTES Control of Manually check the correct rotation of the arm of spin Every day rinsing. of the wash arm Cleaning of Every 1-2 days Do not use solvents on the control panel. exterior walls Checking the Check the operation of the door microswitch when the operation of the Once aweek wash cycle is started, by opening/closing the door or...
- Page 74 INTERVIEW FREQUENCY NOTES Check the operation and wear of all components, replacing them if necessary Controlcleaning the superheater (emptying it and checking for the presence of limestone) Checking the seal of the superheater resistance Check for the possible presence of leaks on the washing pump Checking the integrity of the hydraulic circuit Checking the integrity of the water inlet hose...
- Page 75 Failure to comply with the above checks and the absence of reports from the technician invalidates the product warranty. The Manufacturer is not liable for malfunctions and/or damage caused by negligence or non-compliance with the periodic maintenance rules reported in this use and maintenance manual.
- Page 76 To clean the exterior walls of the dishwasher, use only a specific neutral detergent for steel and a soft, non-abrasive cloth. Warning: the degree of protection of the dishwasher is IPx1, so it is absolutely forbidden to use direct jets of water to clean any component of the dishwasher. Furthermore, it is forbidden to wash the floors, walls or any other object installed near the dishwasher with water jets or high-pressure cleaners.
- Page 77 ISSUE POSSIBLE CAUSE SOLUTION Turn the switch upstream of the The switch upstream of the dishwasher is in the “off” dishwasher to the "on" position position The power plug or cable In the event of damage to these are damaged elements, cut off the voltage to the dishwasher without...
- Page 78 ISSUE POSSIBLE CAUSE SOLUTION The supply water pressure is less Contact the installer to install an additional than 1.5 bar feed water pressure booster pump The supply valve filter Wash and rinse the faucet filter the water is clogged water supply The rinse arm nozzles are clogged Wash and rinse the rinse arm nozzles The arms ofwash/rinse do not spin...
- Page 79 ISSUE POSSIBLE CAUSE SOLUTION Before starting the wash as such, wait until the water in the wash tank has The dishwasher has not completed had time to heat up. When the water the heating phase of the water in in the tank has reached the desired the tub temperature, WATER...
- Page 80 ISSUE POSSIBLE CAUSE SOLUTION Change type detergent indicated in paragraph 11. Use of detergent with high chlorine Remove rust with specific products content without scratching the steel surface Never use bleach. Remove rust with specific products Use of bleach in the tub without scratching the steel surface During manual pre-washing, never use Introduction into the tank of dishes...
- Page 81 If the MAINTENANCE REQUIRED LIGHT comes on (ref.9, fig. 14, paragraph 4.6), it means that general maintenance of the dishwasher is required. This message appears when 80,000 cycles are reached. Contact the assistance center to replace components subject to ordinary wear. Below are the alarms that may appear on the screen in the event of an operating anomaly.
- Page 82 10 Staff training Staff training concerns loading, unloading, preparation for use and use of the dishwasher. All operations are very simple and require normal attention to avoid small accidents. 11 Useful hints Here are some useful tips for the correct operation of the dishwasher: •...
- Page 83 12 Instructions for disposal Information on disposal of electrical appliances. The symbol shown opposite and placed on the electrical device that you have purchased, indicates that this equipment must not be disposed of as ordinary waste but that it must be sorted selectively.
Need help?
Do you have a question about the 500U and is the answer not in the manual?
Questions and answers