Advertisement
Table of Contents
COMPONENTS/ KOMPONENTY / COMPONENTES / COMPONENTES / ΣΥΣΤΑΤΙΚΑ
INSTALLATION GUIDE / INSTRUKCJAINSTALACJI / GUIADE INSTALAÇÃO / GUÍADE INSTALACIÓN / ΟΔΗΓΟΣ ΕΓΚΑΤΑΣΤΑΣΗΣ
2
4
6
http://www.gembird.eu
1
3
5
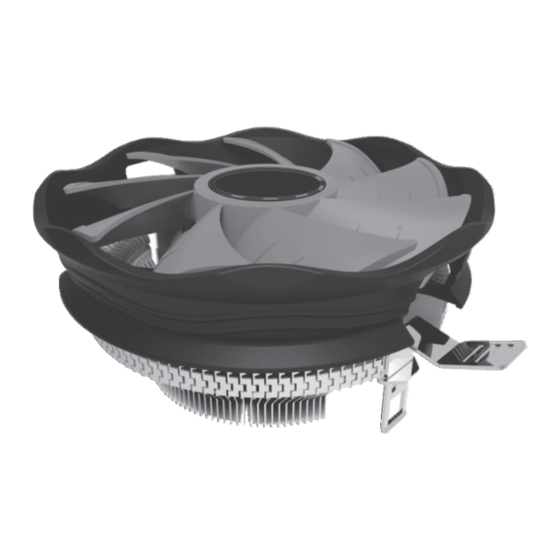
CPU-HURACAN-X30
CPU cooling fan, 12 cm, 45 W,
4 pin
(EN) 1. Insert the 4 clear connectors into the appropriate platforms upports 775/1165.
2. Align the bracket with the transparent connectors inserted into the 4 holes of the motherboard
and install it on the motherboard. Align the bracket with the clear connectors inserted into the 4
1
holes of the motherboard and mount it on the motherboard.
3. In the prepared transparent connectors, insert the 4 black connectors and then press down.
4. Spread the thermal paste evenly over the processo.r
5. Align the side of the heat sink clamp with the clamp point of the bracket, then press down on
the clamp point of the bracket on the other side.
6. The fan power cable should be connected to the 3-pin or 4-pin oscket of the motherboard.
(PL) 1. Włóż 4 przezroczyste złączki w odpowiednie wsporniki platfomr y 775/1165.
2. Dopasuj wspornik do przezroczystych złączek włożonych w 4 otwory płyty głównej i zamontuj
go na
2
płycie głównej. Wyrównaj wspornik z przezroczystymi złączkami włożonymi w 4 otwory płyty
głównej i
zamontuj go na płycie głównej.
3. W przygotowanych przezroczystych złączkach wsuń 4 czarne złączki, a następnie dociśnij.
4. Rozprowadź pastę termiczną równomiernie na procesorze.
5. Dopasuj bok klamry radiatora do punktu klamry wspornika, a następnie naciśnij punkt klamry
wspornika po drugiej stronie.
6. Kabel zasilający wentylatora powinien zostać podłączony do 3-pinowego lub 4-pinowego
gniazda płyty głównej.
(PT) 1. Insira os 4 conectores transparentes nos suportes de plataforma apropriados 775/1165.
3
2. Alinhe o suporte com os conectores transparentes inseridos nos 4 orifícios da placa-mãe e
instale-o na placa-mãe. Alinhe o suporte com os conectores transparentes inseridos nos 4
orifícios da placa-mãe e monte-o na placa-mãe.
3. Nos conectores transparentes preparados, insira os 4 conectores pretos e pressione para
baixo.
4. Espalhe a pasta térmica uniformemente sobre o processado.r
5. Alinhe a lateral do grampo do dissipador de calor com o ponto de fixação do suporte e, em
seguida, pressione o ponto de fixação do suporte do outro lado.
6. O cabo de alimentação do ventilador deve ser conectado ao soquete de 3 ou 4 pinos da placa-
mãe.
4
(ES) 1. Inserte los 4 conectores transparentes en los soportes de plataforma adecuados
775/1165.
2. Alinee el soporte con los conectores transparentes insertados en los 4 orificios de la placa
base e instálelo en la placa base. Alinee el soporte con los conectores transparentes insertados
en los 4 orificios de la placa base y móntelo en la placa base.
3. En los conectores transparentes preparados, inserte los 4 conectores negros y luego presione
hacia abajo.
4. Extienda la pasta térmica uniformemente sobre el procesado.r
5. Alinee el lado de la abrazadera del disipador de calor con el punto de abrazadera del soporte,
luego presione hacia abajo el punto de abrazadera del soporte en el otro lado.
4.1
6. El cable de alimentación del ventilador debe conectarse al enchufe de 3 o 4 pines de la placa
base.
(GR) 1. Εισαγάγετε τους 4 διαφανείς συνδέσμους στα κατάλληλα στηρίγματα πλατφόρμας
775/1165.
2. Ευθυγραμμίστε το στήριγμα με τους διαφανείς συνδέσμους που έχουν εισαχθεί στις 4 οπές της
μητρικής πλακέτας και τοποθετήστε το στη μητρική πλακέτα. Ευθυγραμμίστε το στήριγμα με τους
διαφανείς συνδέσμους που έχουν εισαχθεί στις 4 οπές της μητρικής πλακέτας και τοποθετήστε το
στη μητρική πλακέτα.
3. Στις προετοιμασμένες διαφανείς υποδοχές, τοποθετήστε τις 4 μαύρες υποδοχές και μετά πιέστε
προς τα κάτω.
5
4. Απλώστε ομοιόμορφα τη θερμική πάστα πάνω από τον επεξεργαστή.
5. Ευθυγραμμίστε την πλευρά του σφιγκτήρα της ψύκτρας με το σημείο σύσφιξης του βραχίονα
και, στη συνέχεια, πιέστε προς τα κάτω το σημείο σύσφιξης του βραχίονα στην άλλη πλευρά.
6. Το καλώδιο τροφοδοσίας του ανεμιστήρα πρέπει να είναι συνδεδεμένο στην υποδοχή 3 ή 4
ακίδων της μητρικής πλακέτας.
1
5
2
3
4
Advertisement
Table of Contents

Subscribe to Our Youtube Channel
Related Manuals for Gembird CPU-HURACAN-X30


Summary of Contents for Gembird CPU-HURACAN-X30
- Page 1 CPU-HURACAN-X30 CPU cooling fan, 12 cm, 45 W, 4 pin http://www.gembird.eu COMPONENTS/ KOMPONENTY / COMPONENTES / COMPONENTES / ΣΥΣΤΑΤΙΚΑ INSTALLATION GUIDE / INSTRUKCJAINSTALACJI / GUIADE INSTALAÇÃO / GUÍADE INSTALACIÓN / ΟΔΗΓΟΣ ΕΓΚΑΤΑΣΤΑΣΗΣ (EN) 1. Insert the 4 clear connectors into the appropriate platforms upports 775/1165.
- Page 2 (ENG) Declaration of conformity This product is tested and complies with the essential requirements of the laws of member states concerning EMC(2014/30/EU), RoHS (2011/65/EU). The CE declaration can be found under www.gmb.nl/certificates (DE/A) Konformitätserklärung Dieses Produkt wurde getestet und stimmt mit den grundlegenden Anforderungen der Richtlinie EMC(2014/30/EU), RoHS (2011/65/EU) überein. Die Konformitätserklärung kann auf unserer Webseite www.gmb.nl/certificates heruntergeladen werden.
Need help?
Do you have a question about the CPU-HURACAN-X30 and is the answer not in the manual?
Questions and answers