
Subscribe to Our Youtube Channel
Related Manuals for Kurt AngLock D810


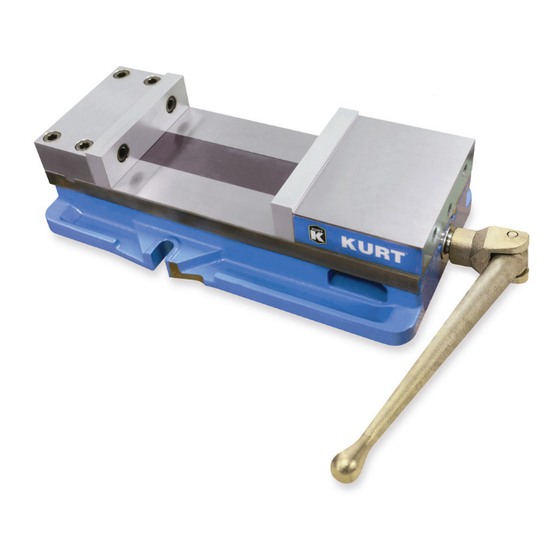
Summary of Contents for Kurt AngLock D810
- Page 1 D810 AngLock Vise ® Base Assembly Operating Instructions Manual Manual de instrucciones de operación ENGLISH ESPAÑOL...
-
Page 2: Table Of Contents
Table of Contents Introduction .........................3 Setup Instructions ......................4 Operating Instructions ..................5-7 D810 Parts List ......................8 D810 Mechanical Drawing ..................9 Maintenance Schedule ..................10-12 Troubleshooting Tips ..................... 13 CAUTION: Is used when your action or lack of action may cause serious injury. Vise Data Use this to fill out information about your vise for quick reference. -
Page 3: Introduction
Introduction Thank you for purchasing a Kurt vise. You have just purchased one of the best machine vises in the industry. The D-Series AngLock vise has a time proven design. The outstanding accuracy of this product is second to none. Backed by a lifetime warranty, this product will last forever when used and maintained properly. -
Page 4: Setup Instructions
Set-up Instructions Now that you have your new Kurt Vise, it’s time to set-up and begin using it. You will see that your new vise comes with a Kurt swivel handle, chip guard and instruction manual in the shipping carton. The chip guard rests between the ways of the vise and can be trimmed to size to help keep the chips out of the screw. -
Page 5: Operating Instructions
If you need more clamping force you may require a larger vise. To properly clamp a part in your Kurt vise you should place the part in the center of the jaws resting on the ways of the vise. Clamping only on one side or above the movable and stationary jaws can result in jaw lift or loss of accuracy. - Page 6 Fig.1 Sketch #2A Incorrect part clamping. Vise width centerline Sketch #2B Correct part clamping. Sketch #2C Correct part clamping. Sketch #2D Correct part clamping. Non- machined spacer ENGLISH | Operating Instructions...
- Page 7 Proper O-Ring installation and usage Most jobs require a tight contact between the workpiece and the parallels (see above). This option offered by Kurt Manufacturing Company is ideal for that. The O-Ring installation will provide for the movement needed when working with parallels.
-
Page 8: D810 Parts List
D810 Parts List ITEM # PART # DESCRIPTION QTY. D810-1A BODY PT800-211 INTERNAL BRUSH SEAL D810-68 RING, “O”, #221 D80-42 THRUST BEARING WASHER D80-41 THRUST BEARING D810-217 RING,RETAINER D810-5A SCREW 01-3953 SCREW,SHSS,5/8-11 X 1-1/4 D810-2 MOVABLE JAW D810-3A D80-9 SEGMENT 225-20 O-RING, POLYURETHANE #008 00-1481... -
Page 9: D810 Mechanical Drawing
D810 Mechanical Drawing | ENLGISH D810 Mechanical Drawing... -
Page 10: Maintenance Schedule
Maintenance Schedule It is very important to perform regularly maintenance on your Kurt vise to assure proper operation. Improper maintenance will result in poor vise performance and may void your warranty. Daily/ Weekly 1. Remove chips from surface of vise. - Page 11 8. Tighten the setscrew to firmly contact the nut. Back off the setscrew ¼ turn (approx.) note: DO NOT leave the setscrew tightened firmly to the nut as this may cause improper operation. The movable jaw is designed to move slightly (pivot side to side) so maximum jaw plate contact is maintained when clamping out- of-parallel, sawed, or cast parts.
- Page 12 3 to 6 months 1. Open vise to maximum opening. 2. Remove spiral snap ring and washer from hex end of the vise screw. 3. Slide the movable jaw toward the stationary. 4. Remove the thrust bearing assembly consisting of (2) thrust washers and (1) thrust bearing from the counter bore in the end of the body.
-
Page 13: Troubleshooting Tips
Troubleshooting Tips The Kurt D-Series vise will operate mostly trouble free for many years. If properly maintained, this product is indestructible. In some cases it will be necessary to troubleshoot. Use the information below to help in the process. Problem: My vise turns hard. - Page 14 Maintenance Log/Notes: ENGLISH | Maintenance Log/Notes...
- Page 15 Thank you for your purchase! If you have any feedback or questions. Please contact us at: workholding@kurt.com 1-877-226-7823 Like, Tweet, and Subscribe to us!
- Page 16 The sole obligation of Kurt Manufacturing Company, Inc. (Kurt) and the purchaser’s SOLE AND EXCLUSIVE REMEDY hereunder, shall be limited to the replacement or repair of any Kurt product or part (by an authorized Kurt technician) which are returned to Kurt Manufacturing Company’s place of business, transportation, shipping and postal charges prepaid, and there determined by Kurt Manufacturing Company to be covered by the warranty contained herein.
- Page 17 Prensa D810 AngLock ® Ensamble de Base Manual de instrucciones de operación ESPAÑOL...
- Page 18 Tabla de contenido Introducción ......................19 Instrucciones de instalación ................20 Instrucciones de operación ................21-23 D810 Lista De Piezas ....................24 D810 Dibujo Mecánico ..................25 Programa de mantenimiento ...............26-28 Sugerencias para la resolución de problemas ..........29 Vise Datos Utilice esta opción para rellenar la información sobre el tornillo de banco para referencia rápida Fecha de compra:...
-
Page 19: Introducción
Introducción Muchas gracias por comprar una prensa Kurt. Usted ha comprado una de las mejores prensas para mecanizado de la industria. La prensa AngLock™ Serie D tiene un diseño ampliamente comprobado. La extraordinaria exactitud de este producto es insuperable. Con el respaldo de una garantía de por vida, este producto durará... -
Page 20: Instrucciones De Instalación
Instrucciones de instalación Ahora que ya tiene su nueva prensa Kurt Serie D, es el momento de comenzar a utilizarla. Usted verá que su nueva prensa viene con una manija giratoria Kurt y un manual de instrucciones suministrados en la caja de envío. La manija está diseñada específicamente para proporcionar el máximo par de torsión a su prensa. -
Page 21: Instrucciones De Operación
Para sujetar debidamente una pieza en su prensa Kurt le sugerimos colocar la pieza en el centro de las mordazas y apoyarla en los carriles de la prensa. La sujeción cargada en uno solo de los lados o por encima de las mordazas móviles y estacionarias puede resultar... - Page 22 Fig.1 Dibujo #2A Parteincorrecta de sujeción. Central de ancho Vise Dibujo #2B Parte de amarre. Dibujo #2C Parte de amarre. Dibujo #2D Parte de amarre. mecanizadas espaciador ESPAÑOL | Instrucciones de operación...
- Page 23 Adecuado O-Ring de instalación y uso La mayoría de trabajos requieren un contacto ajustado entre las piezas de trabajo y la paralela (véase arriba). Esta opción que ofrece Kurt Manufacturing Company es ideal para ello. La instalación del arosello permitirá el movimiento necesario al trabajar con paralelas.
-
Page 24: D810 Lista De Piezas
D810 Lista De Piezas ITEM # PART # DESCRIPTION QTY. D810-1A Cuerpo PT800-211 Sello De Escobilla Interior D810-68 Arosello #221 D80-42 Arandela De Cojinete De Empuje D80-41 Cojinete De Empuje D810-217 Anillo Retendor D810-5A Tornillo 01 3953 Tornillo,SHSS,5/8-11 X 1-1/4 D810-2 Mordaza Móvil D810-3A... -
Page 25: D810 Dibujo Mecánico
D810 Dibujo | ESPAÑOL D810 Dibujo... -
Page 26: Programa De Mantenimiento
Programa de mantenimiento Para asegurar el funcionamiento correcto, es de suma importancia realizar el mantenimiento regular en su prensa Kurt. El mantenimiento erróneo resultará en el desempeño deficiente de la prensa y puede anular su garantía. Diariamente / Semanalmente 1. Retire las virutas de la superficie de la prensa. - Page 27 6. Para reensamblar la mordaza móvil, aplique una “bola” de grasa a la superficie inferior de la mordaza móvil en la cavidad. Coloque el segmento semiesférico en la cavidad correspondiente y empújelo hacia la grasa. La grasa retendrá en posición el segmento al voltear la mordaza para reinstalarla.
- Page 28 3 a 6 meses 1. Abra la prensa al máximo. 2. Retire el anillo de presión en espiral y la arandela del extremo hexagonal del tornillo de la prensa. 3. Deslice la mordaza móvil en dirección a la estacionaria. 4. Retire el conjunto del cojinete de empuje que consiste en (2) arandelas de empuje y (1) cojinete de empuje desde el rebajo avellanado en el extremo del cuerpo.
-
Page 29: Sugerencias Para La Resolución De Problemas
Sugerencias para la resolución de problemas La prensa Kurt Serie D funcionará prácticamente sin problemas durante muchos años. Si se le brinda el mantenimiento apropiado, este producto es indestructible. En algunos casos será necesario resolver algunos problemas. Use la información que se indica a continuación como ayuda en el proceso. - Page 30 Registro de Mantenimiento / Notas: ESPAÑOL | Registro de Mantenimiento / Notas...
- Page 31 ¡Muchas gracias! Si tiene algún comentario o preguntas. comuníquese con nosotros en workholding@kurt.com 877-226-7823 Al igual que, Tweet, y suscribirse a nosotros!
- Page 32 Inc. (Kurt) y la ÚNICA Y EXCLUSIVA COMPENSACIÓN del comprador en virtud del presente documento, habrá de estar limitada al reemplazo o reparación de cualquier producto o pieza de Kurt (realizada por un técnico autorizado de Kurt) siempre que sean devueltos al local comercial de Kurt Manufacturing Company, con los gastos de transporte, envío y porte postal pagados previamente, y que Kurt Manufacturing...
Need help?
Do you have a question about the AngLock D810 and is the answer not in the manual?
Questions and answers