Table of Contents
Advertisement
Quick Links
Advertisement
Table of Contents
Troubleshooting

Summary of Contents for COMPANO XR+
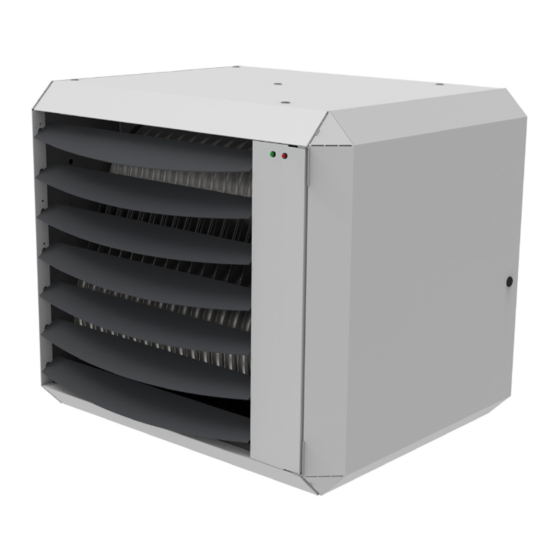
- Page 1 Installation manual Air heater Type XR+ EN - v2.10 / 10-2023...
-
Page 2: Table Of Contents
Contents 1. Introduction 7. Commissioning the air heater 1.1. Symbols used in this manual 7.1. Adjusting the settings 1.2. Warranty 7.2. Commissioning the air heater 2. Safety instructions 8. Combustion settings 2.1. Installation 8.1. Adjusting the burner settings 2.2. Use 8.2. -
Page 3: Introduction
1. Introduction This manual is intended for the gas, electrical and mechanical installer. This document gives instructions on how to use and maintain the air heater. It is most important to follow the instructions in this document for safe operation of this air heater. -
Page 4: Safety Instructions
2. Safety instructions 2.2. Use Always follow the safety instructions in this chapter when installing, using or performing maintenance on this air heater: CAUTION! Make sure the area around the air heater is dry when performing maintenance on the air heater. 2.1. -
Page 5: Technical Specifications
3. Technical specifications 3.1. Performance Technical specification Unit Type XR+ 5.1 (ERP2021) XR10+ XR20+ XR30+ XR40+ XR50+ XR60+ XR80+ XR100+ XR120+ Net nominal heat input (max.) kW 14.0 22.8 32.0 44.0 55.0 66.0 72.0 91.0 111.0 Net nominal heat input (min.) 13.5 18.0 26.4... -
Page 6: Gas Types
3.2. Gas types 3.2.1. Natural gas G20 Specification Unit Natural gas G20 Nominal supply pressure mbar Supply pressure (min. - max.) mbar 17-25 Gas category Class B23, C13, C33 Specification Unit XR10+ XR20+ XR30+ XR40+ XR50+ XR60+ XR80+ XR100+ XR120+ Gas consumption (max.) 11.7 High... -
Page 7: Dimensions
3.3. Dimensions The dimensions of this air heater can be found in figures 1 through 4. Figure 1 - Dimensions of the XR10+ - XR30+ Figure 2 - Dimensions of the XR40+ - XR60+ Figure 3 - Dimensions of the XR80+ - XR100+ Figure 4 - Dimensions of the XR120+ INSTALLATION MANUAL AIR HEATER TYPE XR+... -
Page 8: Installation
4. Installation 4.1. Preparation • Make sure enough space remains to open the door of the air heater. Before installation, please use the data badge to check: • Make sure the wall can support the air heater. • Ensure sufficient clearance distance for the flue •... - Page 9 Figure 6 - Wall support (standard) Dimension XR10+ - XR30+ XR40+ - XR60+ A (mm) B (mm) C (mm) D (mm) Figure 8 - Vertical suspension kit Dimension XR10+ - XR30+ XR40+ - XR60+ A (mm) Figure 7 - Wall support (turnable) *can be rotated horizontally or forward.
-
Page 10: Gas Type & Connection
4.3. Gas type & connection • The heater must be electrically isolated during servicing. Use an isolation switch (min. 3 mm The unit is suited for the use of natural gas or propane gas. contact opening gap), a power plug or a non- switched fuse spur. - Page 11 In all cases, the communication between the heater and the thermostat is based on a two wire, low-voltage connection. (see the electrical wiring diagram in §11.). Follow these instructions to prevent malfunction of the installation and damage to the thermostat or air heater: 1 2 3 4 5 6 7 8 •...
-
Page 12: Flue Systems
c. Set the J14 switch of the first air heater to 1. NOTICE If the J14 switch of more than one air heater is d. Set the J14 switch of the second air heater to set to the same number, the system will not work. 2, etc. -
Page 13: Flue Length (Max.)
Dimension XR10+ XR40+ XR80+ XR120+ NOTICE Different manufacturers use different - XR30+ - XR60+ - XR100+ connections systems for flue pipes. Do not combine A (mm) 1200 1200 1200 1850 systems from different manufacturers. B (mm) d (Ø mm) 5.2. Flue length (max.) D (Ø... -
Page 14: Condensate In The Flue System
5.3.1. Air heater type Condensate is especially likely to form in the smaller heaters (< 25 kW). Condensate will most likely not form in the larger heaters (> 25 kW). 5.3.2. Air heater location When an air heater burns frequently and is placed in a normally heated room (temperature above 15 °C), condensate is unlikely to form. -
Page 15: Installation Of The Flue Terminal
NOTICE Do not combine components or materials from different manufacturers. 5.4.1. Installation - Roof terminal To install the flue terminal in the roof, do the following: 5.4.1.1. Preparation 1. Check all components for possible damage. 2. Determine the roofing type: Universal Flat roof Synthetic tile... - Page 16 CAUTION! Do not rotate the cap. 7. Seal the edges of the flue terminal with kit. 8. Fix the shield on the inside of the wall. 4. Put the flue terminal into a vertical position. Use a level. CAUTION! Make sure that the gasket is not damaged. 5.
- Page 17 5.4.3.3. Seals When installing a flue system inside a shaft, do the following: The connection between the different flue elements must be made airtight and waterproof with silicon seals. 1. Check the components for possible damage or blockage. CAUTION! If the flue elements have been cut, make sure 2.
-
Page 18: Operating The Air Heater
6. Operating the air heater 6.1. Burner cycle 6.2. Minimum firing time The air heater’s display shows the current status of the The heater will always fire for a minimum of 4 minutes, burner cycle (figure 25). even if the heat demand stops. This is to avoid a large amount of start and stops and to prevent condensate from accumulating in the flue system. -
Page 19: Overheating Protection
6.5. Overheating protection 6.5.2. Flue system The air heater's heat exchanger and flue system are both The flue sensor (NTC) is an optional component that is protected from excessive temperatures. located in the flue system of the air heater. This sensor monitors the flue temperature. - Page 20 3. Instruct end user about the necessary maintenance. 4. Leave this manual with the end user. 7.2.1. First use – thermostat To commission the air heater via the room thermostat, do the following: • Put the thermostat in the highest position. The start Figure 26 - Using the display sequence is always the same.
-
Page 21: Combustion Settings
Summer ventilation When this mode is activated, the air heater ventilates continuously. The air heater does respond to heat demands. When a heat demand ends, the ventilation function continues. To activate the summer ventilation, do the following: 1. Press the (+) and (-) buttons (figure 27) simultaneously. -
Page 22: Converting To Another Gas Type
The air heater must first be commissioned at High fire. NOTICE If the air heater does not ignite while sparking, close the air-openings of the gas-air mixer during ignition. Use your forefinger. The gas mixture will become richer and will ignite more easily. Look for the correct CO value for the air heater in §3.2.. -
Page 23: Temporary Errors
Display Error type Description Case # Display Error type Description Case # L-2 and 3 Internal error Internal error E-30 and 31 Flue sensor error Flue sensor short-circuit E-error E-error for more than 24 E-34 Reset button Too many reset actions in hours error a short timespan... - Page 24 Case 2: No flame after ignition. Case 6: Burner fan does not work. • There is not enough gas pressure. • Check if the burner fan is blocked. • The gas mixture is too poor: • Check if the wiring is damaged. –...
-
Page 25: Further Troubleshooting
Case 19: Heater configuration error 9.5.2. Insufficient output • The heater does not know which program to run, The heat output of the air heater is insufficient if there is due to a mismatch between the burner control unit too much resistance in the inlet or outlet flue system. The and the display. -
Page 26: Maintenance Of The Burner Unit
4. Clean the inside of the air heater. Focus on the following parts: – Body – Fan blades and motor – Heat exchanger – Temperature sensor – Vane switch (if present) 5. Check if the wiring, nuts and bolts are properly secured and tightened. -
Page 27: Electrical Wiring Diagram
11. Electrical wiring diagram A complete electrical wiring diagram is shown in figure 33 / 35 / 37 / 39. The connections that are most important to the installation process are shown in figure 34 / 36 / 38 / 40. Connection type 21 (0-10V) Alarm output 230 V (optional) - Page 28 Connection type 21 (0-10V) Alarm output 230 V (optional) J9- 1 20 (GND) J9- 3 Modbus connection J9- 2 J2-1..6 0 - 10 V input (optional) J9- 4 J6- 1 Modulating thermostat J6- 8 J1- 1 ON/OFF thermostat J6- 2 J1- 5 J6- 9 J1- 2...
- Page 29 Connection type 21 (0-10V) Alarm output 230 V (optional) J9- 1 20 (GND) J9- 3 Modbus connection (optional) J9- 2 J2-1..6 J9- 4 0 - 10 V input (optional) J6- 1 Modulating thermostat J6- 8 J1- 1 J6- 2 ON/OFF thermostat (optional) J1- 5 J6- 9 J1- 2...
- Page 30 Connection type Alarm output 230 V (optional) Modbus connection 21 (0-10V) J9- 1 20 (GND) J9- 3 0 - 10 V input (optional) J9- 2 J2-1..6 Modulating thermostat J9- 4 J6- 1 ON/OFF thermostat J6- 8 J1- 1 Display (2 x 7 segment) J6- 2 J1- 5 J6- 9...
-
Page 31: Exploded View And Spare Parts
12. Exploded view and spare parts The parts of the air heater are shown in an exploded view in figure 41. The table below describes each part and shows the correct article number for a replacement part. Figure 41 - Exploded view of the XR10+ - XR60+ Figure 42 - Exploded view of the XR80+ - XR120+ INSTALLATION MANUAL AIR HEATER TYPE XR+... - Page 32 Description XR10+ XR20+ XR30+ XR40+ XR50+ XR60+ XR80+ XR100+ XR120+ Burner set natural gas GA3260 GA3262 GA3264 GA3266 GA3266 GA3268 Burner set propane GA3224-2 GA3226-2 GA3228-2 GA3234-2 GA3230-2 GA3232-2 GA3236-2 GA3236-2 GA3236-2 Ignition / ionisation set GA3460 GA3460 GA3460 GA3460 GA3460 GA3460 GA3460...
-
Page 33: Disposal And Recycling
13. Disposal and recycling The meaning of the symbol on the material, its accessory or packaging indicates that this product shall not be treated as household waste. Please, dispose of this equipment at your applicable collection point for the recycling of electrical and electronic equipments waste. In the European Union and Other European countries which there are separate collection systems for used electrical and electronic product.
Need help?
Do you have a question about the XR+ and is the answer not in the manual?
Questions and answers