Table of Contents
Advertisement
Quick Links
swiss made
Schermaschine
de
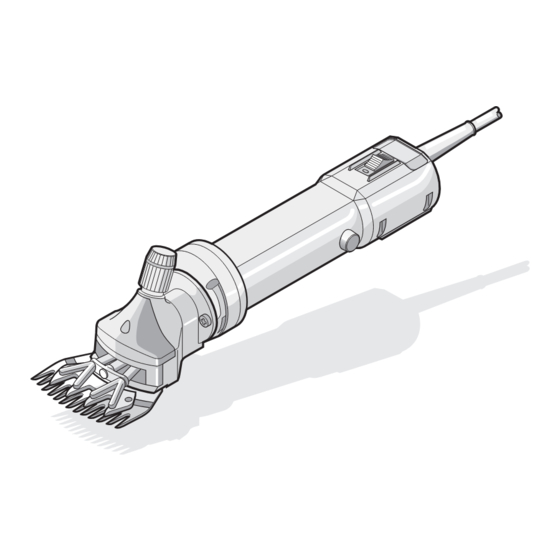
Shearing machine
en
Tondeuse
fr
Tosatrice
it
Esquiladora
es
Scheermachine
nl
Klipper
da
Klipper
sv
nb
Klippemaskin
Karvanleikkuukone
fi
Máquina de tosquia
pt
Κουρευτική μηχανή
el
Ausgabe/Index: Xtra/I
Translation of the original operating instructions
Traduction de la notice originale
Traduzione delle istruzioni originali
Traducción del manual original
Vertaling van de oorspronkelijke handleiding
Oversættelse af den originale brugsanvisning
Översättning av bruksanvisning i original
Oversettelse av den originale brukerveiledningen
Alkuperäisen käyttöohjeen käännös
Μετάφραση πρωτότυπων οδηγιών χρήσης
Original-Betriebsanleitung
Tradução do manual original
03-23
Advertisement
Table of Contents

Summary of Contents for Swiss Made Xtra
- Page 1 Vertaling van de oorspronkelijke handleiding Klipper Oversættelse af den originale brugsanvisning Klipper Översättning av bruksanvisning i original Klippemaskin Oversettelse av den originale brukerveiledningen Karvanleikkuukone Alkuperäisen käyttöohjeen käännös Máquina de tosquia Tradução do manual original Κουρευτική μηχανή Μετάφραση πρωτότυπων οδηγιών χρήσης Ausgabe/Index: Xtra/I 03-23...
-
Page 2: Table Of Contents
Table of contents Safety regulations ................3 Introduction ..................3 Symbols and warning notes ............... 3 Stipulated usage ................. 4 Basic safety principles ............... 4 1.4.1 Power supply connections ..............4 1.4.2 Maintenance and inspection obligation ..........6 1.4.3 Noise emission / personal protective equipment ....... 6 1.4.4 Residual dangers ................ -
Page 3: Safety Regulations
IMPORTANT SAFETY INSTRUCTIONS NOTE! precautionary measures as described below. Read all instructions before using the device. Safety regulations Introduction y This chapter describes the safety regulations that are to be taken into consideration as a matter of course when using the shearing machine. -
Page 4: Stipulated Usage
Stipulated usage The intended purpose of use of the shearing machine is de- scribed in Chapter “2.2 Purpose of use”. Shearing of other animal tions for life and limb. The device is intended for commercial use. The shearing machine must only be used in dry areas. considered as legally binding limit values and characteristic data. - Page 5 WARNING! to people: A device must never be left unattended when it is plugged in. vised by a person responsible for their safety or have been given instructions by that person on how to use the device. Children should be supervised to ensure that they do not play with the equipment.
-
Page 6: Maintenance And Inspection Obligation
1.4.2 Maintenance and inspection obligation Only operate the shearing machine when it is undamaged and in proper condition. must be repaired by a repair and service centre. 1.4.3 Noise emission / personal protective equipment The acoustic emission while operating the device is typically and gloves are always worn when operating the plant. -
Page 7: Operator Requirements
Sheep shearing head case Ventilation blade VS84 XTRA/12V Swivelling fork XTRA/12V incl. item. 37 Sheep shearing head cover XTRA/12V black incl. item. 37 Chicken feet 2.5” XTRA/12V Option Play compensation disc 626 right Chicken feet 2.5” XTRA/12V Option Ball bearing 626-2Z left Chicken feet 3”... - Page 8 Main switch VS84/ HANDY/12V Ball bearing 608-2Z Capacitor 0.15µF VS84/ HANDY 240V Sheep shearing head 3” Capacitor 0.15µF VS84/ XTRA/12V with comb plates HANDY 120V Socket head cap screw Cable clamp VS84/HANDY M3.5 x 8 Gearbox housing XTRA/12V Cable clamp VS84/...
-
Page 9: Purpose Of Use
Purpose of use the range of use can also be extended to cattle and horses. prohibited. Technical data Product name Xtra Mains voltage see rating plate Motor output see rating plate Rotary speed see rating plate Required fuse protection see rating plate approx. -
Page 10: Initial Start-Up
Initial start-up Controls and operating instructions WARNING! venting measures: power supply must match. The plant may only be connected to an AC power supply. y Avoid any contact with the moving shearing blades. round the shearing blades as long as the machine is still con- nected to a power source. -
Page 11: Shearing Adjustment With Shearing Pressure Adjustment Knob
ing or jewellery. These can get caught in the moving machine parts. Wearing safety glasses and hearing protection is strong- ly recommended. y Never insert an object into an opening of the machine. y The noise of the clipper can trouble animals. A kick or the body y Shearing of animals should only be done when unauthorised persons do not have access to the shearing site. -
Page 12: During Shearing
WARNING! If the shearing pressure adjustment knob is released too much the upper blade can fl off and result in in uries. Tighten the shearing pressure adjustment knob only slowly until the noise level becomes dull and you feel resistance when tight- ening the shearing pressure adjustment knob. -
Page 13: On/Off Switch
NOTE! Lack of lubrication is the most common cause of failure for unsat- isfactory shearing results. reduced service life of the blades. oiled during shearing so that they do not run dry. ON/OFF switch y Position I: Machine switched on NOTE! Check the switch position before plugging in the cable. -
Page 14: Maintenance
Maintenance NOTE! Before commencing any maintenance work disconnect the elec- trical power supply by pulling out the plug. Do not handle the area round the shearing blades as long as the machine is still connected to a power source. Whenever working power supply. -
Page 15: Regrinding The Shearing Blades
Check that the shearing blades are correctly mounted and that the driv- them on the upper blade. Now tighten the shearing pressure adjustment knob until the upper blade is pressed onto the comb plate and you feel a slight resistance. Regrinding the shearing blades Only work with sharp shearing blades. -
Page 16: Troubleshooting And Repairs
Troubleshooting and repairs This product has been developed and assembled using the best individu- al components available. It is designed to give longevity and high perfor- that they are genuine Heiniger parts. Failure to use genuine Heiniger spares may reduce the performance of this precision engineered product and will void any warranty claim. - Page 17 Malfunction Cause Rectification Not enough pressure can Retaining spring broken. Notify customer service be applied to the upper Sliding sleeve is missing Replace sliding sleeve blade. Sliding sleeve is worn Replace sliding sleeve Swivelling fork is worn at Notify customer service the top Chicken feet are worn Chicken feet fall out.
-
Page 18: Motor Unit
5.2.2 Motor unit Malfunction Cause Rectification Motor is not running No power. Power supply and/or fuse faulty. Cable faulty. Notify customer service Switch or motor defective Overload protection switch Overload protection Remove blockage. Rotor or stator faulty Notify customer service Faulty overload protection switch Motor runs very slowly... -
Page 19: Environmental Protection And Waste Disposal
Environmental protection and waste disposal Introduction The operator is responsible for the proper disposal of the shearing blades and the shearing machine after they are no longer in working order. Please observe the relevant regulations applicable in your country. Material groups Please hand this in to a service point or your local specialist electrical work- shop when the machine is to be dismantled. - Page 21 14 15 16 17 20 21 24 25...
- Page 22 1,5–2,0 mm...
- Page 23 Item Artikel Artículo Artikel Article Artikel Artikel Artikkel Articolo Tuote Artico Προϊόν Serial no. Serie nr. No. de serie Serie Nr. No. de série Serienr. Seriennummer Serie nummer No. di serie Sarjanro No. de série Αριθμός σειράς Date of purchase Datum van aankoop Fecha de compra Købsdato...
Need help?
Do you have a question about the Xtra and is the answer not in the manual?
Questions and answers