Table of Contents
Advertisement
Quick Links
Advertisement
Table of Contents

Related Manuals for komodo KMD55LPFRIDGC

Summary of Contents for komodo KMD55LPFRIDGC
- Page 1 55L PORTABLE FRIDGE FREEZER COOLER KMD55LPFRIDGC...
-
Page 3: Safety And Warnings
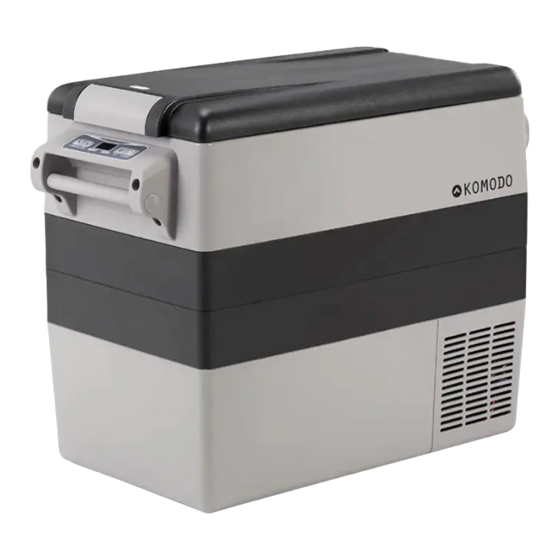
SAFETY & WARNINGS • Read instructions in this guide before using this product. Retain this guide for future reference. Do not skip, substitute or modify any steps or procedures in this guide, as doing so could result in personal injury or product damage. •... - Page 4 OVERVIEW Lid latch Control panel Handle Control Panel Set button display Increase Decrease Mode Power Power indicator indicator button...
-
Page 5: Operation
OPERATION This fridge/freezer can be powered using either DC 12V/24V power or AC 240V power. Using DC 12V/24V Connection Connect the DC power cord into the power input port on the fridge. Insert the DC power cord into a 12V/24V socket (cigarette lighter). Using AC 240V Connection Connect the AC power cord into the power input port on the fridge. - Page 6 Turning the Fridge On/Off • Press and hold the power button for 5 seconds to turn the fridge on. The fridge will enter standby mode. • The LED display on the control panel will turn on and the interior temperature is displayed.
-
Page 7: Cleaning And Care
CLEANING & CARE • Clean the appliance inside and out with a clean damp cloth every week. If it is dirty, use sodium bicarbonate dissolved in lukewarm water to clean the unit. • Never use abrasive products, detergents or soap. •... -
Page 8: Specifications
SPECIFICATIONS Climatic category T/ST/N/SN Protective classification of electric shock resistance Rated voltage DC 12/24V Rated current for DC 4.6A/2.3A DC fuse Total input power Refrigerant (R134a) Capacity Temperature range -18˚C ~ 10˚C Foam vesicant C5H10/C-Pentane Dimensions 69 x 34.5 x 52.4cm Weight 17.5kg... -
Page 9: Troubleshooting
TROUBLESHOOTING Problem Solution • Check whether the unit has been turned on. • Check the power supply (try a different power source, i.e. a different vehicle or electrical outlet). The fridge is not turning on. • Check whether the plug and the socket have a good connection. - Page 10 Error Codes When the electronic control module of compressor malfunctions, the LED display will show ER1, ER2, ER3, ER4, ER5 and compressor will stop working. After rectifying the fault, please wait for 3 minutes before starting the operation. When an NTC (temperature sensor) failure is detected, the LED display shows ER0 and ER9 and after rectifying the fault, the display will show the internal temperature again.
- Page 11 NOTES...
- Page 12 Need more information? We hope that this user guide has given you the assistance needed for a simple set-up. For the most up-to-date guide for your product, as well as any additional assistance you may require, head online to help.kogan.com...
Need help?
Do you have a question about the KMD55LPFRIDGC and is the answer not in the manual?
Questions and answers