
Subscribe to Our Youtube Channel
Related Manuals for Analog way AXION ARC100

Summary of Contents for Analog way AXION ARC100
- Page 1 User’s Manual MODELS: ARC100 & ARC100-B ANALOG WAY® AXION – AW5090 EDITION: 09 / 07...
-
Page 2: Table Of Contents
AXION TABLE OF CONTENTS SAFETY INSTRUCTIONS ................................3 Chapter 1 : INTRODUCTION ...............................6 1-1. ACCESSORIES SUPPLIED..................................6 1-2. GENERAL INFORMATION ..................................6 1-3. INSTALLATION.....................................6 1-4. FRONT PANEL DESCRIPTION ................................7 1-5. REAR PANEL DESCRIPTION ................................10 Chapter 2 : STARTING ................................11 2-1. CONNECTIONS (MODEL ARC100)..............................11 2-2. -
Page 3: Safety Instructions
AXION SAFETY INSTRUCTIONS All of the safety and operating instructions should be read before the product is operated and should be retained for further reference. Please follow all of the warnings on this product and its operating instructions. CAUTION: WARNING: To prevent the risk of electric shock and fire, do not expose this device to rain, humidity or intense heat sources (such as heaters or direct sunlight). - Page 4 AXION INSTRUCTIONS DE SÉCURITÉ Afin de mieux comprendre le fonctionnement de cet appareil nous vous conseillons de bien lire toutes les consignes de sécurité et de fonctionnement de l’appareil avant utilisation. Conserver les instructions de sécurité et de fonctionnement afin de pouvoir les consulter ultérieurement. Respecter toutes les consignes marquées dans la documentation, sur le produit et sur ce document.
- Page 5 AXION SICHERHEITSHINWEISE Um den Betrieb dieses Geräts zu verstehen, raten wir Ihnen vor der Inbetriebnahme alle Sicherheits- und Betriebsanweisungen genau zu lesen. Diese Sicherheits- und Betriebsanweisungen für einen späteren Gebrauch sicher aufbewahren. Alle in den Unterlagen, an dem Gerät und hier angegebenen Sicherheitsanweisungen einhalten.
-
Page 6: Chapter 1 : Introduction
• 1 CD-ROM (Tutorials). 1-2. GENERAL INFORMATION Axion by Analog Way is a Powerful High End Remote Controller to manage, independently or simultaneously, several Switchers of the iX range either as stand alone boxes or any kind of combination, including soft-edge blending. -
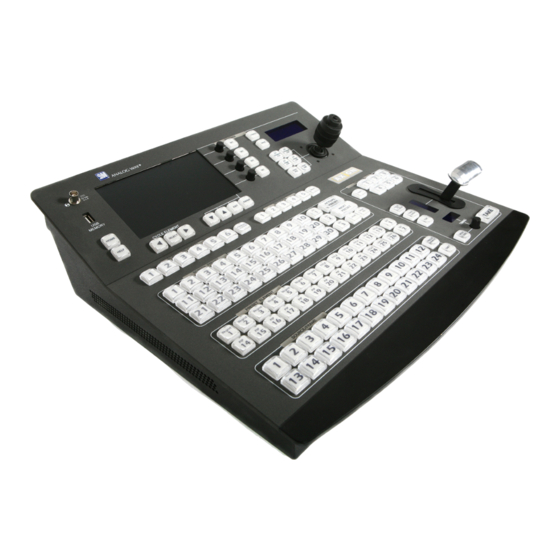
Page 7: Front Panel Description
AXION Chapter 1 : INTRODUCTION (continued) 1-4. FRONT PANEL DESCRIPTION CONTROL AREA TOUCHSCREEN EDIT AREA TRANSITION (LIVE) AREA PAGE 7... - Page 8 Chapter 1 : INTRODUCTION (continued) AXION 1-4. FRONT PANEL DESCRIPTION (continued) • CONTROL AREA 12 Vdc 0.1A: BNC plug for portable lamp. USB MEMORY: USB plug for USB memory drive connection. Use for update and parameters back up copy. HOME: Displays the home menu.
- Page 9 AXION Chapter 1 : INTRODUCTION (continued) 1-4. FRONT PANEL DESCRIPTION (continued) • EDIT AREA SCREEN SELECTION: Row of screen selection buttons. NOTE: Axion can control up to 6 screens. A screen is a projection area and can handle several machines and video projector (notably in Softedge mode configuration). 1 to 6: Screen selection.
-
Page 10: Rear Panel Description
Chapter 1 : INTRODUCTION (continued) AXION 1-5. REAR PANEL DESCRIPTION • MODEL: ARC100 RS-232 100-250 VAC 1A 50-60 Hz 100-250 VAC 1A 50-60 Hz (OPTIONAL) IP/LAN MODEL : ARC100 100-240 Vac 3A 50-60Hz: IEC standard power connector. O / I: Power switch (O = OFF, I = ON) IP/LAN: LAN communication port on a RJ45 connector. -
Page 11: Chapter 2 : Starting
AXION Chapter 2 : STARTING 2-1. CONNECTIONS (MODEL ARC100) NOTE: Turn OFF all of your equipment before connecting. Connect the AC power supply cord to the AXION and to an AC power outlet. Connect your sources and display devices to the iX devices as describe in the iX Device User's Manual. Connect the AC power supply cord to the iX devices and to an AC power outlet. -
Page 12: Connections (Model Arc100-B)
Chapter 2 : STARTING (continued) AXION 2-2. CONNECTIONS (MODEL ARC100-B) NOTE: Turn OFF all of your equipment before connecting. Connect the AC power supply cord to the AXION and to an AC power outlet. Connect your sources and display devices to the iX devices as describe in the iX Device User's Manual. Connect the AC power supply cord to the iX devices and to an AC power outlet. -
Page 13: Show Setup
AXION Chapter 2 : STARTING (continued) 2-3. SHOW SETUP • Around one minute after switching ON the AXION, the touchscreen displays the User selection screen. Create a new user by pressing the New User touchscreen button. • Press the Edit name touchscreen button to open the touchscreen keyboard… …... - Page 14 Chapter 2 : STARTING (continued) AXION 2-3. SHOW SETUP (continued) • If needed, you can set a password, press Edit password to display the touchscreen keyboard… …. Then choose your password and press Enter on the touchscreen keyboard. • Select your User account and press Enter. Type your password and press Enter to validate the creation of your User name.
-
Page 15: System Configuration
AXION Chapter 2 : STARTING (continued) 2-4. SYSTEM CONFIGURATION • Press the System touchscreen button to display the System window… …then press the Network touchscreen button and set the AXION IP address with the knobs on the right of the touchscreen. •... -
Page 16: How To Set A Device To A Screen
Chapter 2 : STARTING (continued) AXION 2-5. HOW TO SET A DEVICE TO A SCREEN • Press the Shows touchscreen button to display the Show window. • Press Create a new show and type a new show name for example show#1. Then press the Enter touchscreen button. •... - Page 17 AXION Chapter 2 : STARTING (continued) 2-5. HOW TO SET A DEVICE TO A SCREEN (continued) • Add a device to your screen: Press Screen setup to open the Screen properties window. Then press Edit name and type a screen name (for example Screen 1). Then press Enter. •...
- Page 18 Chapter 2 : STARTING (continued) AXION 2-5. HOW TO SET A DEVICE TO A SCREEN (continued) • Select the Connection type (RS232, UDP or TCP) according to your installation. Then press Edit LAN Settings to open the IP parameters window. •...
- Page 19 AXION Chapter 2 : STARTING (continued) 2-5. HOW TO SET A DEVICE TO A SCREEN (continued) • Press on the Output resolution arrow to open the output list… Select the needed resolution validate with ENTER and select the others needed adjustment…. •...
-
Page 20: Preset Setup
Chapter 2 : STARTING (continued) AXION 2-6. PRESET SETUP NOTE: Before beginning, open an existing show or create a new one. Wait for the initialization. The touchscreen displays “Success: all devices connected are initialized”. Then… Select a SCREEN with the SCREEN SELECTION buttons. Select a PRESET with the SCREEN PRESET buttons. -
Page 21: Chapter 3 : How To Set A Softedge Screen With Two Devices
AXION Chapter 3 : HOW TO SET A SOFTEDGE SCREEN WITH TWO DEVICES 3-1. SCREEN SET UP • Log on and press the Shows touchscreen button… …then press Create a new show. • Type the show’s name (i.e: Show#2) and press Enter. •... - Page 22 Chapter 3 : HOW TO SET A SOFTEDGE SCREEN WITH TWO DEVICES (continued) AXION 3-1. SCREEN SET UP (continued) • Press Edit devices to add the 2 devices to your Screen. …then press Add new device and select the device type. •...
-
Page 23: Projectors Configuration
AXION Chapter 3 : HOW TO SET A SOFTEDGE SCREEN WITH TWO DEVICES (continued) 3-2. PROJECTORS CONFIGURATION IMPORTANT: Before doing the following adjustments, make sure the 2 projectors are the same (mark, model and type) with same lenses. The projector matrices should be imperatively at the same resolution. The parameters of the 2 projectors should be homogenous (color, gamma, lamp lifetime...). - Page 24 Chapter 3 : HOW TO SET A SOFTEDGE SCREEN WITH TWO DEVICES (continued) AXION 3-2. PROJECTORS CONFIGURATION (continued) • Press ENTER button to return to the Screen Properties window… ...then press Edit Input and set up all the inputs. • Press ENTER Axion’s button to come back to the Screen properties window. Then Press Edit softedge to display the softedge window.
- Page 25 AXION Chapter 3 : HOW TO SET A SOFTEDGE SCREEN WITH TWO DEVICES (continued) 3-2. PROJECTORS CONFIGURATION (continued) • Press the Covering touchscreen button and set the Covering adjustment so that the test pattern overlaps each other at the junctions of the projectors. Example: Test pattern in horizontal SE configuration.
- Page 26 Chapter 3 : HOW TO SET A SOFTEDGE SCREEN WITH TWO DEVICES (continued) AXION 3-2. PROJECTORS CONFIGURATION (continued) • Softedge curve explanations: The operation consist of attenuate progressively the light diffused of one projector and in the same time increase symmetrically the light of the other one.
-
Page 27: Chapter 4 : Updating The Device
AXION Chapter 4 : UPDATING THE DEVICE The AXION can be updated thanks a USB memory stick. Plug your USB memory drive to your computer, open the disk drive and create a folder named AXION. Go on our website (http://www.analogway.com) and download the last firmware version to the AXION folder of your USB memory drive. -
Page 28: Chapter 5 : Technical Specifications
AXION Chapter 5 : TECHNICAL SPECIFICATIONS 5-1. COMMUNICATION PORTS • RS-232 (on DB9 female connector) Data Rate: 9600 Bauds, 8 data bits, 1 stop bit, no parity bit, and no flow control. Pin-out: PIN # FUNCTIONS RXD (Receive data) TXD (Transmit data) GROUND (Gnd) DB9 connector •... -
Page 29: Warranty
AXION WARRANTY Analog Way warrants the product against any defects in materials and workmanship for a period of three years from the date of purchase (back to the factory). In the event of any malfunction during the warranty period, Analog Way will, at its discretion, repair or replace the defective units, including free materials and labor.
Need help?
Do you have a question about the AXION ARC100 and is the answer not in the manual?
Questions and answers