Table of Contents
Advertisement
Quick Links
Advertisement
Table of Contents

Subscribe to Our Youtube Channel
Related Manuals for Asus ExpertBook B9


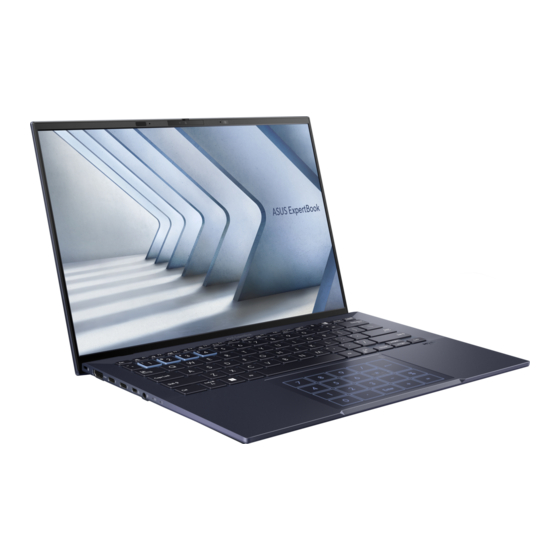
Summary of Contents for Asus ExpertBook B9
- Page 1 E21248 First Edition / December 2022 E-Manual...
- Page 2 Warranty Statement, up to the listed contract price of each product. ASUS will only be responsible for or indemnify you for loss, damages or claims based in contract, tort or infringement under this Warranty Statement.
-
Page 3: Table Of Contents
Table of Contents About this manual .....................7 Conventions used in this manual ................8 Icons ............................ 8 Typography ........................8 Safety precautions .....................9 Using your Notebook PC ....................9 Caring for your Notebook PC ..................10 Proper disposal ........................ 11 Battery safety information................... - Page 4 Chapter 3: Working with Windows Starting for the first time ..................46 Start menu ........................47 Windows apps ......................49 MyASUS Splendid ......................50 Connecting to wireless networks ................52 Wi-Fi ............................. 52 Bluetooth ........................... 53 Airplane mode ......................... 54 Connecting to wired networks ................55 Turning your Notebook PC off ................56 Putting your Notebook PC to sleep ..............57 Chapter 4: Power-On Self-Test (POST)
- Page 5 Appendices Federal Communications Commission Interference Statement ....74 FCC RF Exposure Information..................75 Compliance Statement of Innovation, Science and Economic Development Canada (ISED) ..............76 Déclaration de conformité de Innovation, Sciences et Développement économique Canada (ISED) ............76 Radiation Exposure Statement .................. 77 Déclaration d’exposition aux radiations ..............
- Page 6 EU RoHS..........................83 Japan JIS-C-0950 Material Declarations ..............83 India RoHS ......................... 83 Vietnam RoHS ........................84 ASUS Recycling/Takeback Services ................84 Rechargeable Battery Recycling Service in North America......84 Ecodesign Directive ....................... 84 ENERGY STAR Qualified Product ................85 EPEAT Registered Products ..................
-
Page 7: About This Manual
About this manual This manual provides information about the hardware and software features of your Notebook PC, organized through the following chapters: Chapter 1: Hardware Setup This chapter details the hardware components of your Notebook Chapter 2: Using your Notebook PC This chapter shows you how to use the different parts of your Notebook PC. -
Page 8: Conventions Used In This Manual
Conventions used in this manual To highlight key information in this manual, some text are presented as follows: IMPORTANT! This message contains vital information that must be followed to complete a task. NOTE: This message contains additional information and tips that can help complete tasks. -
Page 9: Safety Precautions
Safety precautions Using your Notebook PC This Notebook PC should only be used in environments with ambient temperatures between 5°C (41°F) and 35°C (95°F). Refer to the rating label on the bottom of your Notebook PC and ensure that your power adapter complies with this rating. -
Page 10: Caring For Your Notebook Pc
Caring for your Notebook PC Disconnect the AC power and remove the battery pack (if applicable) before cleaning your Notebook PC. Use a clean cellulose sponge or chamois cloth dampened with warm water or a solution with low concentration of nonabrasive detergent. Remove any extra moisture from your Notebook PC using a dry cloth. -
Page 11: Proper Disposal
Do not use your Notebook PC near gas leaks. Do not place active electronic devices close to your Notebook PC to avoid electromagnetic wave interference to the display panel. Do not use this Notebook PC for cryptocurrency mining (consuming a vast amount of electricity and time to gain convertible virtual currency) and/or related activities. -
Page 12: Battery Safety Information
Battery safety information Battery protection • Frequently charging a battery under high voltage may shorten the battery life. To protect the battery, once the battery is fully charged, the system may stop charging when the battery power is between 90% and 100%. NOTE: The level at which the battery resumes charging is usually set between 90% and 99%. - Page 13 Standard battery care • If you are not using your device for a long period of time, ensure to charge the battery power to 50% then power off your device and disconnect the AC power adapter. Recharge the battery power to 50% every three months to avoid over-discharging and prevent damage to the battery.
- Page 14 Notebook PC E-Manual...
-
Page 15: Chapter 1: Hardware Setup
Chapter 1: Hardware Setup Notebook PC E-Manual... -
Page 16: Getting To Know Your Notebook Pc
Getting to know your Notebook PC Front View NOTE: The keyboard's layout may vary per region or country. The Notebook view may also vary in appearance depending on the Notebook PC model. Notebook PC E-Manual... - Page 17 Camera indicator The camera indicator lights up when the built-in camera is in use. Proximity sensor The proximity sensor will automatically wake up and log into your Notebook PC with Windows Hello after detecting your presence in the vicinity. Your Notebook PC will enter sleep mode after you leave the vicinity.
- Page 18 Display panel This high-definition display panel provides excellent viewing features for photos, videos, and other multimedia files on your Notebook PC. Keyboard The keyboard provides full-sized QWERTY keys with a comfortable travel depth for typing. It also enables you to use the function keys, allows quick access to Windows, and controls other multimedia functions.
- Page 19 Touchpad/NumberPad This allows you to toggle between touchpad and NumberPad. The touchpad allows the use of multi-gestures to navigate onscreen, providing an intuitive user experience. It also simulates the functions of a regular mouse. NOTE: For more details, refer to the Using the touchpad section in this manual.
- Page 20 Webcam shield This allows you to cover the camera lens of your Notebook PC. Ambient light sensor The ambient light sensor detects the amount of ambient light in your environment. It allows the system to automatically adjust the brightness of the display depending on the ambient light condition.
-
Page 21: Bottom View
Notebook PC. The battery pack cannot be disassembled. • Purchase components from authorized retailers to ensure maximum compatibility and reliability. Consult an ASUS service center or authorized retailers for product service or assistance on proper disassembly or assembly of the product. - Page 22 Air vents The air vents allow cool air to enter and warm air to exit the Notebook PC. WARNING! Ensure that paper, books, clothing, cables, or other objects do not block any of the air vents or else overheating may occur.
-
Page 23: Right View
Right View Microphone The built-in microphone can be used for video conferencing, voice narrations, or simple audio recording. Power button Press the power button to turn your Notebook PC on or off. You can also use the power button to put your Notebook PC to sleep or hibernate mode and wake it up from sleep or hibernate mode. -
Page 24: Left View
Left View Kensington® security slot The Kensington® security slot allows you to secure your Notebook PC using Kensington® compatible Notebook PC security products. HDMI output port This port allows you to send audio and video signals from your Notebook PC to an HDMI-compatible device using an HDMI cable. - Page 25 • To prevent any damage, use only power sources rated 20V/3.25A to charge your Notebook PC with the USB Power Delivery combo port. For more information, consult an ASUS service center for assistance. Notebook PC E-Manual...
- Page 26 LAN port Insert the network cable into this port to connect to a local area network. Headphone/Headset/Microphone jack This port allows you to connect amplified speakers or headphones. You can also use this port to connect your headset or an external microphone. Notebook PC E-Manual...
- Page 27 Status indicators The status indicators help identify the current hardware status of your Notebook PC. Two-color battery charge indicator The two-color LED provides a visual indication of the battery’s charge status. Refer to the following table for details: Color Status Solid White The Notebook PC is plugged to a power source and the battery...
- Page 28 Notebook PC E-Manual...
-
Page 29: Chapter 2: Using Your Notebook Pc
Chapter 2: Using your Notebook PC Notebook PC E-Manual... -
Page 30: Getting Started
Getting started Charge your Notebook PC Connect the AC power cord to the AC/DC adapter. Connect the DC power connector into your Notebook PC’s power (DC) input port. Plug the AC power adapter into a 100V~240V power source. Charge the Notebook PC for 3 hours before using it in battery mode for the first time. - Page 31 WARNING! Read the following precautions for your Notebook PC’s battery: • Only ASUS-authorized technicians should remove the battery inside the device (for non-removable battery only). • The battery used in this device may present a risk of fire or chemical burn if removed or disassembled.
-
Page 32: Lift To Open The Display Panel
Lift to open the display panel Press the power button Notebook PC E-Manual... -
Page 33: Using The Touchpad
Using the touchpad Moving the pointer You can tap anywhere on the touchpad to activate its pointer, then slide your finger on the touchpad to move the pointer onscreen. Slide horizontally Slide vertically Slide diagonally Notebook PC E-Manual... - Page 34 One-finger gestures Tap/Double-tap • Tap an app to select it. • Double-tap an app to launch it. Drag and drop Double-tap an item, then slide the same finger without lifting it off the touchpad. To drop the item to its new location, lift your finger from the touchpad.
- Page 35 Left-click Right-click • Click an app to select it. Click this button to open the right- click menu. • Double-click an app to launch it. NOTE: The areas inside the dotted line represent the locations of the left mouse button and the right mouse button on the touchpad. Two-finger gestures Tap two fingers on the touchpad to simulate the right-click function.
- Page 36 Two-finger scroll (up/down) Two-finger scroll (left/right) Slide two fingers to scroll up or Slide two fingers to scroll left or down. right. Zoom out Zoom in Bring together your two fingers Spread apart your two fingers on on the touchpad. the touchpad.
- Page 37 Drag and drop Select an item then press and hold the left button. Using your other finger, slide on the touchpad to drag the item, lift your finger off the button to drop the item. Three-finger gestures Tap three fingers on the touchpad to launch the function you selected in Settings.
- Page 38 Swipe left/Swipe right If you opened multiple apps, swipe three fingers left or right to switch between these apps. Swipe up Swipe down Swipe up to see an overview of all Swipe down to show the desktop. the apps currently opened. Notebook PC E-Manual...
- Page 39 Four-finger gestures Tap four fingers on the touchpad to launch the function you selected in Settings. Notebook PC E-Manual...
-
Page 40: Using The Numberpad
Using the NumberPad Press and hold for a second to toggle between number keys or touchpad. IMPORTANT! Please note that all versions of NumberPad are only supported on the latest Microsoft Windows operating system. NOTE: To use the % and = function, set the input language to English. Notebook PC E-Manual... -
Page 41: Using The Nfc Reader
Using the NFC reader Please refer to the following tips when using the NFC reader: • Place the NFC card on the indicated area (5mm inward from the Touchpad/NumberPad) to ensure stable connectivity. • Keep any objects away from the Touchpad/NumberPad to ensure stable connectivity. -
Page 42: Using The Keyboard
Using the keyboard HotKeys The HotKeys on your Notebook PC’s keyboard can trigger the following commands: Turns the speaker on or off Turns the speaker volume down Turns the speaker volume up Decreases display brightness Increases display brightness Enables or disables the touchpad Adjusts brightness for the backlit keyboard Toggles the display mode NOTE: Ensure that the second display is connected to... - Page 43 Activates the Lock screen Activates screen capture tool Activates the assigned function (customizable) Turns the microphone on or off Toggles ASUS AI Noise-Canceling for built-in or external audio speakers Built-in microphone Toggles between Front and Rear AI Noise Cancellation or 360° AI Noise Cancellation mode.
-
Page 44: Function Keys
Function keys Press to enable or disable the function keys feature. When the function keys feature is enabled, you can also access HotKeys by holding down in combination with the top row keys. Windows keys There are two special Windows keys on your Notebook PC’s keyboard used as below: Launches the Start menu Displays the drop-down menu... -
Page 45: Chapter 3: Working With Windows
Chapter 3: Working with Windows Notebook PC E-Manual... -
Page 46: Starting For The First Time
Starting for the first time When you start your Notebook PC for the first time, a series of screens appear to guide you in configuring your Windows operating system. Follow the onscreen instructions to configure the following basic items: • Personalize •... -
Page 47: Start Menu
Start menu The Start menu is the main gateway to your Notebook PC’s programs, Windows apps, folders, and settings. You can use the Start menu to do these common activities: • Start programs or Windows apps • Open commonly used programs or Windows apps •... - Page 48 Launching the Start menu Position your mouse pointer over the Start icon on your desktop then click it. Press the Windows logo key on your keyboard. Opening programs from the Start menu One of the most common uses of the Start menu is opening programs installed on your Notebook PC.
-
Page 49: Windows Apps
Windows apps NOTE: Some Windows apps require signing in to your Microsoft account before they are fully launched. Launching Windows apps from the Start menu Position your mouse pointer over the app then click to launch it. Use the arrow keys to browse through the apps. Press to launch an app. -
Page 50: Myasus Splendid
MyASUS Splendid MyASUS Splendid ensures that all ASUS display panels show identical and accurate colors. You may select Vivid, Eye Care, or Manual Mode beside Normal Mode to adjust the display settings. • Normal Mode: Through Gamma and Color temperature correction, the image output from the panel is as close as possible as what your eye can naturally see. - Page 51 Please refer to the following tips to alleviate eye strain: • Take some time away from the display if working for long hours. It is advised to take short breaks (at least 5 minutes) after around 1 hour of continuous working at the computer. Taking short and frequent breaks is more effective than a long break.
-
Page 52: Connecting To Wireless Networks
Connecting to wireless networks Wi-Fi Access emails, surf the Internet, and share applications via social networking sites using your Notebook PC’s Wi-Fi connection. IMPORTANT! Airplane mode disables this feature. Ensure that Airplane mode is turned off before enabling the Wi-Fi connection of your Notebook PC. -
Page 53: Bluetooth
Bluetooth Use Bluetooth to facilitate wireless data transfers with other Bluetooth- enabled devices. IMPORTANT! Airplane mode disables this feature. Ensure that Airplane mode is turned off before enabling the Bluetooth connection of your Notebook PC. Pairing with other Bluetooth-enabled devices You need to pair your Notebook PC with other Bluetooth-enabled devices to enable data transfers. -
Page 54: Airplane Mode
Airplane mode Airplane mode disables wireless communication, allowing you to use your Notebook PC safely while in-flight. NOTE: Contact your airline provider to learn about related in-flight services that can be used and restrictions that must be followed when using your Notebook PC in-flight. Turning Airplane mode on/off Launch Action Center from the taskbar. -
Page 55: Connecting To Wired Networks
Connecting to wired networks You can also connect to wired networks, such as local area networks and broadband Internet connection, using your Notebook PC’s LAN port. NOTE: Contact your Internet Service Provider (ISP) for details or your network administrator for assistance in setting up your Internet connection. -
Page 56: Turning Your Notebook Pc Off
Turning your Notebook PC off You can turn off your Notebook PC by doing either of the following procedures: • Launch the Start menu, select the power icon then select Shut down to do a normal shutdown. • From the log-in screen, select the power icon then select Shut down. -
Page 57: Putting Your Notebook Pc To Sleep
Putting your Notebook PC to sleep To put your Notebook PC to Sleep mode: • Launch the Start menu, select the power icon then select Sleep to put your Notebook PC to sleep. • From the log-in screen, select the power icon then select Sleep. - Page 58 Notebook PC E-Manual...
-
Page 59: Chapter 4: Power-On Self-Test (Post)
Chapter 4: Power-On Self-Test (POST) Notebook PC E-Manual... -
Page 60: The Power-On Self-Test (Post)
The Power-On Self-Test (POST) The POST (Power-On Self-Test) is a series of software-controlled diagnostic tests that run when you turn on or restart your Notebook PC. The software that controls the POST is installed as a permanent part of the Notebook PC’s architecture. Using POST to access BIOS and Troubleshoot During POST, you can access the BIOS settings or run troubleshooting options using the function keys of your Notebook PC. -
Page 61: Recovering Your System
Recovering your system Using recovery options on your Notebook PC allows you to restore the system to its original state or simply refresh its settings to help improve performance. IMPORTANT! • Backup all your data files before doing any recovery option on your Notebook PC. -
Page 62: Performing A Recovery Option
• Advanced startup - Using this option allows you to perform other advanced recovery options on your Notebook PC such as: Using a USB drive, network connection or Windows recovery DVD to startup your Notebook PC. Using Troubleshoot to enable any of these advanced recovery options: Startup Repair, Uninstall Updates, Startup Settings, UEFI Firmware Settings, Command Prompt, System Restore, and System Image Recovery. -
Page 63: Tips And Faqs
Tips and FAQs Notebook PC E-Manual... -
Page 64: Useful Tips For Your Notebook Pc
Update Windows periodically to ensure that your applications have the latest security settings. • Update MyASUS to ensure that you have the latest settings for ASUS exclusive applications, drivers, and utilities. • Use an anti-virus software to protect your data and keep this updated too. - Page 65 Product key for your operating systems and other installed applications Backup data Log in ID and password Internet connection information • Visit our support site for troubleshooting and view some of the most frequently asked questions at https://www.asus.com/support. Notebook PC E-Manual...
-
Page 66: Hardware Faqs
I turn on the Notebook PC. What should I do? Although these dots normally appear onscreen, they will not affect your system. If the incident continues and subsequently affects system performance, consult an authorized ASUS service center. My display panel has an uneven color and brightness. How... - Page 67 Notebook PC. • If the problem still exists, contact your local ASUS service center for assistance. Why is my touchpad not working? Press to enable your touchpad.
- Page 68 What should I do if my Notebook PC’s power adapter gets lost or my battery stops working? Contact your local ASUS service center for assistance. My Notebook PC cannot do keystrokes correctly because my cursor keeps on moving. What should I do? Make sure that nothing accidentally touches or presses on your touchpad while you type on the keyboard.
-
Page 69: Software Faqs
Notebook PC. • If the problem still exists, contact your local ASUS service center for assistance. What should I do when my screen displays this message: “Remove disks or other media. Press any key to restart.”? You can try doing any of the following suggestions: •... - Page 70 • Remove all connected devices to your Notebook PC then restart your system. • If the problem still exists, contact your local ASUS service center for assistance. Why can’t my Notebook PC wake up from sleep mode? • You need to press the power button to resume your last working state.
- Page 71 Does my Notebook PC support eSIM? If so, how can I enable eSIM on my Notebook PC? Visit https://www.asus.com/support/FAQ/1048158/ for details on eSIM activation. To determine if your Notebook PC supports eSIM, follow the steps on the web page and see if the “eSIM“ option appears after step 3.
- Page 72 Notebook PC E-Manual...
-
Page 73: Appendices
Appendices Notebook PC E-Manual... -
Page 74: Federal Communications Commission Interference Statement
Federal Communications Commission Interference Statement This device complies with FCC Rules Part 15. Operation is subject to the following two conditions: • This device may not cause harmful interference. • This device must accept any interference received, including interference that may cause undesired operation. This equipment has been tested and found to comply with the limits for a class B digital device, pursuant to Part 15 of the Federal Communications Commission (FCC) rules. -
Page 75: Fcc Rf Exposure Information
This device operates within a 5.15-5.25 GHz frequency range and is restricted for indoor use only. Outdoor operation within 5150-5250 MHz is prohibited. FCC RF Exposure Information This device meets the government’s requirements for exposure to radio waves. This device is designed and manufactured not to exceed the emission limits for exposure to radio frequency (RF) energy set by the Federal Communications Commission of the U.S. -
Page 76: Compliance Statement Of Innovation, Science And Economic Development Canada (Ised)
Compliance Statement of Innovation, Science and Economic Development Canada (ISED) This device complies with Innovation, Science and Economic Development Canada license exempt RSS standard(s). Operation is subject to the following two conditions: (1) this device may not cause interference, and (2) this device must accept any interference, including interference that may cause undesired operation of the device. -
Page 77: Radiation Exposure Statement
Radiation Exposure Statement The product comply with the Canada portable RF exposure limit set forth for an uncontrolled environment and are safe for intended operation as described in this manual. The further RF exposure reduction can be achieved if the product can be kept as far as possible from the user body or set the device to lower output power if such function is available. -
Page 78: Radio Frequency (Rf) Exposure Information
Radio Frequency (RF) Exposure Information The radiated output power of the Wireless Device is below the Industry Canada (IC) radio frequency exposure limits. The Wireless Device should be used in such a manner such that the potential for human contact during normal operation is minimized. -
Page 79: Caution
Caution (i) the device for operation in the band 5150-5250 MHz is only for indoor use to reduce the potential for harmful interference to co-channel mobile satellite systems; (ii) the maximum antenna gain permitted for devices in the bands 5250-5350 MHz and 5470-5725 MHz shall comply with the e.i.r.p. -
Page 80: Ul Safety Notices
UL Safety Notices Required for UL 1459 covering telecommunications (telephone) equipment intended to be electrically connected to a telecommunication network that has an operating voltage to ground that does not exceed 200V peak, 300V peak-to-peak, and 105V rms, and installed or used in accordance with the National Electrical Code (NFPA 70). -
Page 81: Power Safety Requirement
Power Safety Requirement Products with electrical current ratings up to 6A and weighing more than 3Kg must use approved power cords greater than or equal to: H05VV-F, 3G, 0.75mm H05VV-F, 2G, 0.75mm TV Notices Note to CATV System Installer—Cable distribution system should be grounded (earthed) in accordance with ANSI/NFPA 70, the National Electrical Code (NEC), in particular Section 820.93, Grounding of Outer Conductive Shield of a Coaxial Cable –... -
Page 82: Nordic Lithium Cautions (For Lithium-Ion Batteries)
Nordic Lithium Cautions (for lithium-ion batteries) CAUTION! Danger of explosion if battery is incorrectly replaced. Replace only with the same or equivalent type recommended by the manufacturer. Dispose of used batteries according to the manufacturer’s instructions. (English) ATTENZIONE! Rischio di esplosione della batteria se sostituita in modo errato. Sostituire la batteria con un una di tipo uguale o equivalente consigliata dalla fabbrica. -
Page 83: Declaration Of Compliance For Product Environmental Regulation
Environmental Regulation ASUS follows the green design concept to design and manufacture our products, and makes sure that each stage of the product life cycle of ASUS product is in line with global environmental regulations. In addition, ASUS disclose the relevant information based on regulation requirements. -
Page 84: Vietnam Rohs
ASUS products sold in Vietnam, on or after September 23, 2011, meet the requirements of the Vietnam Circular 30/2011/TT-BCT. Các sản phẩm ASUS bán tại Việt Nam, vào ngày 23 tháng 9 năm2011 trở về sau, đều phải đáp ứng các yêu cầu của Thông tư 30/2011/TT-BCT của Việt Nam. -
Page 85: Energy Star Qualified Product
All ASUS products with the ENERGY STAR logo comply with the ENERGY STAR standard, and the power management feature is enabled by default. The monitor is automatically set to sleep within 10 minutes of user inactivity; the computer is automatically set to sleep within 30 minutes of user inactivity. -
Page 86: Regional Notice For Singapore
Regional notice for Singapore This ASUS product complies with IMDA Standards. Complies with IMDA Standards DB103778 Notices for removable batteries • Risk of explosion if battery is replaced by an incorrect type. • The battery and its component must be recycled or disposed of properly. -
Page 87: Simplified Eu Declaration Of Conformity
Directive 2014/53/EU. Full text of EU declaration of conformity is available at https://www.asus.com/support/. The WiFi operating in the band 5150-5350 MHz shall be restricted to indoor use for countries listed in the table below:... -
Page 88: Simplified Ukca Declaration Of Conformity
The Radio Equipment Regulations 2017 (S.I. 2017/1206). Full text of UKCA declaration of conformity is available at https://www.asus.com/support/. The WiFi operating in the band 5150-5350 MHz shall be restricted to indoor use...
Need help?
Do you have a question about the ExpertBook B9 and is the answer not in the manual?
Questions and answers