
Subscribe to Our Youtube Channel
Related Manuals for Lenovo EDGE 2


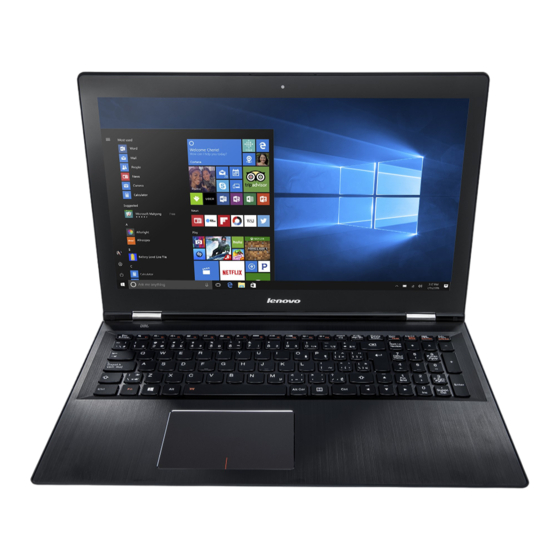
Summary of Contents for Lenovo EDGE 2
- Page 1 FLEX 3/EDGE 2 User Guide Read the safety notices and important tips in the included manuals before using your computer.
- Page 2 Notes • Before using the product, be sure to read Lenovo Safety and General Information Guide first. Some instructions in this guide may assume that you are using Windows ® 8.1. If you are • using another Windows operating system, some operations may be slightly different. If you are using other operating systems, some operations may not apply to you.
- Page 3 Lenovo FLEX 3/EDGE 2 FLEX 3/EDGE 2 User Guide User Guide Instructions and technical information in this manual are applicable to the following Lenovo notebook computers unless otherwise stated. Model name FLEX 3-1470 80JK FLEX 3-1475 80JL FLEX 3-1570 80JM...
-
Page 5: Table Of Contents
Putting the computer to sleep or shutting it down ................15 Touch screen operation ..........................16 Connecting to a wireless network ......................20 Help and support ............................21 Chapter 3. Lenovo OneKey Recovery System................22 Chapter 4. Troubleshooting......................23 Frequently asked questions ........................23 Troubleshooting ............................25... -
Page 7: Chapter 1. Getting To Know Your Computer
Chapter 1. Getting to know your computer Top view - - - - - - - - - - - - - - - - - - - - - - - - - - - - - - - - - - - - - - - - - - - - - - - - - - - - - - - - - - - - - - - - - - - - - - - - - - - - - - - - - - - - - - - - - - - - - - - - - - - - - - - - - - - - - - - - - - - - - - - - - - FLEX 3-1470/FLEX 3-1475/FLEX 3-1470 HSW/FLEX 3-1475 Carrizo ... - Page 8 Chapter 1. Getting to know your computer FLEX 3-1570/EDGE 2-1570/FLEX 3-1570 HSW/EDGE 2-1570 HSW Note: The dashed areas indicate parts that are not visible externally. Attention: • When closing the display panel, be careful not to leave pens or any other objects in between the display...
- Page 9 Chapter 1. Getting to know your computer Integrated camera Use the camera for video communication. (on select models) Wireless LAN antennas Connect to a wireless LAN adapter to send and receive wireless radio signals. Built-in microphone Captures sound which can be used for video conferencing, voice narration, or audio recording.
- Page 10 Chapter 1. Getting to know your computer Using the keyboard Keyboard function keys You can access certain system settings quickly by pressing the appropriate function keys. : Mutes/unmutes the sound. : Enables/disables Airplane mode. : Decreases the volume level. : Displays all currently active apps.
- Page 11 Chapter 1. Getting to know your computer Positioning the display panel The display panel can be opened to any angle up to 300 degrees. Notebook Mode Suitable for tasks that require a keyboard and mouse (such as creating documents, writing e-mails, and so on).
-
Page 12: Left-Side View
Before purchasing any security product, verify that it is compatible with this type of security keyhole. • You are responsible for evaluating, selecting, and implementing the locking devices and security features. Lenovo offers no comment judgment or warranty regarding the function, quality or performance of locking devices and security features. AC power adapter jack Connects to the AC power adapter. - Page 13 Chapter 1. Getting to know your computer Connecting USB device Your computer comes with 3 USB ports compatible with USB devices. The first time you plug a USB device into a particular USB port on your computer, Windows automatically installs a driver for that device. After the driver has been installed, you can disconnect and reconnect the device without performing any additional steps.
- Page 14 Chapter 1. Getting to know your computer Screen orientation You can rotate the display panel to your preferred orientation. • The orientation of the display automatically changes (alternating between portrait and landscape modes) depending on how you hold it. Landscape Portrait •...
-
Page 15: Right-Side View
The computer is powered off. Novo button When the computer is off, press this button to start the Lenovo OneKey Recovery System or the BIOS setup utility, or to enter the boot menu. USB port Connects to USB 3.0 devices. -
Page 16: Bottom View
Chapter 1. Getting to know your computer Bottom view - - - - - - - - - - - - - - - - - - - - - - - - - - - - - - - - - - - - - - - - - - - - - - - - - - - - - - - - - - - - - - - - - - - - - - - - - - - - - - - - - - - - - - - - - - - - - - - - - - - - - - - - - - - - - - - - - - ... - Page 17 Chapter 1. Getting to know your computer FLEX 3-1570/EDGE 2-1570/FLEX 3-1570 HSW/EDGE 2-1570 HSW Ventilation slots Dissipate internal heat. Note: Make sure that the ventilation slots are not blocked or else the computer may overheat. Speakers Provide audio output.
-
Page 18: Chapter 2. Starting To Use Windows 8.1
Chapter 2. Starting to use Windows 8.1 Configuring the operating system for the first time - - - - - - - - - - - - - - - - - You may need to configure the operating system when it is first used. The configuration process may include the procedures below: •... -
Page 19: The Charms
Chapter 2. Starting to use Windows 8.1 The charms - - - - - - - - - - - - - - - - - - - - - - - - - - - - - - - - - - - - - - - - - - - - - - - - - - - - - - - - - - - - - - - - - - - - - - - - - - - - - - - - - - - - - - - - - - - - - - - - - - - - - - - - - - - - - - - - - - - Charms are navigation buttons that let you control your Windows ®... - Page 20 Chapter 2. Starting to use Windows 8.1 Start charm The Start charm is a fast way to go to the Start screen. Devices charm The Devices charm allows you to connect or send files to any external devices, including the devices to play, print, and project.
-
Page 21: Putting The Computer To Sleep Or Shutting It Down
Chapter 2. Starting to use Windows 8.1 Putting the computer to sleep or shutting it down - - - - - - - - - - - - - - - - - - - - When you have finished working with your computer, you can put it to sleep or shut it down. Putting your computer to sleep ... -
Page 22: Touch Screen Operation
Chapter 2. Starting to use Windows 8.1 Touch screen operation - - - - - - - - - - - - - - - - - - - - - - - - - - - - - - - - - - - - - - - - - - - - - - - - - - - - - - - - - - - - - - - - - - - - - - - - - - - - - - - - - - - - - The display panel can accept inputs like a tablet, using the multi-touch screen, or like a traditional notebook computer, using the keyboard and touchpad. - Page 23 Chapter 2. Starting to use Windows 8.1 (continued) Frequently used gestures Tasks performed Zoom Move two fingers together or apart while touching the screen. Zooms in and out on visual apps, such as pictures and maps. Can also jump to the beginning or end of a list.
- Page 24 Chapter 2. Starting to use Windows 8.1 (continued) Frequently used gestures Tasks performed Swipe Start from any edge of the screen, then swipe inwards toward the center. Swiping down from the top edge or up from the bottom edge displays a task bar on the bottom of the screen with app commands, including save, edit, and delete.
- Page 25 Chapter 2. Starting to use Windows 8.1 (continued) Frequently used gestures Tasks performed Swiping in from the left edge can: • Bring in and open an app currently running in the background. If there is more than one currently open app, you can: •...
-
Page 26: Connecting To A Wireless Network
Chapter 2. Starting to use Windows 8.1 Connecting to a wireless network - - - - - - - - - - - - - - - - - - - - - - - - - - - - - - - - - - - - - - - - - - - - - - - - - - - - - - - - - - - - Enabling wireless connection To enable wireless functions, do one of the following: •... -
Page 27: Help And Support
Chapter 2. Starting to use Windows 8.1 Help and support - - - - - - - - - - - - - - - - - - - - - - - - - - - - - - - - - - - - - - - - - - - - - - - - - - - - - - - - - - - - - - - - - - - - - - - - - - - - - - - - - - - - - - - - - - - - - - - - - - - - - If you have a problem with the operating system, see the Windows Help and Support file. -
Page 28: Chapter 3. Lenovo Onekey Recovery System
• The above instructions should be followed when Windows can be started normally. If Windows cannot be started, then follow the steps below to start the Lenovo OneKey Recovery System: Shut down the computer. Press the Novo button. From Novo Button Menu, select System Recovery and press Enter. -
Page 29: Chapter 4. Troubleshooting
Where are the recovery discs? Your computer did not come with any recovery discs. Use the Lenovo OneKey Recovery System if you need to restore the system to its original factory status. What can I do if the back-up process fails? If you can start the backup but it fails during the back-up process, try the following steps: Close all open programs, and then restart the back-up process. - Page 30 Windows, Linux or Dos, etc cannot be installed if you don't change the boot mode. Getting help How can I contact the customer support center? See “Chapter 3. Getting help and service” in the Lenovo Safety and General Information Guide.
-
Page 31: Troubleshooting
Lenovo OneKey Recovery System. If you still see blank screen. only the cursor on the screen, have the computer serviced. - Page 32 Chapter 4. Troubleshooting The computer does not • If your computer is in sleep mode, connect the AC power return from sleep mode, adapter to the computer, then press the Windows button or and the computer the Power button. does not work. •...
- Page 33 Chapter 4. Troubleshooting Battery pack problems Your computer shuts down • Recharge the battery. before the battery status indicator shows empty. -or- Your computer operates after the battery status indicator shows empty. Other problems Your computer • To turn off your computer, press and hold the Power button does not respond.
-
Page 34: Trademarks
Trademarks The following terms are trademarks or registered trademarks of Lenovo in the United States, other countries, or both. Lenovo OneKey Microsoft and Windows are trademarks of Microsoft Corporation in the United States, other countries, or both. Other company, products, or service names may be trademarks or service marks of others. - Page 35 en-US Rev. AA00...
- Page 36 Lenovo Flex 3 Regulatory Notice...
- Page 37 • 3160NGW • BCM943162ZP • BCM94352Z • QCNFA34AC (QCNFA344, QCNFA345) • QCNFA335 The following wireless modules are supported on Lenovo Flex 3-1470 (HSW)/Flex 3-1570 (HSW): • 3160NGW • BCM943162ZP • QCNFA34AC (QCNFA345) • QCNFA335 The following wireless modules are supported on Lenovo Flex 3-1435/Flex 3-1475: •...
- Page 38 FCC ID of wireless module: On the bottom side of your Lenovo computer, you will find an indicator label of the format “Contains Transmitter Module: FCC ID XXXX”, where XXXX represents the FCC ID that corresponds to your preinstalled Wireless LAN + Bluetooth Combo module.
- Page 39 Lenovo computer. Instead you will find an indicator label pointing to the location of the IC Certification number on the bottom side of your Lenovo computer. This label will be of the format “Contains Transmitter Module: Canada IC: XXXX”, where XXXX represents the IC ID that corresponds to your preinstalled WLAN module.
- Page 40 Le boîtier de votre ordinateur Lenovo ne comporte pas de numéro d’homologation IC (Industry Canada) pour la carte mini-PCI Express ; mais sous votre Lenovo, vous trouverez une étiquette indicatrice pointant vers l’emplacement du numéro d’homologation IC. L’étiquette se présente sous la forme “Contains Transmitter Module: Canada IC: XXXX”...
- Page 41 1009 Think Place - Building One Morrisville, NC 27560 Telephone: 1-919-294-5900 Trademarks Lenovo and the Lenovo logo are trademarks of Lenovo in the United States, other countries, or both. Other company, product, or service names may be trademarks or service marks of others.
- Page 42 Rev. AA00...
Need help?
Do you have a question about the EDGE 2 and is the answer not in the manual?
Questions and answers