Advertisement
Advertisement
Table of Contents

Related Manuals for Shot-Scope G5


Summary of Contents for Shot-Scope G5
- Page 1 User Guide support.shotscope.com...
-
Page 2: Table Of Contents
Inside your box Contents Inside your box Thank you for buying a Shot Scope G5. Before turning on the device, please read our full user guide to ensure Build your watch the correct set up. Charging your Shot Scope G5... -
Page 3: Build Your Watch
Build your watch... - Page 4 Build your watch Your G5 will need to be assembled before you use it on the golf course, it is simple and easy to assemble your G5 watch. In your G5 packaging box you will receive: 1 x G5 watch case 1x Watch case 2 x colored watch straps of your choice.
-
Page 5: Charging Your Shot Scope G5
Charging your Shot Scope G5 watch... - Page 6 Charging your Shot Scope G5 watch Your G5 can be charged from any USB port or USB compliant wall charger. Please only use the USB charging cable provided with the G5 for charging. Plug the charger into the charging port on the back of the watch face; the screen will show charging has commenced if connected successfully.
-
Page 7: Main Menu And Navigation
Main menu and navigation... - Page 8 Main menu and navigation Navigate up Confirm / The G5 watch has four buttons for navigation Main menu Press the top right button to power on the device and access the main menu. You will then be shown the following options: Play Golf = Select a golf mode to play.
-
Page 9: Setting Up Your Shot Scope G5
Setting up your Shot Scope G5... - Page 10 Setting up your Shot Scope G5 The G5 watch is ready to play straight out of the box for quick and simple set up. All you need to do is charge the watch and skip the connect to app screen (top left button) to start using your G5 device.
- Page 11 During this process, you will turn on your G5 and pair the device with the app. You will choose the settings for your device and sync the watch to ensure it has the latest firmware installed.
- Page 12 Step 4: Check course maps We recommend that you check the mapping status of any courses you intend to play 48 hours before your tee off time. This is to ensure that the course is in the system and has been mapped. While most courses will be mapped and already downloaded to the watch, occasionally there will be a new course that isn’t on the system or your course may have an update pending.
- Page 13 Search Step 5: Searching for, subscribing, and adding a course You can search our course database by entering the name of the course or using your location to find nearby courses. Either use the search bar or the filter at the top right of the screen to find courses by proximity to your Request current location.
- Page 14 Step 6: Syncing course changes If you have any course maps that need to be uploaded to the watch, or any updates that need to be transferred to the watch, you should see a red notification at the top of the courses screen.
-
Page 15: Starting A Round
Starting a round... - Page 16 Starting a round If you do not connect the G5 to the app, the first time you play it will ask you to set the time and date. Select the time by adjusting the digits shown on the screen to the correct time. Follow the same process to set the date.
- Page 17 To start a round Switch on the watch by pressing the top right button. If lock is enabled, press the bottom left button to unlock the watch. Power on Once the watch is unlocked, press the select button (top right) to enter the main menu where you can select ‘Play Golf’.
- Page 18 Selecting a course The G5 will display any golf courses within 1km of you. The nearest two courses will be displayed on screen, to view other nearby courses navigate up and down using the buttons on the left. Once the course you would like to play is highlighted in white, confirm your selection by pressing select.
- Page 19 Keep score G5 will prompt you to choose whether or not you want to add your score while playing the round. Scoring can be toggled on / off in the settings menu - for example if you never want to keep your score then you can turn this feature off altogether.
-
Page 20: During Play
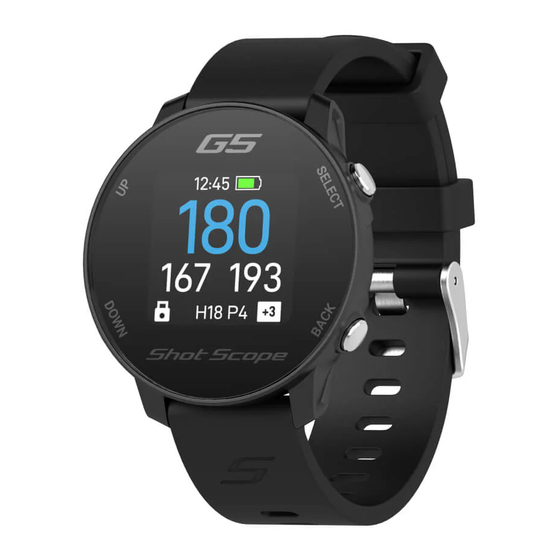
During play... - Page 21 During play F/M/B screen diagram You are now ready to play golf. The main screen will show you F/M/B distances to the green. The large blue number representing the middle of the green. The bottom left number representing the front of the green. The bottom right number representing the back of the green.
- Page 22 Lock during play The lock feature locks the buttons whilst in play to avoid pressing accidentally. The buttons will lock after 15 seconds of inactivity. To unlock, press the bottom left button with the padlock symbol. You can disable the lock screen feature in the settings menu. Press to unlock Page 22...
- Page 23 Hazards To view hazards during play, unlock the watch The bottom number indicates the distance to the front of each and press the hazards icon (bottom left). hazard, and the top number indicates the distance to the back of each hazard. Fairway bunker Greenside...
- Page 24 Doglegs and Layups Whilst in the hazard menu, you can view the layup points and dogleg distance (if available) on that hole by pressing the top right button to scroll through the screens. The layup screen will display three distances to layup (100 yards, 150 yards and 200 yards) Simply press the up / down buttons to view all distances available.
- Page 25 Scoring G5 allows you to track your score whilst you play. You will be asked to confirm your total score at the end of each hole including putts. Use the up / down buttons to add your score and confirm your selection.
- Page 26 Game menu The game menu can be accessed by pressing select when the watch is unlocked on the F/M/B screen. This menu will give you more options and features to access during your round such as; ending a round, the distance of your last shot hit, and the option to change hole.
- Page 27 Last Shot When standing on the tee or beside your ball before hitting a shot, navigate to the last shot screen. You can access last shot within the game menu. Select the play icon (top right) to start recording a shot, as you walk towards your ball, the number shown on the screen will increase.
- Page 28 End round After playing the 18th hole you will automatically be asked if you want to end the round. If you wish, to end the round select ‘End Round’, if you do not want to end the round select ‘Resume Round’. You can manually end a round at any point by navigating to the Game Menu and selecting ‘End Round’.
- Page 29 Clockfaces G5 has a choice of three customizable clockfaces that can be used to display the time when the watch is not in golf mode. To change the clockface, navigate to the settings menu and select “Clockface”. You can then scroll up / down to change the clock face and press select to confirm a selection.
- Page 30 F/M/B layout Default G5 F/M/B layout Stacked layout Large layout The standard layout for An alternative layout that Middle distance Shot Scope GPS watches. shows yardages stacked. displayed in a larger font. Page 30...
- Page 31 Shutdown To shutdown your G5, unlock the Then press the ‘up’ button to watch and navigate to the main menu navigate to “Shutdown” and from the clockface screen. press select to confirm. Page 31...
-
Page 32: Terms And Conditions
provider of Shot Scope Technologies Ltd; (v) damage to a product that has been modified or altered Shot Scope without written permission of Shot Scope Technologies Ltd; or (vi) damage to a product that has not been charged or powered in accordance with the charging and powering instructions provided by Shot Scope Technologies Ltd;... - Page 33 SAFETY INFORMATION & HEALTH WARNINGS GPS NOTICE For your personal safety and to avoid damage to device follow safety information guidelines detailed below. The device may experience degraded performance if you use it in proximity to any device that uses a Failure to avoid the following potentially hazardous situations could result in serious injury: terrestrial broadband network operating close to the frequencies used by any Global Navigation Satellite •Always consult your Physician/Doctor before beginning or modifying any exercise program.
- Page 34 MODE, FREQUENCY AND POWER Operation is subject to the following two conditions: (1) this device may not cause harmful interference and (2) this device must accept any interference that may cause undesired operation of the device. This device has been tested and found to comply with the limits for a Class B digital device, pursuant to part 15 of the FCC rules.
- Page 35 To find out more information visit: www.support@shotscope.com Join our social pages to be kept up to date with the latest Shot Scope news: Facebook: shotscope Twitter: @shotscope Instagram: @shot_scope Version 1 - 040723...
Need help?
Do you have a question about the G5 and is the answer not in the manual?
Questions and answers
What is the yellow triangle with exclamation mark mean
On the Shot Scope G5, a red exclamation mark (not yellow) next to a golf course indicates that an update is available for that course.
This answer is automatically generated
Does a G5 manual exist in French oder in Dutch languages?