
Summary of Contents for WaterLogic S18
- Page 1 S18 Undercounter Chiller Product Manual Filtered Undercounter Cooler Carbonator 4B0004 Technical Support wltechsupport@quenchwater.com (800) 288-1891...
-
Page 2: Table Of Contents
Cleaning 8-10 Introduction The S18 UC is a high capacity cooler carbonator. The unit is designed to deliver a choice of filtered chilled and ambient still water and chilled carbonated water. The unit should be isolated from the electricity supply before removal of any covers. -
Page 3: Installation
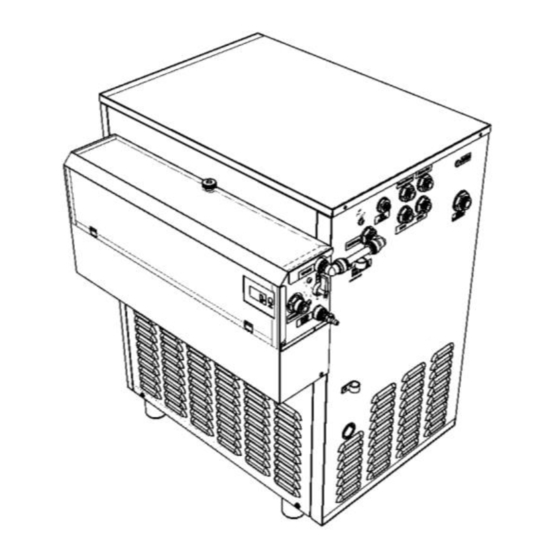
Installation and Commissioning Recirc Return Gas Inlet Gas Inlet Recirc Out 1/4” John Guest Speedfit. 1/4” John Guest Speedfit. Sparkling Out Still Out 3/8” John Guest Speedfit. Bath Overflow 1/2” John Guest Speedfit. Water Inlet 3/8” John Guest Speedfit. Electrical Inlet Power Switch 115Vac 60Hz Page 3 of 16... - Page 4 Installation and Commissioning • The unit must be installed by a competent person, on a firm level surface capable of supporting the weight of the machine, when the bath is filled. • Make all connections for water (inlet and outlet), gas and electricity, but do not turn these on at this stage.
- Page 5 Installation and Commissioning • Before turning on the water supply locate the flush valve at the front of the filter housing and turn the lever to the ‘Flush Position’. Connect the clear PVC tubing supplied to the flush outlet and place the other end of the tubing into an empty bucket or to a drain.
- Page 6 Installation and Commissioning Water Pressure Carbonator Control Mains Power In & Flow Relief Board Meter Valve On/Off Switch Page 6 of 16...
-
Page 7: Schematics
Schematics Electrical Circuit Water Circuit Page 7 of 16... -
Page 8: Cleaning
Cleaning Important: The frequency of the following cleaning procedures should be determined locally and may vary depending on machine usage and environmental conditions. Warm water should be no higher than 113°F. • After any cleaning procedure, dispense a minimum of 34 fl •... - Page 9 Cleaning Deep Clean - Parts in contact with food products Important: It is recommended that the deep clean procedure be performed at least monthly. Remove dispense components, pre clean using a damp multi-purpose disposable cleaning cloth soaked in warm water. Soak cloth in cleaning agent solution, remove excess water and clean dispense components.
- Page 10 Cleaning Prepare the Unit Disconnect the electrical power to the unit and isolate from the water supply. Carefully following the manufacturer’s instructions, prepare a solution of proprietary sanitizing fluid. Sanitize the Water System Disconnect flexible water inlet tube from the water supply and place the end into a container of sanitizing fluid.
-
Page 11: Fault Finding
Fault Finding Prior to any fault finding, please ensure all water and gas connections to the chiller are sound and that the incoming water and gas supplies are turned on. Also ensure that all electrical connections to the chiller and in the chiller are secure and in good condition, the power is on. If the above are satisfied, ensure that the chiller has had adequate time to reach operating temperature. - Page 12 Fault Finding CO2 pressure (check by Check CO2 bottle, regulator and non- operating pressure relief return valve. Supply pressure should be valve on carbonator can) 55 psi, adjust or replace as necessary. Check carbonator probe for possible short circuit to ground. Including moisture on the can lid.
-
Page 13: Spare Parts
Spare Parts 1A6138 3B7868 Rear Panel 3B7870 Side Panel 3B7870 Side Panel 1A6139 – Front Panel Assembly 1A6135 – LED Filter Assembly 1A4674 – Pressure Regulator 1A6050 Pump Assy 3B3201 3B7886 1A6209 Base Guard Thermostat Page 13 of 16... - Page 14 Spare Parts 1A6065 1A5811 3B6223 Carb Can Cooling Coil 1A6002 Agitator Page 14 of 16...
-
Page 15: Removal, Transportation And Disposal
Removal, Transportation and Disposal Important: Before removal from the installation, ensure all electrical, product and gas connections are disconnected. Disposal of Scrap Units It is illegal to simply scrap a refrigeration unit. Before a unit can be scrapped it must first have the gas removed by a specialist using special equipment. - Page 16 Page 16 of 16...