
Subscribe to Our Youtube Channel
Related Manuals for Grundig GW78941F


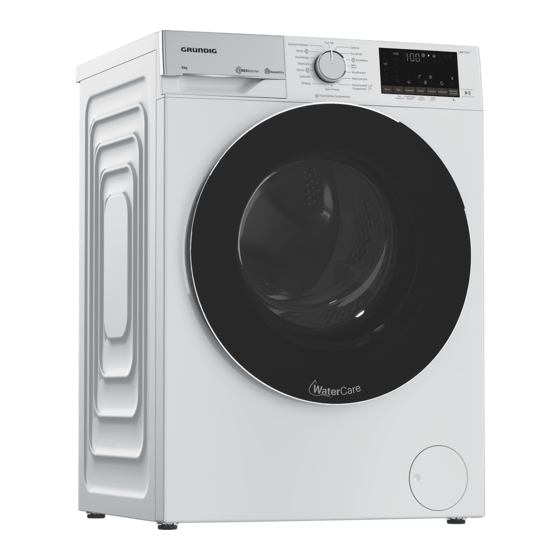
Summary of Contents for Grundig GW78941F
- Page 1 Washing Machine User Manual GW78941FW Document Number: 2820529476_EN/ 05-07-21.(11:11)
- Page 2 Please read this user manual first! Dear Customer, Thank you for selecting a Grundig product. We hope that you get the best results from your product which has been manufactured with high quality and state-of-the-art technology. Therefore, please read this entire user manual and all other accompanying documents carefully before using the product.
-
Page 3: General Safety Instructions
General safety instructions This section contains safety instructions that will help protect from risk of personal injury or property damage. Our company shall not be liable for any damages that may arise in case of failure to follow these instructions. Always have the installation and repairing procedures carried out by the Authorized Service Agent. -
Page 4: Electrical Safety
Keep packaging materials away from children. Danger of injury and drowning. Keep all detergents and additives used for the product away from children’s reach. Cut the power cable and break and deactivate the locking mechanism of the loading door before disposing of the product for children’s safety. 1.3 Electrical safety Product should be unplugged during installation, maintenance, cleaning and repair procedures. -
Page 5: Installation Safety
1.5 Installation Safety Check the information on the manual and installation instructions to prepare the product for installation and make sure the electrical mains, clean water mains and water outlet are suitable. If not, call a qualified electrician and plumber to have them make the necessary arrangements. These operations are the responsibility of the customer. -
Page 6: Usage Safety
Do not install the product behind a door, a sliding door or at another location that will prevent the door from opening completely. If a drier is to be placed on the product, fix with a suitable connection apparatus obtained from the authorized service. There is a risk of contact with electrical pieces when the upper trays is removed. - Page 7 Do not place your hand or a metal object under the washing machine. If washing laundry at high temperatures, the discharged washing water could burn your skin if in contact with it. When the discharge hose is connected to the tap. Do not touch the discharge water. Take the following precautions to prevent formation of biofilm and malodours: - Make sure the room where the washing machine is placed is well ventilated.
-
Page 8: Important Instructions For Environment
Important instructions for environment 2.1 Compliance with WEEE Directive This product complies with EU WEEE Directive (2012/19/EU). This product bears a classification symbol for waste electrical and electronic equipment (WEEE). This product has been manufactured with high quality parts and materials which can be reused and are suitable for recycling. -
Page 9: Technical Specifications
Technical specifications Supplier name or trademark GRUNDIG GW78941FW Model name 7178541200 Rated capacity (kg) Maximum spin speed (rpm) 1400 Built-in Height (cm) Width (cm) Depth (cm) Single Water inlet / Double Water inlet • / - • Available Electrical input (V/Hz) -
Page 10: Appropriate Installation Location
4.1 Installation Please read the “Safety Instructions” section first! • Apply to the nearest authorized service agent for the installation of your product. • Preparation of the location and electrical, tap water and waste water installations at the place of installation is under customer's responsibility. -
Page 11: Removing Transportation Safety Bolts
Insert the cap by pushing it with your finger. 4.1.3 Removing transportation safety bolts Loosen all transportation safety bolts with an appropriate wrench until they turn freely. Stretch the internal component by pressing on the holding areas and pull the component out. Attach the plastic covers supplied in the User Manual bag into the holes on the rear panel. -
Page 12: Connecting The Drain Hose To The Drain
4.1.5 Connecting the drain hose to the drain • Attach the end of the drain hose directly to waste water drain, washbasin or bathtub. Your house will be flooded if the drain hose is dislocated during water draining. There is also a risk of burning due to the high washing temperatures! In order to prevent such situations and make sure that the product performs water intake and drain processes without any problem, fix the drain hose securely. -
Page 13: Electrical Connection
4.1.7 Electrical connection Connect the product to a grounded outlet protected by a 13 A fuse. Our company shall not be liable for any damages that may arise when the product is used without grounding in accordance with the local regulations. •... -
Page 14: Transportation Of The Product
Transportation of the product 1. Unplug the product before transporting it. 2. Remove water drain and water supply connections. 3. Drain all water that has remained in the product. 4. Install transportation safety bolts in the reverse order of removal procedure. Never move the product without the transportation safety bolts properly fixed in place! WARNING Packaging materials are dangerous to children. -
Page 15: Preparing Laundry For Washing
4.2 Preparation Please read the “Safety Instructions” section first! 4.2.1 Sorting the laundry • Sort laundry according to type of fabric, colour, and degree of soiling and allowable water temperature. • Always observe the instructions given on the garment care labels. 4.2.2 Preparing laundry for washing •... -
Page 16: Using Detergent And Softener
4.2.6 Using detergent and softener Read the manufacturer instructions on the package while using detergents, softeners, starch, bleach and decolourants, anti- WARNING limescale and follow the dosage information provided. Use a measuring cup, if any. The detergent drawer comprises of three compartments: –... -
Page 17: Using Liquid Detergents
Using liquid detergents If the product has a liquid detergent apparatus • Press and rotate the apparatus at where it is shown when you want to use liquid detergents. The part falling below will serve as a barrier for liquid detergent. •... -
Page 18: Tips For Efficient Washing
4.2.7 Tips for efficient washing Clothes Light Colours and Black/Dark Delicates/ Colours Colours Woollens/Silks Whites (Recommended (Recommended (Recommended temperature (Recommended temperature temperature range temperature range range based on soiling level: range based on soiling level: based on soiling level: based on soiling level: 40-90 oC) cold -40°C) cold -40°C) -
Page 19: Operating The Product
4.3 Operating the product Please read the “Safety Instructions” section first! 4.3.1 Control panel 1. Programme selection knob 7 - End Time Setting button 2 - Temperature level lights 8 - Auxiliary Function button 3 3 - Spin level indicator lights 9 - Auxiliary Function button 2 4 - Display 10 - Auxiliary Function button 1... -
Page 20: Programme And Consumption Table
4.3.3 Programme and consumption table Auxiliary functions Selectable temperature Programme range °C Cold - 90 2,75 1400 • • • • • Cottons Cold - 90 2,00 1400 • • • • • 1,10 1400 • • • • • Cold - 90 40-60 40 ***... - Page 21 The auxiliary functions in the table may vary according to the model of your machine. Water and power consumption may vary subject to the changes in water pressure, water hardness and temperature, ambient temperature, type and amount of laundry, selection of auxiliary functions and spin speed, and changes in electric voltage. You can see the washing duration on the display of your machine while selecting a programme.
-
Page 22: Programme Selection
4.3.4 Programme selection 1 Determine the programme suitable for the type, quantity and soiling level of the laundry in accordance with "Programme and consumption table". Programmes are limited with the highest spin speed appropriate for that particular type of fabric. When selecting a programme, always consider the type of fabric, colour, degree of soiling and permissible water temperature. - Page 23 • Anti-Allergy+ Applying a steam step at the beginning of the programme allows to soften the dirt easily. Use this programme for your laundry (baby clothes, bed sheets, bedlinen, underwear, etc. cotton items) that requires an anti-allergic and hygienic washing at high temperature with intensive and long washing cycle. The high level of hygiene is ensured thanks to the steam application before the programme, long heating duration and additional rinsing step.
- Page 24 • MachineCare Regularly clean (once every 1 to 2 months) the drum for ensuring the required hygiene. Steam is applied before the programme to soften the residues in the drum. Turn on the programme when the machine is completely empty. For more effective results, place powder anti-limescale (drum cleaning materials) suitable for washing machines inside the detergent compartment no.
-
Page 25: Temperature Selection
• Select the stain you want to clean by locating it in the groups above and selecting the related group with the quick auxiliary function button. • Read the garment tag carefully and ensure that correct temperature and spin speed are selected. •... -
Page 26: Rinse Hold
If you are not going to unload your laundry immediately after the programme completes, you can use Rinse Hold function in order to prevent them from getting wrinkled when there is no water in the machine. This function holds the laundry in the final rinsing water. If you want to spin your laundry after the Rinse Hold function: - Adjust the Spin Speed. -
Page 27: Functions/Programmes Selected By Pressing The Function Keys For 3 Seconds
• Steam Use this programme to reduce the creases and ironing times of a small amount of unspotted cotton, synthetic or mixed laundry. When you activate the steam function, do not use liquid detergent if the product does not have a liquid detergent cup or liquid dosing function. - Page 28 To activate the Child Lock: Press and hold Auxiliary Function button 3 for 3 seconds. After the countdown as “3-2-1" on the display is over, child lock symbol appears on the display. When this warning is displayed, you can release the Auxiliary Function button 3.
-
Page 29: Starting The Programme
4 Press Start / Pause button. Time countdown starts. “:” sign in the middle of the end time on the display starts flashing. Additional laundry can be added into the machine during the End Time countdown. At the end of the countdown, End Time indicator turns off, washing cycle starts and the time of the selected programme appears on the display. -
Page 30: Changing The Programme Selection After Programme Has Started
• Pull and release the loading door emergency handle with a tool. Then, open the loading door. • Repeat the previous step if the loading door does not open. 4.3.12 Changing the selections after programme has started Adding laundry after the programme has started If the water level in the machine is suitable when you press Start/Pause button, the door lock will be deactivated and the door will open, allowing you to add garments. -
Page 31: Cancelling The Programme
4.3.13 Cancelling the programme The programme is cancelled when programme selection knob is turned to a different programme or machine is turned off and on again using the programme selection knob. If you turn the programme selection knob when the Child Lock is enabled, the programme will not be cancelled. You should cancel the Child Lock first. - Page 32 4.3.16.1 HomeWhiz Setup In order for the application to run, a connection between your appliance and the HomeWhiz Application must be established. For this connection to be established you must follow the steps below for setup procedure on both the appliance and the HomeWhiz Application. •...
- Page 33 4.3.16.2 Setting up a washing machine that is connected to someone else's account If the washing machine you want to use was previously introduced to the system with someone else‘s account, you must establish a new connection between your HomeWhiz Application and the appliance. •...
-
Page 34: Troubleshooting
4.3.16.4 Troubleshooting Do the following if you have a problem with controlling or connection. Observe whether the problem persists or not after the action you have performed. Do the following if the problem is not resolved. • Check whether your smart device is connected to the relevant home network. •... -
Page 35: Maintenance And Cleaning
4.4 Maintenance and cleaning Please read the “Safety Instructions” section first! Service life of product extends and frequently experienced problems will be reduced if it is cleaned at regular intervals. 4.4.1 Cleaning the detergent drawer Clean the detergent drawer at regular intervals (once every 4 to 5 wash) as mentioned below to prevent accumulation of washing powder. - Page 36 Turn off the filter full warning by pressing the Filter replacement auxiliary function button ( ) on the screen for 3 seconds. Replace the full FiberCatcher filter box with a new one and never clean the inside of the box. 4.4.3 Cleaning the loading door and the drum For products with drum cleaning programme, please see Operating the product - section.
- Page 37 If the product fails to drain water inside it, the pump filter is clogged. Filter must be cleaned whenever it is clogged or in every 3 months. Water must be drained off first to clean the pump filter. In addition, prior to transporting the product (e.g., when moving to another house) water should be drained completely.
- Page 38 Troubleshooting Please read the “Safety Instructions” section first! Problem Cause Solution Programmes do not start after the Start / Pause / Cancel button is not pressed. • Press Start / Pause / Cancel button. loading door is closed. It may be difficult to close the loading door in case of •...
- Page 39 Problem Cause Solution Washing takes longer than Water pressure is low. • Product waits until taking in adequate amount specified in the user manual.(*) of water to prevent poor washing quality due to the decreased amount of water. Therefore, the washing time extends.
- Page 40 Problem Cause Solution Washing performance is poor: Insufficient amount of detergent is used. • Use the recommended amount of detergent Stains persist or the laundry is not appropriate for water hardness and the laundry. whitened. (**) Excessive laundry is loaded in. •...
- Page 41 Problem Cause Solution Detergent residue in the detergent Detergent was put in wet drawer. • Dry the detergent drawer before putting in drawer. (**) detergent. Detergent has gotten damp. • Keep detergents closed in an environment free of humidity and do not expose them to excessive temperatures.
- Page 42 However, only the service agent (i.e. authorized professional repairers) that you can reach through the phone number given in the user manual/warranty card or through your authorized dealer may provide service under the guarantee terms. Therefore, please be advised that repairs by professional repairers (who are not authorized by Grundig) shall void the guarantee. Self-Repair Self-repair can be done by the end-user with regard to the following spare parts: door, door hinge and seals, other seals, door locking support.grundig.com...
- Page 45 Accidental damage, misuse or abuse of a product. An attempted repair of a product by anyone other than a Grundig Approved Engineer (the “Engineer”). Installation or use of a product where such installation or use fails to meet the requirements contained in this ...
- Page 46 11. Optional extras, where available (i.e. extendable feet) are supplied on a chargeable basis only. Does Grundig offer replacements? This is a repair-only guarantee. On occasion, the Manufacturer may at its sole discretion, replace your product with a new product instead of carrying out a repair.
- Page 47 60 months parts and labour guarantee by registering within 90 days of the original purchase date. To make a claim against your Grundig Eco Inverter Motor Guarantee (the “Guarantee”), all customer and product details must be registered with Beko plc using the procedure outlined below.
- Page 48 Please take a few moments to complete the details below, as you will need this information when you call us, or to use our online services. When you call us you may be required to input your serial number into your telephone keypad. For help please visit grundig.co.uk/support/model-finder The product model number is printed on the Operating Instruction Booklet / User guide •...
Need help?
Do you have a question about the GW78941F and is the answer not in the manual?
Questions and answers