
Related Manuals for The Learning Journey Techno Gears Marble Mania VELOCITY


Summary of Contents for The Learning Journey Techno Gears Marble Mania VELOCITY
- Page 2 The Learning Journey International, L.L.C. 4727 E. Union Hills Dr., Ste. 300, Phoenix, AZ 85050, USA. Made in China. Please retain this information for future reference. ©The Learning Journey International, L.L.C. All rights reserved. The Learning Journey and The Learning Journey characters are registered trademarks.
- Page 3 Información adicional para padres y niños Parts Count 6 way connectors Conteo de Partes Thank you for your purchase of Techno Gears Marble Mania Velocity! Conectores de 6 vías On the side of each construction Included in this instruction manual you will find the following: step, a panel will show the exact • A list of components...
-
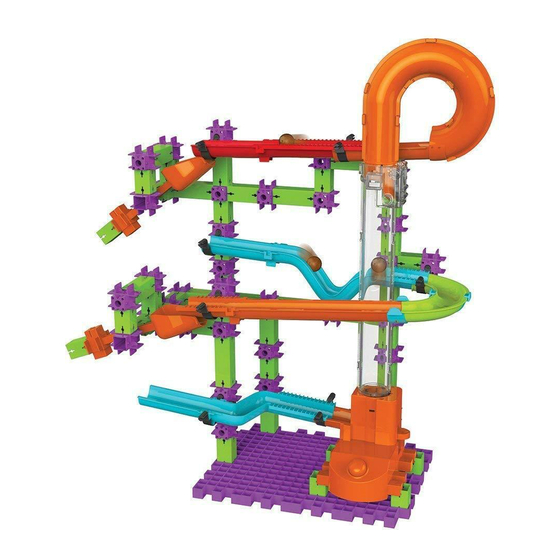
Page 4: Parts And Accessories
Parts and Accessories Parts and Accessories Color of pieces may vary Color of pieces may vary Partes y Accesorios Partes y Accesorios assorted colors El color de las piezas puede variar El color de las piezas puede variar colores surtidos 9 x 53 10 x 45 x 23... - Page 5 Building Marble Mania Quick Tip Consejo Rápido Construye el Marble Mania 1. Make sure all base plates are facing the same direction. Motorized gear - Part 1 2. Use below diagram and paint Engranaje motorizado – Parte 1 ® marks to place connectors in proper location on base plates, ensuring 1.5 Volts...
- Page 6 x 18...
- Page 8 x 15 x 22...
- Page 10 x 10 x 11 12 x 2 x 23...
- Page 11 12 x 1...
- Page 13 12 x 1 11 x 3...
- Page 14 12 x 3 x 11 10 x 2...
- Page 15 12 x 3 10 x 3...
- Page 16 16 x 2 20 x 1...
- Page 17 24 x 1 16 x 3 17 x 1 18 x 1 10 x 1...
- Page 18 49 x 1 24 x 1 16 x 2 17 x 1...
- Page 19 22 x 1 6 x 1 8 x 1...
- Page 20 20 x 1 21 x 1 55 x 1 16 x 2...
- Page 21 16 x 2 16 x 2 24 x 1 17 x 1 17 x 1 18 x 1 18 x 1 45 x 1...
- Page 22 42 x 1 16 x 2 20 x 1...
- Page 23 19 x 1...
- Page 24 16 x 2 59 x 1 17 x 1 20 x 1 6 x 6 4 x 3 3 x 3...
-
Page 25: Helpful Hints
Helpful Hints Consejos Útiles Press to ensure alignment between two 6-way connectors. Step 1 Presione para asegurarse Paso 1 que los conectores de 6 entradas están bien alineados. Press to ensure alignment between horizontal connectors. Step 2 Presione para asegurarse Paso 2 que los conectores horizontales están...
Need help?
Do you have a question about the Techno Gears Marble Mania VELOCITY and is the answer not in the manual?
Questions and answers